


4
CAUTION
This tank, as all tanks, will eventually leak. Do not install without
adequate drainage provisions where water flow will cause
damage. Note: normal condensation from a tank may appear
to be a leaking tank.
WATER PIPING
This tank is design certified to be used with a potable water
system. When connecting water piping with solder joints use
only lead free solder.
WARNING
HOTTER WATER CAN SCALD: Water heating tanks are intended
to produce hot water. Water heated to a temperature which will
satisfy clothes washing, dish washing, and other sanitizing
needs can scald and permanently injure you upon contact.
Some people are more likely to be permanently injured by hot
water than others. These include the elderly, children, the
infirmed, or physically handicapped. If anyone using hot water
in your home fits into one of these groups or if there is a local
code or state law requiring a certain temperature water at the
hot water tap, then you must take special precautions. In
addition to using the lowest possible temperature setting that
satisfies your hot water needs, some type of tempering device,
such as a mixing valve, should be used at the hot water taps
used by these people or at the tank.
WARNING
This tank shall not be connected to any heating systems or
component(s) previously used with a non-potable water heating
appliance.
If this tank is also used for space heating applications, all piping
and components connected to the tank shall be suitable for
use with potable water.
This appliance has been design certified as a solar booster
tank complying with Standards for Safety - UL174. The particular
application of this appliance described (above paragraph) may
be subject to review and approval by local code officials.
WARNING
Toxic chemicals such as used for treatment of boilers or non-
potable water heating appliances shall never be introduced
into a potable water space heating system.
WARNING
When the system requires water at temperatures higher than
required for other uses, a means such as a mixing valve shall
be installed to temper the water for those uses in order to reduce
scald hazard potential. Mixing valves are available at plumbing
supply or hardware stores. Follow manufacturer’s instructions
for installation of these valves.
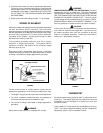
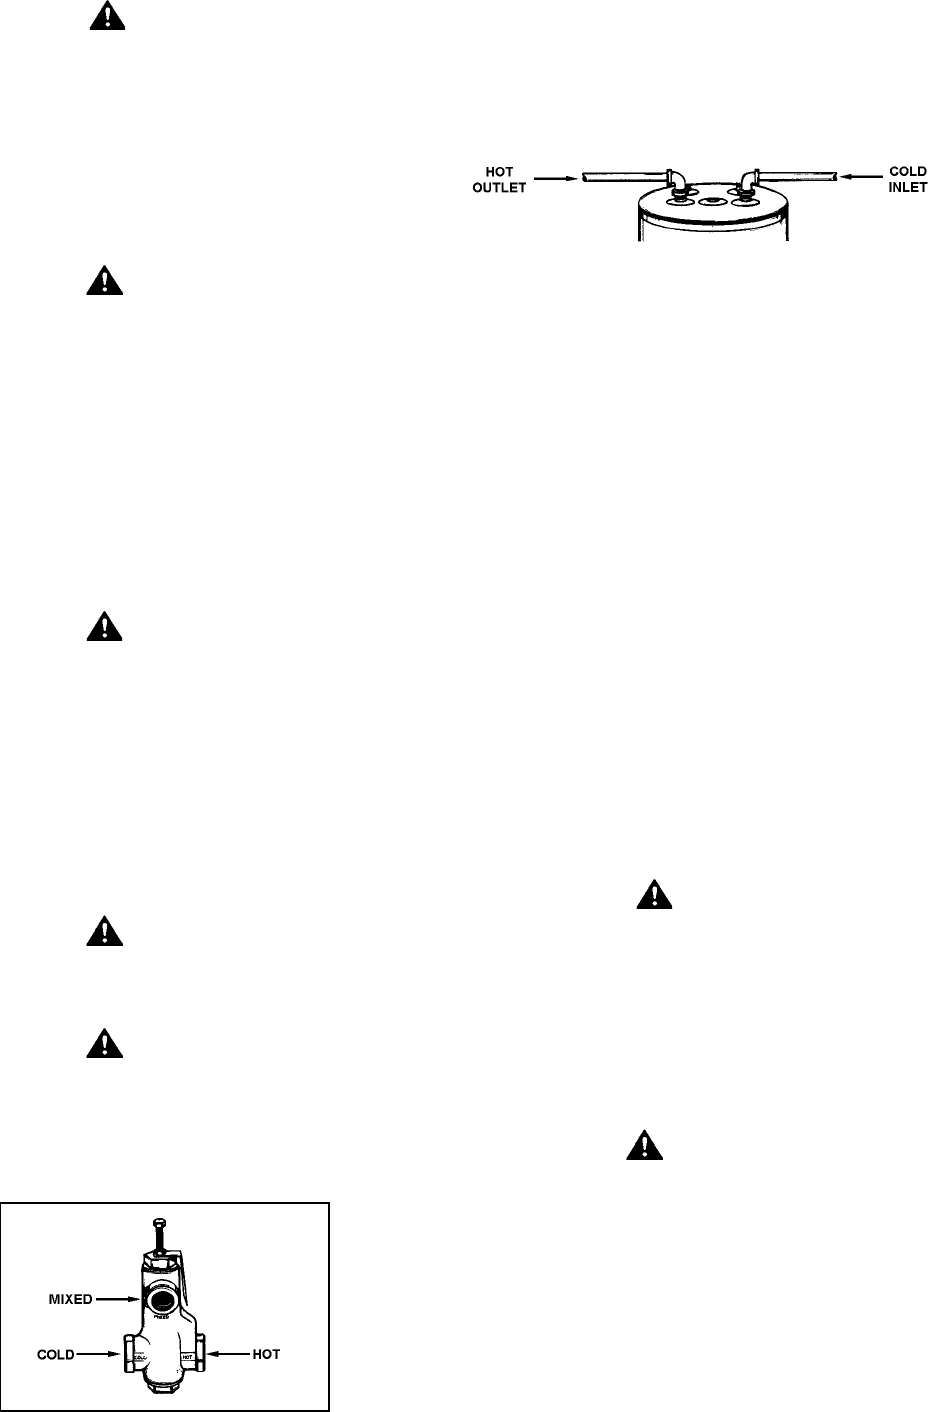
FIGURE 3
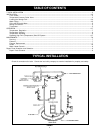
The tank will work better if you keep the hot water runs short.
You will also get hot water faster and with less heat loss.
The illustration shows the correct valves and fittings that you
will need to install the tank. Threaded (3/4”) water connections
are supplied through the tank top.
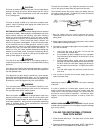
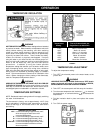
FIGURE 4
1. Buy the fittings that you need to connect the pipes.
Remember that you have to connect both the hot and cold
water pipes.
2. Apply a light covering of pipe joint compound to each outside
thread before making connection.
3. Connect the cold water supply pipe to the cold water inlet of
your tank as follows:
a. Look at the top cover of the tank. The hot and cold
connections are marked there.
b. A non-metallic dip tube is supplied to carry cold water
from the tank top to the bottom. Be sure that it is in the
cold water inlet.
c. If using copper tubing, solder tubing to an adapter
BEFORE you attach the adapter to the cold water inlet.
DO NOT solder the cold water supply pipe directly to
the cold water inlet connection. It might harm the dip
tube.
d. The cold water supply line must have a shut-off valve
and union.
4. Use a union to connect the hot water supply pipe to the
tank’s hot water outlet.
CAUTION
Operating an empty or partially filled tank will result in damage
to the tank.
If a tank is installed in a closed water system; such as one
having a back flow preventer, check valve or water meter with
check valve in the cold water supply line, means shall be
provided to control thermal expansion. Contact the water
supplier or local plumbing contractor on how to control this
situation.
WARNING
INSTALLATION IN RESIDENTIAL GARAGES: The tank must be
located and/or protected so it is not subject to physical damage
by a moving vehicle.
FILLING THE GEOTHERMAL STORAGE
TANK WITH WATER
1. Close the tank drain valve. The drain valve is on the lower
front of the tank.
2. Open the cold water supply to the tank. NOTE: THIS VALVE
MUST BE LEFT OPEN WHEN THE TANK IS IN USE.