


SpectraPure
SpectraPure®Inc.
480.894.5437 Call us toll-free 1.800.685.2783
2167 East Fifth St, Tempe, Arizona 85281
®
8
1. IMPORTANT: During the initial rinse-up of the
MAXCAP RO/DI
™, a large ionic load is
presented to the downstream DI cartridges. Be sure to rinse up all new
MAXCAP DI
™ with the downstream cartridge removed. This rinsing step will
ensure that the
MAXCAP DI
™ cartridge is initially rinsed up to produce high quality
water before connecting your downstream cartridge. Failure to rinse this upstream
MAXCAP DI
™ cartridge may reduce the lifetimeof your downstream DI cartridge.
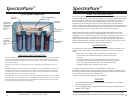
2. Remove the SilicaBuster ™ DI cartridge from the right-most housing and re-install the
empty housing on the system. Attach garden hose adapter to your cold water source.
Never run hot water (greater than 100 F (38 C)) through the system.
3. Place the yellow concentrate tubing and the blue purified water tubing into a drain or
bucket. Do not restrict flow from these lines.
4. Slowly open the cold water supply valve and allow the housings to fill. You may use
pressure up to 80 psi (5.5 bar). If the pressure is less than 40-PSI, a booster pump will
be required. If the pressure is greater than 80- PSI, a pressure regulator will be
required. (See “Optional Items” for the part numbers).
5. Turn on both TDS meters. Set the left-side meter to “OUT” (Post-RO and Pre-
MAXCAP DI
™). Set the righ-side meter to “IN” (Post-
MAXCAP DI
™).
6. When the right-side meter reads zero, turn the cold water feed off and place the
SilicaBuster™ DI cartridge back into its housing.
7. Turn the cold water feed back on and run the system until the “OUT” probe of the
rigt-hand meter reads zero.
8. Now test the concentrate to purified water ratio on page 9-12.
CHECK:
- Ensure that all fittings are tight and leak-free before leaving the system
unattended.
- The concentrate line (yellow) includes a smaller capillary tube (flow restrictor)
that is located “inside” of the tubing. Do not remove or discard this restrictor;
the system will not produce permeate water without the flow restrictor.
- All of the following conditions must be met before water will flow through the
system. The water source must be turned “ON” and the water level in the
reservoir tank must be below the low level float, if present.
Note: It is recommended that at least 2 gallons (7.57 liters) of purified water be discarded
before collecting purified water for use. If the unit is not used for
several days, run the system for at least 15 minutes before collecting any water.
Upon start-up, air may be trapped in the DI cartridges (housing may not appear full), this is
a normal condition and it will not affect the operation of the DI system
.
SYSTEM INITIALIZATION
If you are setting up your system for the first time or replacing the
RO membrane, p
lease see the “
Checking the Concentrate to
Purified Water Ratio” .
SpectraPure®Inc
. Fax 480.894.6109 Fax us toll-free 1.877.527.7873
E-mail: spectra@spectrapure.com Visit us on the web www.spectrapure.com
17
SpectraPure
®
Reconnect the tubing to the membrane housing. Place the
flow restrictor in a safe location where it will not be accidentally
crushed or damaged.
11. Put the yellow concentrate tubing and the blue product
water tubing in the drain and turn on the system water supply.
Allow the system to flush for several minutes.
12. Turn off the water supply to the system. Remove the yellow
tubing from the membrane housing and replace the flow restrictor.
13. Re-insert the flow restrictor end of the yellow tubing into
its push-fitting at the RO membrane and reconnect the yellow
concentrate tubing to the membrane housing.
14. Turn on the water supply to the system and check for leaks. Check,
and if necessary adjust, the Concentrate to Purified Water Ratio per
the procedures.
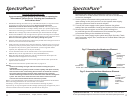
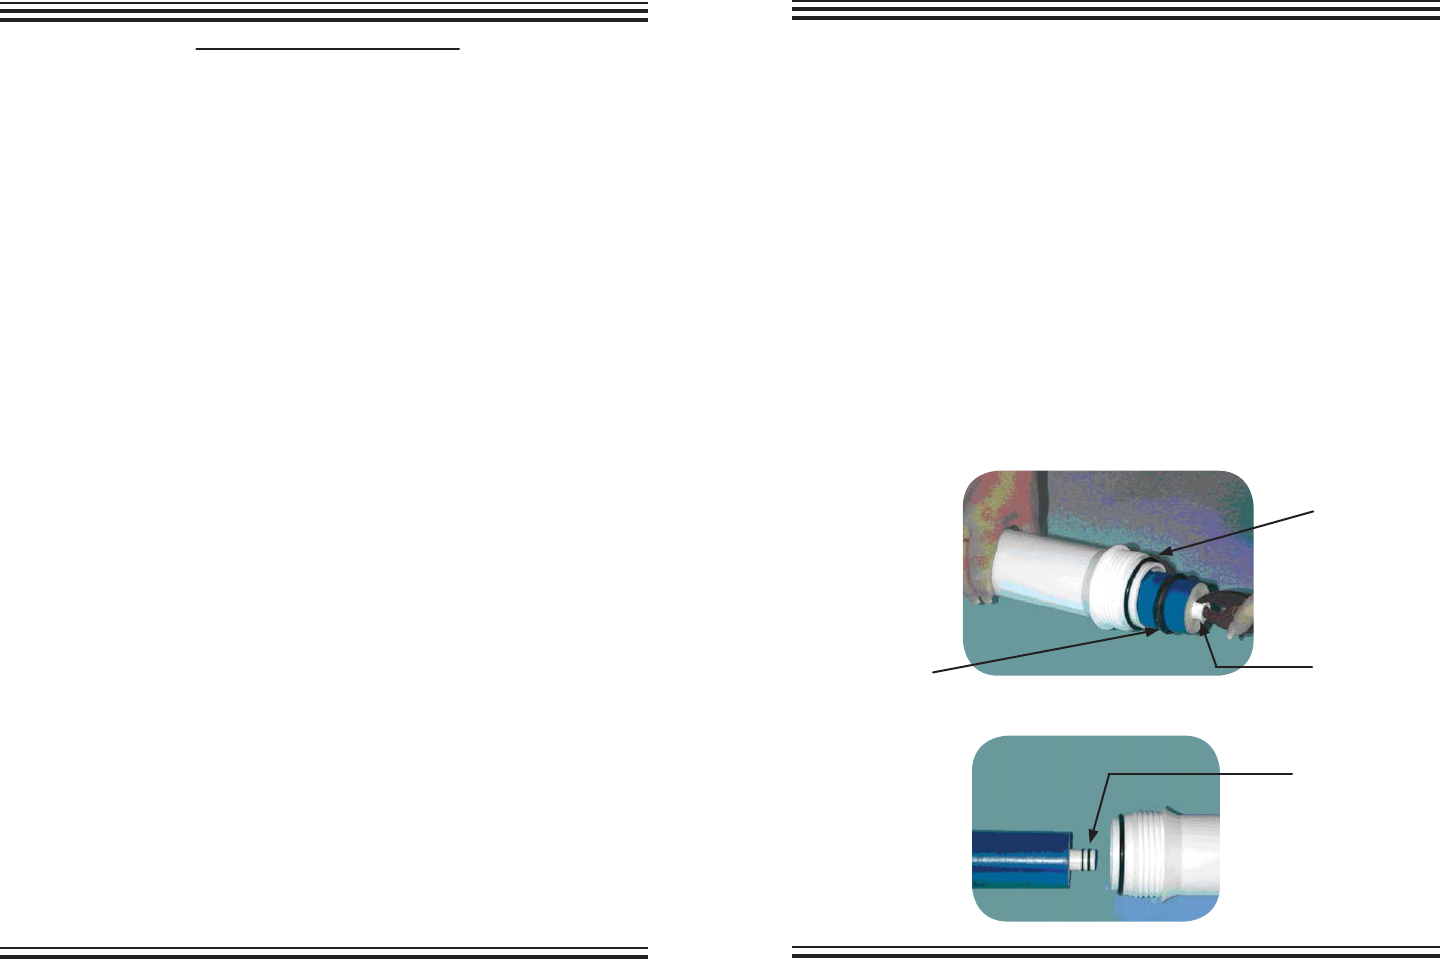
Fig. F: Removing the Membrane Element
Fig. G: Inserting the New Membrane Element
black
membrane
brine seal
black
membrane
housing
O-ring
membrane
product
water tube
double
O-ring end of
membrane
product
water stem
tube