8
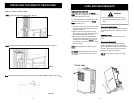
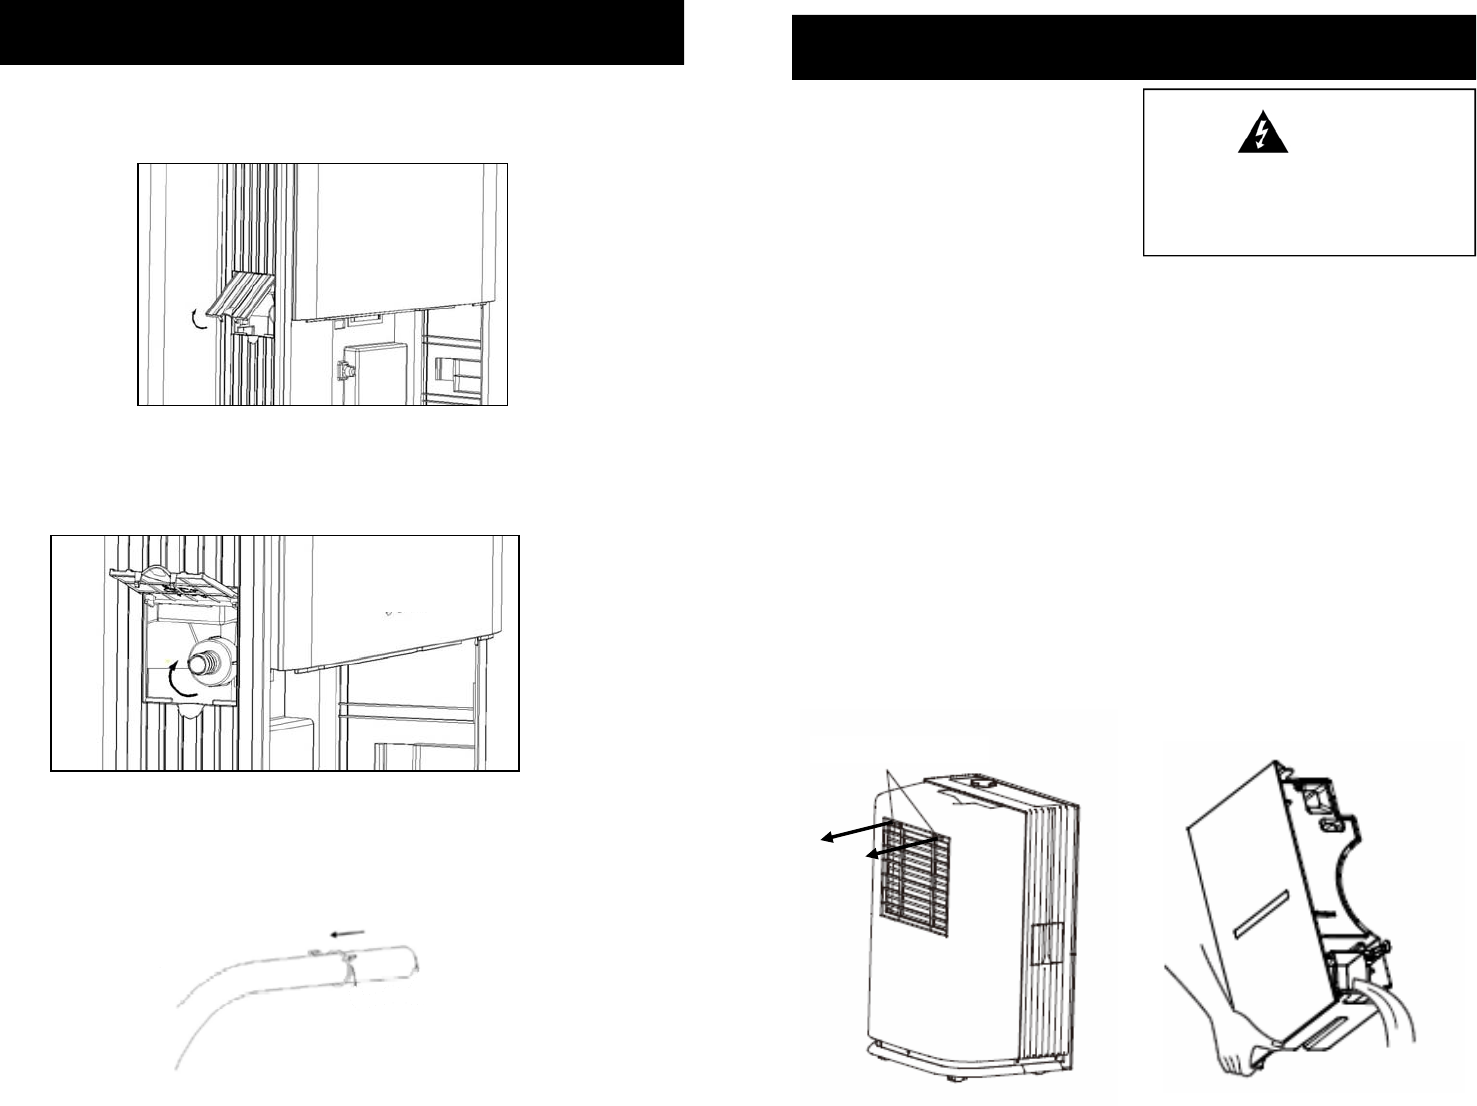
Step Open the drain connector door. (Fig. 6)
Step Install and secure the drainage joint onto the drain connector. (Fig. 7)
INSTALLING THE GRAVITY DRAIN HOSE
(FIG. 6)
(FIG. 7)
Step Place large hose clamp on the flat end of the dehumidifier drain hose. (Fig.
8)
(FIG. 8)
13
CARE AND MAINTENANCE
WARNING
• Disconnect power supply cord from re-
ceptacle before performing any mainte-
nance.
CLEANING THE AIR FILTER
After 250 hours of operation the FILTER
RESET indicator will light up to remind you to
clean and change the air filter.
It is recommended to periodically check the
filter for excess dirt even if the FILTER
RESET indicator is off.
1. To remove the air filter, press the two filter
tabs and pull the filter holder away from
the back of the unit.
2. Remove the filter and clean with warm,
soapy water. Rinse and allow the filter to
dry before placing back in the unit.
3. Place the filter back into dehumidifier.
Plug unit back into outlet, power the unit
on and press and hold the FILTER key up
to 5 seconds on the control panel to reset
the filter setting.
NOTE: DO NOT place the filter in a dish-
washer
CAUTION: DO NOT operate the dehumidi-
fier without a filter. Doing so may cause a
unit failure.
FILTER TABS
CLEANING THE EXTERIOR
Clean the cabinet using a damp cloth and a
mild detergent. Do not use bleach or abra-
sives.
CONTROL PANEL
Wipe down the control panel with a dry
cloth.
CLEANING THE BUCKET
Every few weeks, clean the dehumidifier
bucket. Partially fill the bucket with clean
water and mild detergent. Swish the mixture
around in the bucket, empty and rinse. Re-
place the bucket when finished
NOTE: Do not place the bucket in a dish-
washer.
1:
2:
3:
Option 2: GRAVITY DRAIN HOSE


