


MAINTENANCE
-12-
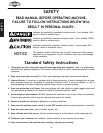
Figure 9. Typical unacceptable fasteners.
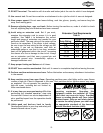
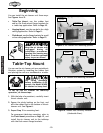
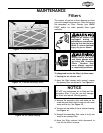
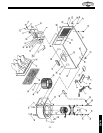
Figure 10. Flange bracket mounting holes and lip.
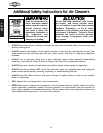
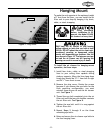
Figure 11. Flange correctly installed under lip.
You can install the air filter unit in a confined
shop by mounting it flush to a ceiling, wall, or
table using the flange mounts.
To install the air cleaner for flush mount
operation, do these steps:
1. Locate the applicable load bearing studs or
supports in the wall or ceiling, and mark the
air cleaner unit bolt pattern on the wall or
ceiling (17
1
⁄4" from left-to-right and 31" from
front-to-rear).
2. Drill the bolt pattern to accept at least
1
⁄4"
shank lag bolts for studs, or use
1
⁄4" nuts,
bolts, and washers for mounting to supports.
3. Position the flange bracket under the air
cleaner unit lip at the mounting hole location.
See Figure 10. For permanent table top
mounting, use the lower-lip holes.
4. Install the flat washers and the hex bolts to
secure the flange brackets to the unit. See
Figure 11.
5. Repeat Steps 3 and 4 for the other three
flange brackets.
6. With the help of an assistant, position the air
cleaner on the wall or ceiling, and screw or
bolt the unit in place.
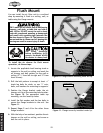
Flush Mount
ONLY mount the air cleaner unit to load bearing
supports, wall studs, or table that can hold at
least 100 lbs. DO NOT mount the unit to sheet
rock walls, pressboard, paneling, or honeycomb
wall panels with expansion-type fasteners like
the ones shown in Figure 10. The fasteners can
tear out and the air cleaner can fall. Ignoring this
warning can result in severe injury or death.
Get lifting assistance
before installation. At 55
pounds, the Model W1690
air cleaner is a heavy load.
Mounting
holes
Flange bracket
mounted under lip
Lip