9
www.shark sonicduo.com
IMPORTANT: Do not use on unsealed wood
or unglazed ceramic floors. Do not use on wood
or tile floors that are highly worn, unfinished
or have a wax or oil finish. Surfaces that have
been treated with wax or some no wax floors
may be damaged by the cleaning and polishing
solutions therefore it is always recommended to
test an isolated area of the surface to be cleaned
or polished before proceeding. You should check
the use and care instructions from the floor
manufacturer before cleaning or polishing.
IMPORTANT: Do not use more than one brand
of floor polish to polish one room. Use only
Shark
®
Wood & Hard Floor Polish.
Frequently Asked Questions
Q. Polishing has left my floors streaky or spotty.
A. You should go over the streaky or spotty
area with more polish. Always leave the area
looking very wet, never dry.
Q. There is a footprint, smudge or uneven spot after
or during polishing.
A. You should add more polish to any problem
areas during polishing. Always leave the area
looking very wet, never dry.
Q. I accidentally ran the Shark
®
Wood & Hard Floor
Polish through the Sonic Duo
™
and now it is
not working properly.
A. Shark
®
Wood & Hard Floor Polish should
always be squirted directly onto the floor . If it
was run through the unit, you need to flush it
out immediately. Fill the Reusable Bottle with
warm water and spray it through the system
to flush it. Then turn and remove the tip of
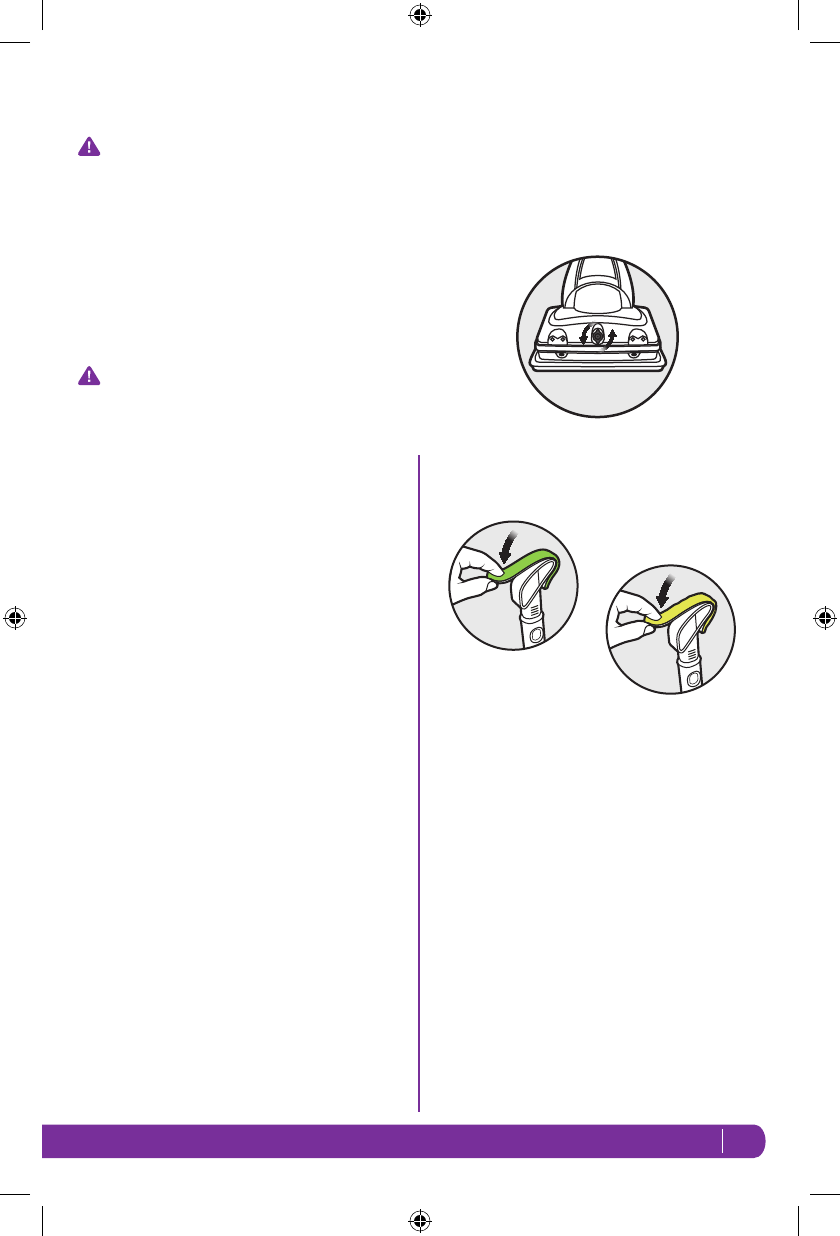
the nozzle to clean it. (Fig. 26) Call Customer
Service at 1-800-798-7398 for additional
assistance if necessary.
Using the ScrubDuster
™
(may not be included):
Use the ScrubDuster
™
with the Scrubbing Pad to
remove tough stains and dried on dirt or the Dusting
Pad to dust around and reach inside the narrowest
crevices for a true Total Clean in every nook and
cranny.
1 Attach one side of the Scrubbing Pad or the
Dusting Pad to the Velcro
®
strip on the front side
of the ScrubDuster
™
and then bring it up and
attach it to the Velcro
®
strip on the back. Make
sure that the pad is attached tightly.
(Fig. 27, Fig. 28) Extend the wand for easier
reach.
fig. 26
fig. 28
fig. 27
(may not be included)
(may not be included)
KD450W_26_IB_E_130511_1.indd 9 13-03-11 3:43 PM


