


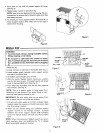
4.Pushdownon clipuntilfullyseatedagainstlid hinge.
(Seefig.6)
5.Repeatsteps3and4to seatotherclip.
NOTE:Yourlidisnowfastenedtothehousing.Werec-
ommendnotto removethelidretentionclipsoncethey
havebeensecured.
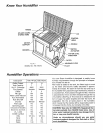
6•Toremoveyourmotorsupportsectionliftlidandliftout
motorsupportsection,thenslidecordto the rightto
removefromhousing•
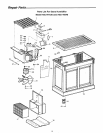
Figure 5
Water Fill
Figure 6
WARNING:
1.To avoid shock, always unplug humidifier before
filling, cleaning, or servicing.
2. Do not pour or spill water into control or motor
area. If controls do get wet, have the unit checked
by a qualified service technician before plugging
in.
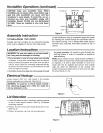
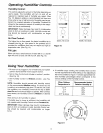
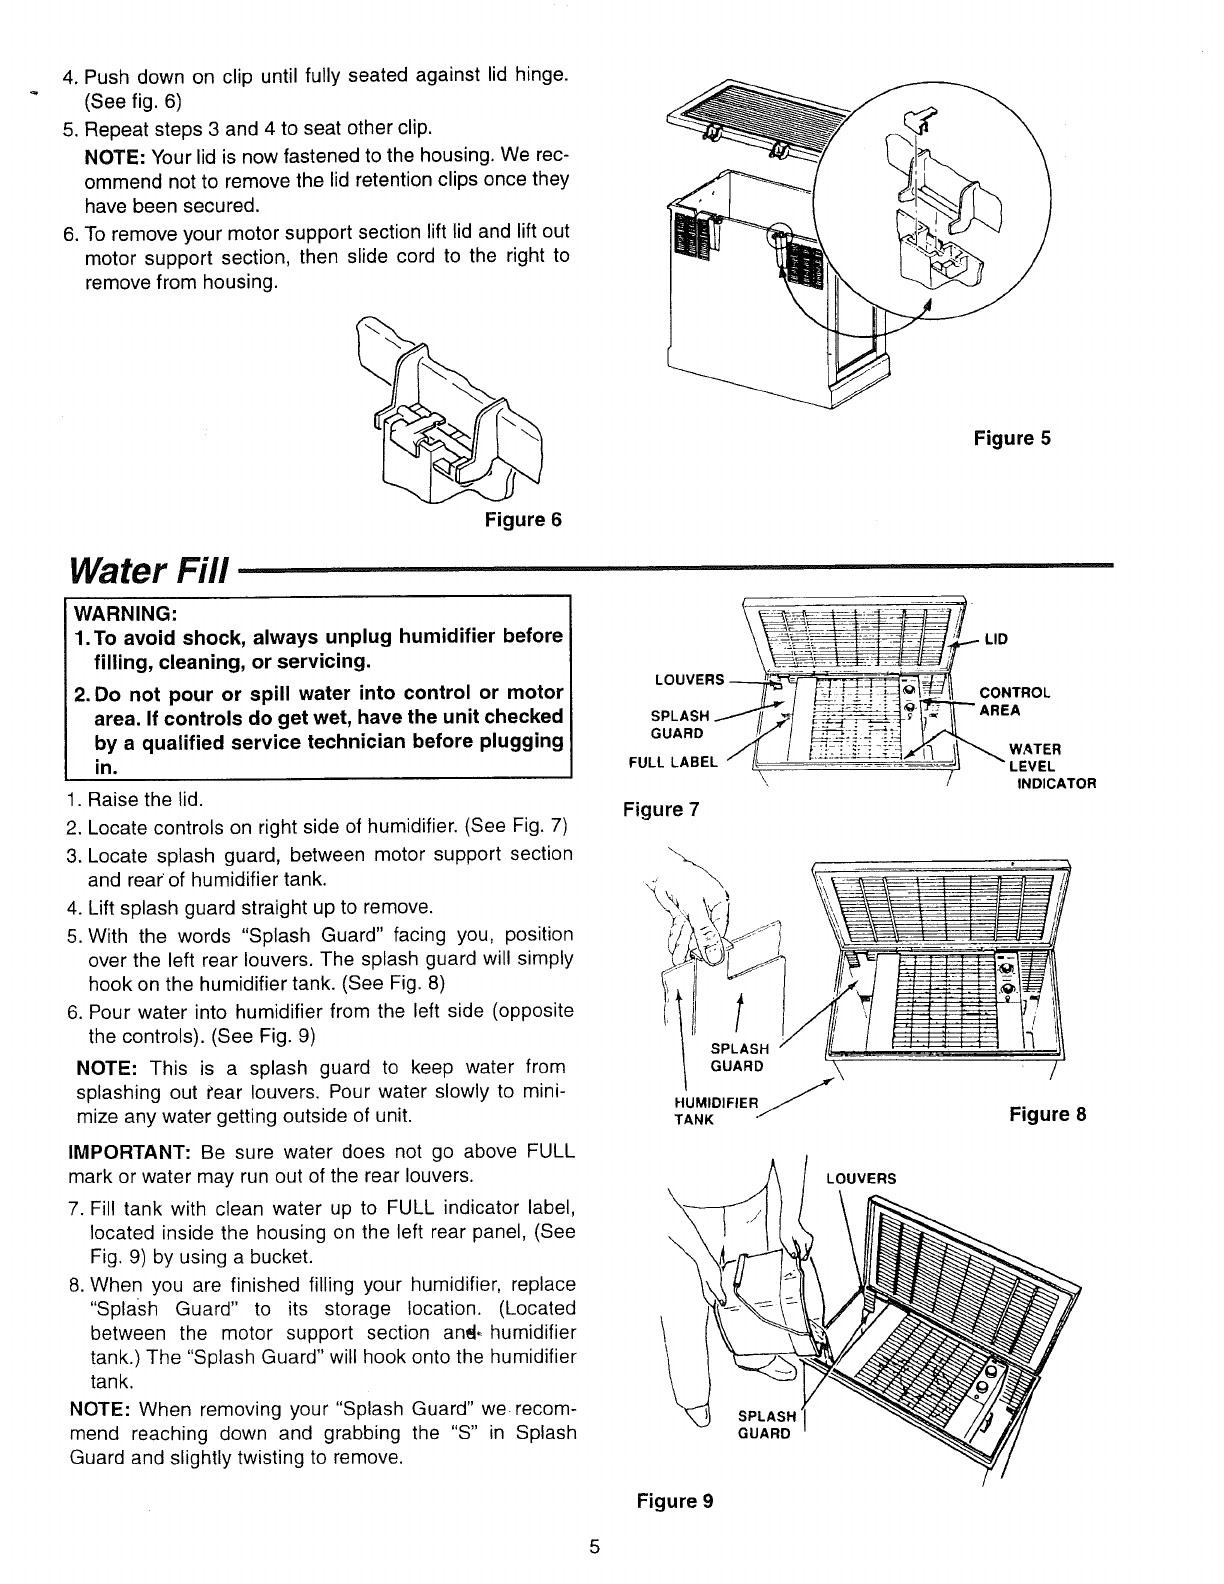
• Raise the lid.
2. Locate controls on right side of humidifier• (See Fig. 7)
LOUVERS _CONTROL
t! -AREA
GUARD W,TER
FULL LABEL _" __ ' _--:__ ...... '_ _" LEVEL
\, / INDICATOR
Figure 7
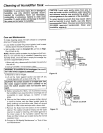
3. Locate splash guard, between motor support section
and rear of humidifier tank•
4• Lift splash guard straight up to remove•
5. With the words "Splash Guard" facing you, position
over the left rear louvers• The splash guard will simply
hook on the humidifier tank• (See Fig. 8)
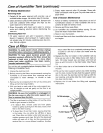
6. Pour water into humidifier from the left side (opposite
the controls)• (See Fig. 9)
NOTE: This is a splash guard to keep water from
splashing out i_ear louvers. Pour water slowly to mini-
mize any water getting outside of unit.
IMPORTANT: Be sure water does not go above FULL
mark or water may run out of the rear louvers.
7. Fill tank with clean water up to FULL indicator label,
located inside the housing on the left rear panel, (See
Fig• 9) by using a bucket•
8. When you are finished filling your humidifier, replace
"Splash Guard" to its storage location. (Located
between the motor support section and_ humidifier
tank.) The "Splash Guard" will hook onto the humidifier
tank.
NOTE: When removing your "Splash Guard" we recom-
mend reaching clown and grabbing the "S" in Splash
Guard and slightly twisting to remove.
t
SPLASH
GUARD \
HUMIDIFIER f
TANK /"
LOUVERS
\
\
SPLASH'
GUARD
Figure 9
Figure 8