


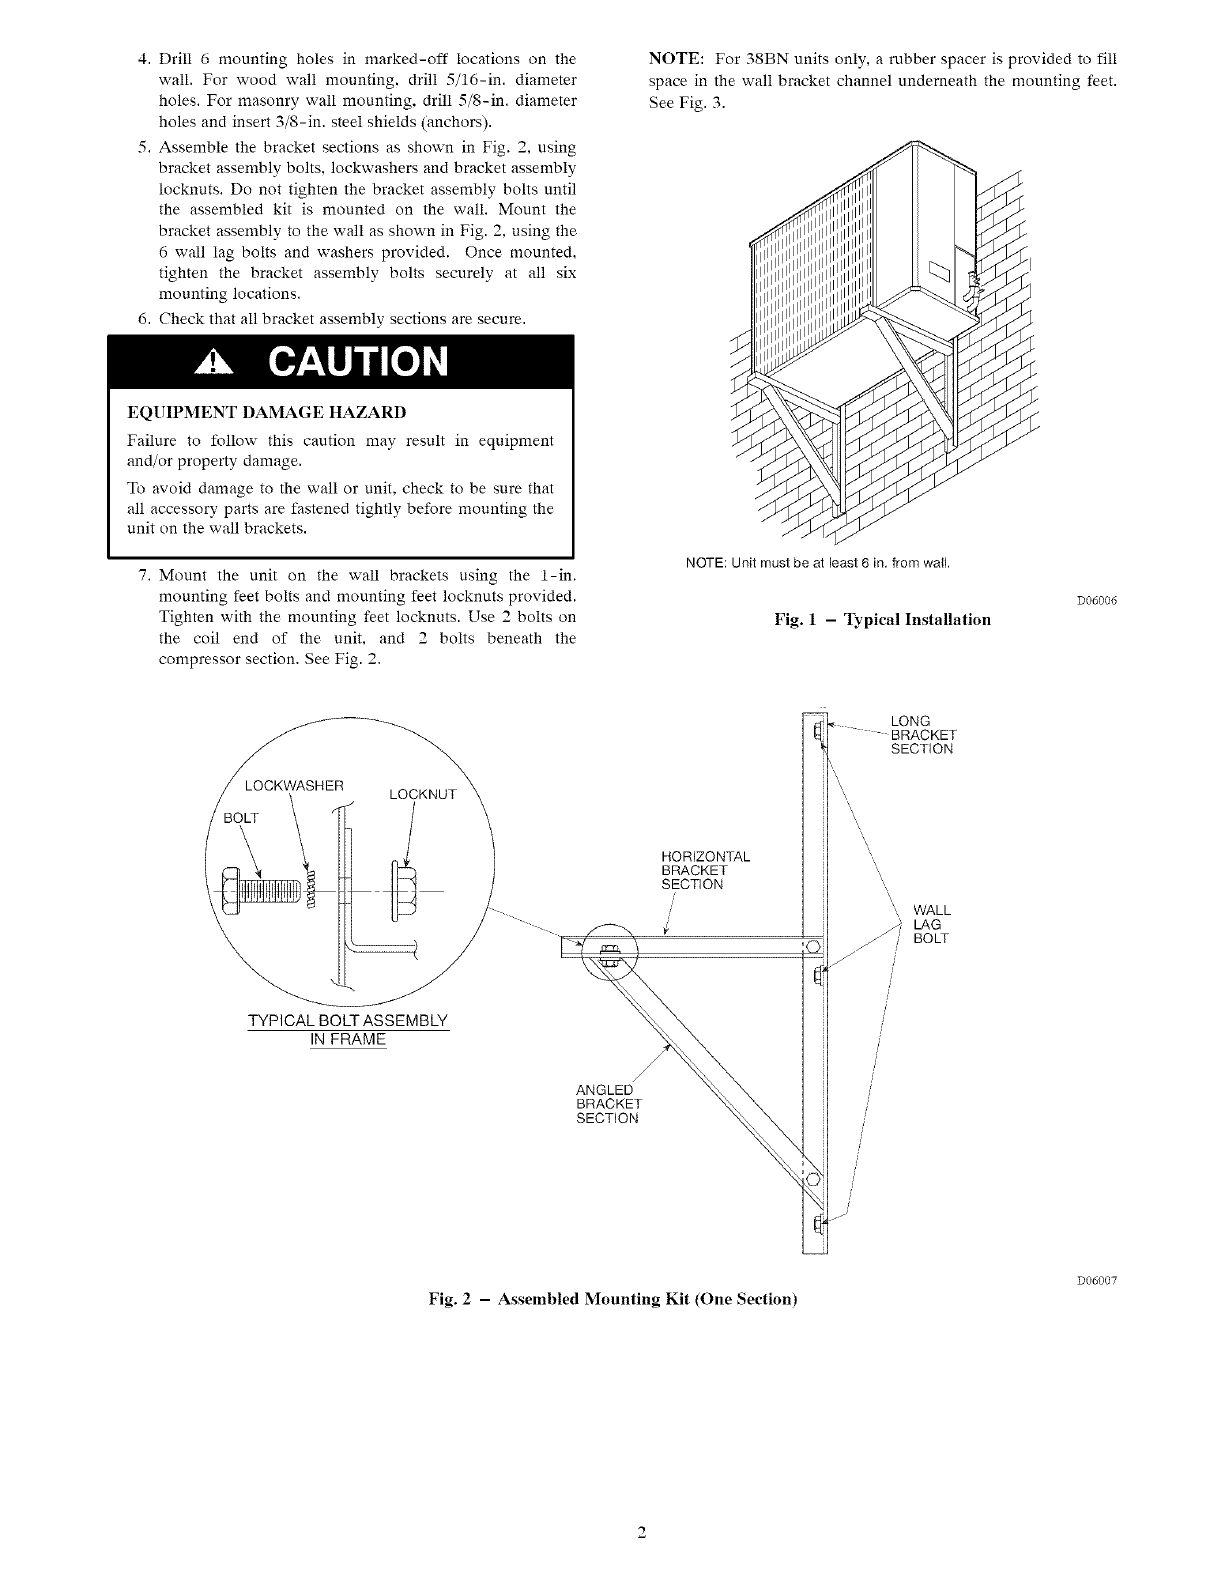
4.Drill6 mountingholesinmarked-offlocationsonthe
wall.Forwoodwallmounting,drill5/16-in.diameter
holes.Formasonrywallmounting,drill5/8-in.diameter
holesandinsert3/8-in.steelshields(anchors).
5.AssemblethebracketsectionsasshowninFig.2,using
bracketassemblybolts,lockwashersandbracketassembly
locknuts.Donottightenthebracketassemblyboltsuntil
theassembledkit is mountedonthewall.Mountthe
bracketassemblytothewallasshowninFig.2,usingthe
6walllagboltsandwashersprovided.Oncemounted,
tightenthebracketassemblyboltssecurelyatall six
mountinglocations.
6.Checkthatallbracketassemblysectionsaresecure.
NOTE:For38BNunitsonly,arubberspacerisprovidedtofill
spaceinthewallbracketchannelunderneaththemountingfeet.
SeeFig.3.
EQUIPMENTDAMAGEHAZARD
Failureto followthiscautionmayresultin equipment
and/orpropertydamage.
Toavoiddamagetothewallorunit.checktobesurethat
allaccessorypartsarefastenedtightlybeforemountingthe
unitonthewallbrackets.
7.Mounttheunitonthewallbracketsusingthe1-in.
mountingfeetboltsandmountingfeetlocknutsprovided.
Tightenwiththemountingfeetlocknuts.Use2boltson
thecoil endof theunit,and2 boltsbeneaththe
compressorsection.SeeFig.2.
NOTE: Unit must be at least, ;in. from wail.
Fig. 1 - Typical Installation
D06006
/
LOCKWASHER LOCKNUT
/BOLT\ /
TYPICAL BOLT ASSEMBLY
IN FRAME
ANGLED
BRACKET
SECTION
HORIZONTAL
BRACKET
SECTION
/
;KET
SECTION
', WALL
/_.} LAG
j / BOLT
Fig. 2 - Assembled Mounting Kit (One Section)
D06007