Ted's Technical Tips 2006
Once the video segment appears in the download list you can
return to the viewing window and use the Time Scale Panel
for selection of additional video segments to add to the
download list (Batch Mode). Up to twenty defined segments
of video can be added to the list. Or click the download
button to immediately start downloading any items displayed
in the list. When video is downloaded to a directory on the
PC hard drive there will be two files created with the same
name as the download but having separate file extensions.
The two extensions are .mp2 & .idx, these must both remain
together if the video file is moved to another location or the
video file will reported as invalid when played back with
Sanyo software. There is also another application
downloaded to the directory called the MP2 viewer. This file
and it’s two associated .dll files is a stand alone player
application able to playback clips from the Sanyo MPEG2
DVRs independently of the VA-SW8000 application. Any
PC with a Video card fully supporting Direct X 9.0c or
higher should be able to playback video clips from our
application with this application. To play back downloaded
video files within the VA-SW8000 application you can use
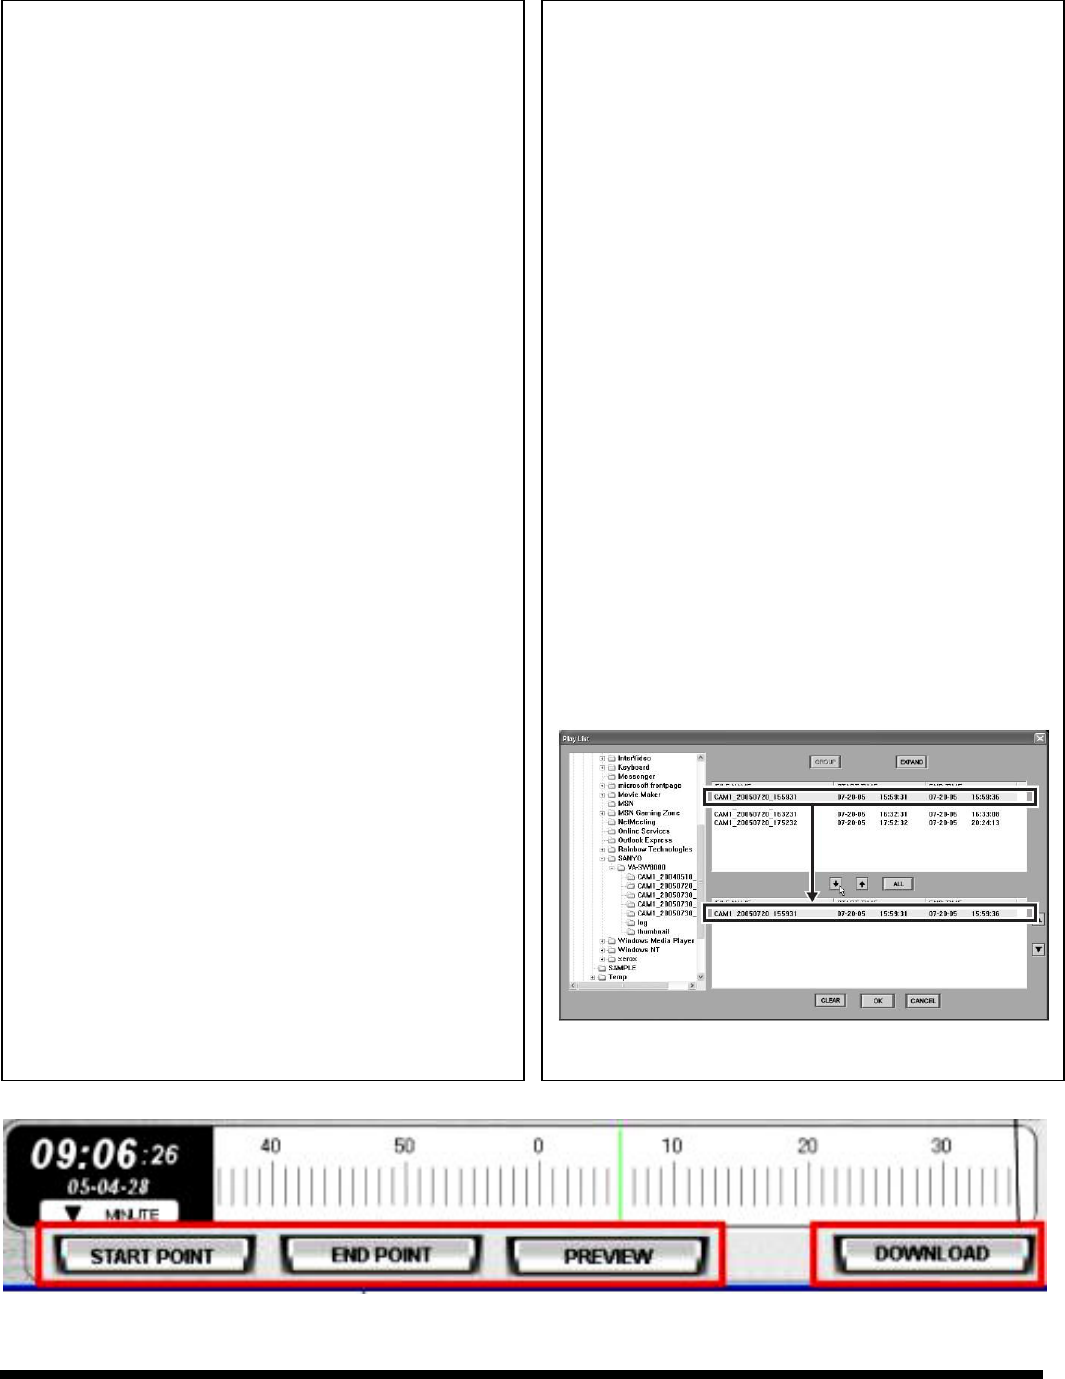
the “FILE” button found on the Control Panel. This
application allows you to browse available folders on the PC,
add them to a play list (up to 100 files can be selected), and
select “OK” to start play back in the order they appear in the
list.
Using the Time Scale Panel
The Time Scale Panel is a useful tool that has been added to
the VA-SW8000 allowing you to quickly jump backwards or
forwards along the timeline of recorded video (see pages 21-
22 in the user manual). In the live mode the Time Scale
displays the current Time & Date. By clicking and dragging
the scale to a previous time point, or by double clicking on
the point you wish to go to it is possible to quickly jump to a
previous point in time. This feature allows you to start
playback from the Time Scale. A pull down menu beneath
the active time display allows you to select the unit of time
the scale controls. The options are Day, Hour, or Minute.
When a given unit is selected the graduations on the Time
Scale will change to reflect that unit of time measurement. In
live mode playback can be started by sliding the scale to the
right, in play back mode you can also slide the scale right to
go back further, or slide the scale to the left to move play
forward in time.
The Time Scale Panel can also be used to quickly set blocks
of download time from the currently selected DVR in the
viewing window (see pages 48-58 in the user manual).
To download video drag or double click a point on the Time
Scale before your desired start point and wait for playback to
start. When playback reaches your start point click the “Start
Point” button. This will set the download start point and the
button will turn red. Drag the Time Scale, or double click a
point where the download will end. A green band will
connect the start point to the end point defining the
download range. Click the “End Point” button to define the
download ending, the button will turn blue. You now have
the option to preview the defined video download segment
by selecting the “Preview” button. Or start the download
immediately by selecting “Download”. Selecting
“Download” will bring up the download window which will
display visual confirmation the download range is valid by
showing the first and last frames of the download segment.
The “Browse” button allows selection of a folder to
download the video to, or the storage path can be manually
typed into the “File name” field. Click “Add” to place the
defined segment in the download list. You can also preview
defined clips from the download list by selecting an item on
the list and selecting “Preview”.


