


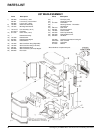
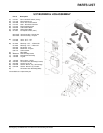
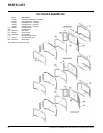
26 U37 Regency ULTIMATE Rear Vent Direct Vent Freestanding Gas Heater
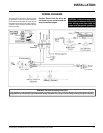
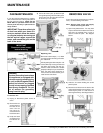
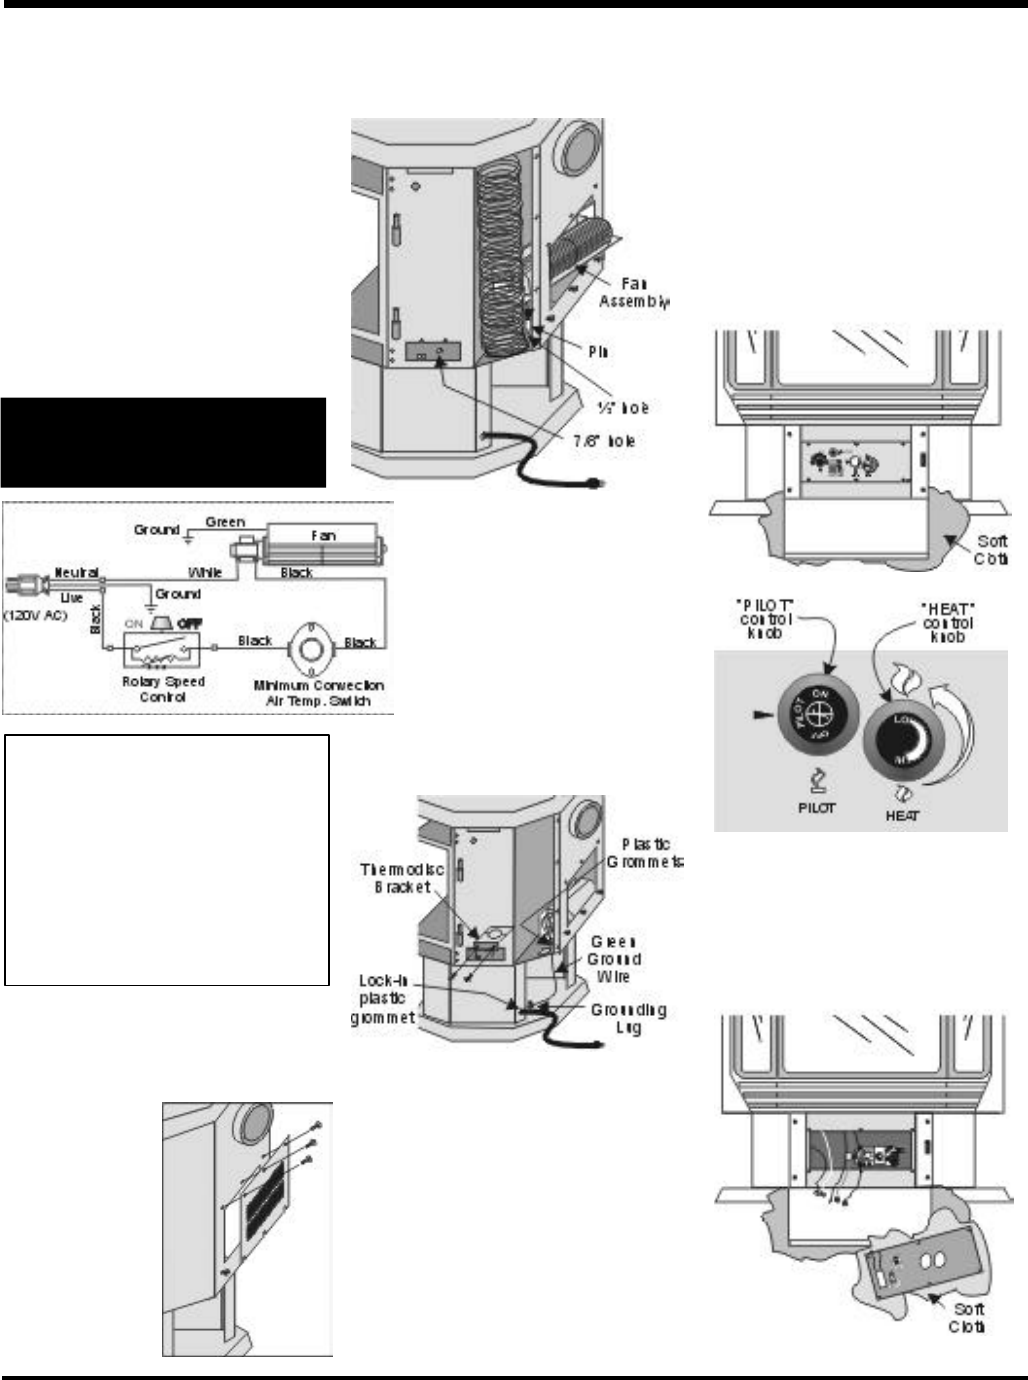
REMOVING VALVE
If your valve requires maintenance or replace-
ment, use the following instructions:
Note: Always close off the gas supply
before removing the valve.
1) Open front pedestal door. You may want
to put a soft cloth on the base of the unit so
that when the pedestal door is open it
doesn't scratch the paint. See diagram
below.
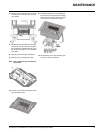
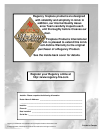
FAN MAINTENANCE
If your fan requires maintenance or replace-
ment, access to the fan is through the plate on
the rear wall of the firebox. NOTE: the unit
MUST NOT be operated without the fan
access panel securely in place and cor-
rectly sealed.
IMPORTANT:These fans collect a lot
of dust from within your home. En-
sure you maintain these fan motors
on a regular basis by vacuuming out
the fan squirrel cages, around the
motor, and around the grills on the
back of the stove.
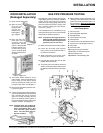
To remove fan:
1) Unplug or disconnect power source to
stove.
2) Remove the rear
access panel on
the back of the
stove. The fan
can only be ac-
cessed from the
back of the stove.
3) Unclip the black
and white wires
from the fan mo-
tor.
WARNING:
Electrical Grounding Instructions
This appliance is equipped with
a three pronged (grounding) plug
for your protection against shock
hazard and should be plugged
directly into a properly grounded
three-prong receptacle. Do not
cut or remove the grounding
prong from this plug.
4) Lift fan off of the 2 pins, tip back and pull
through the opening. Disconnect the green
ground wire from the right side of the fan
as soon as you can reach it.
Replacing Fan:
Reverse the above steps (1 - 4). Make
sure the fan wires and the ground wire
are reattached.
Hint for pushing fan down onto pins - rub
a bit of dish soap on the grommet so it
will slide more easily onto the pin.
Check to make sure the fan is seated
properly on the pins - try to move the fan
back and forth, there should be no
noise, if there is check that the grom-
mets haven't come loose.
2) Undo the six screws holding the control
panel in place.
3) Disconnect all wires from the back of the
control panel and then remove panel. You
should lay the panel on a soft cloth so it
doesn't get marked up. See diagram above.
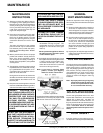
MAINTENANCE
IMPORTANT
Disconnect power supply
before servicing