


Regency P48 Zero Clearance Direct Vent Gas Fireplace
24
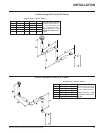
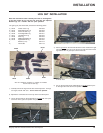
BRICK PANELS INSTALLATION
INSTALLATION
1) Unhook the 2 spring loaded hooks from the bottom of the flush door
and lift the Flush Front off the unit.
2) Unwrap the brick pattern panels from the protective wrapping.
Note: The logs must not be in the unit.
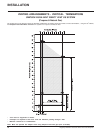
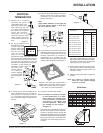
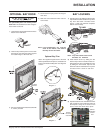
a) Loosen the two screws from the bottom of the
baffle plate. Install the bottom clips onto the baffle
plate (refer to Diagram 1).
Diagram 1
Bottom
Clips
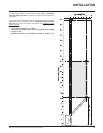
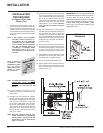
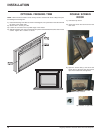
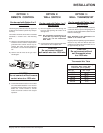
Diagram 2
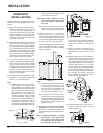
Top Bracket
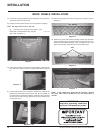
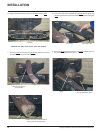
5) Place the top bracket onto the front edge of the top panel (refer to
Diagram 5).
6) Slide the top panel and bracket assembly carefully onto the baffle
plate ensuring the panel is centered. Make sure the tabs of the top
bracket fit into the baffle openings (refer to Diagrams 6 & 7). The
back of the top brick panel sits on top of the bottom clips.
3) Insert the back brick panel first by carefully slipping it between the
back wall of the firebox and the rear log bracket (refer to Diagram
2).
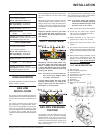
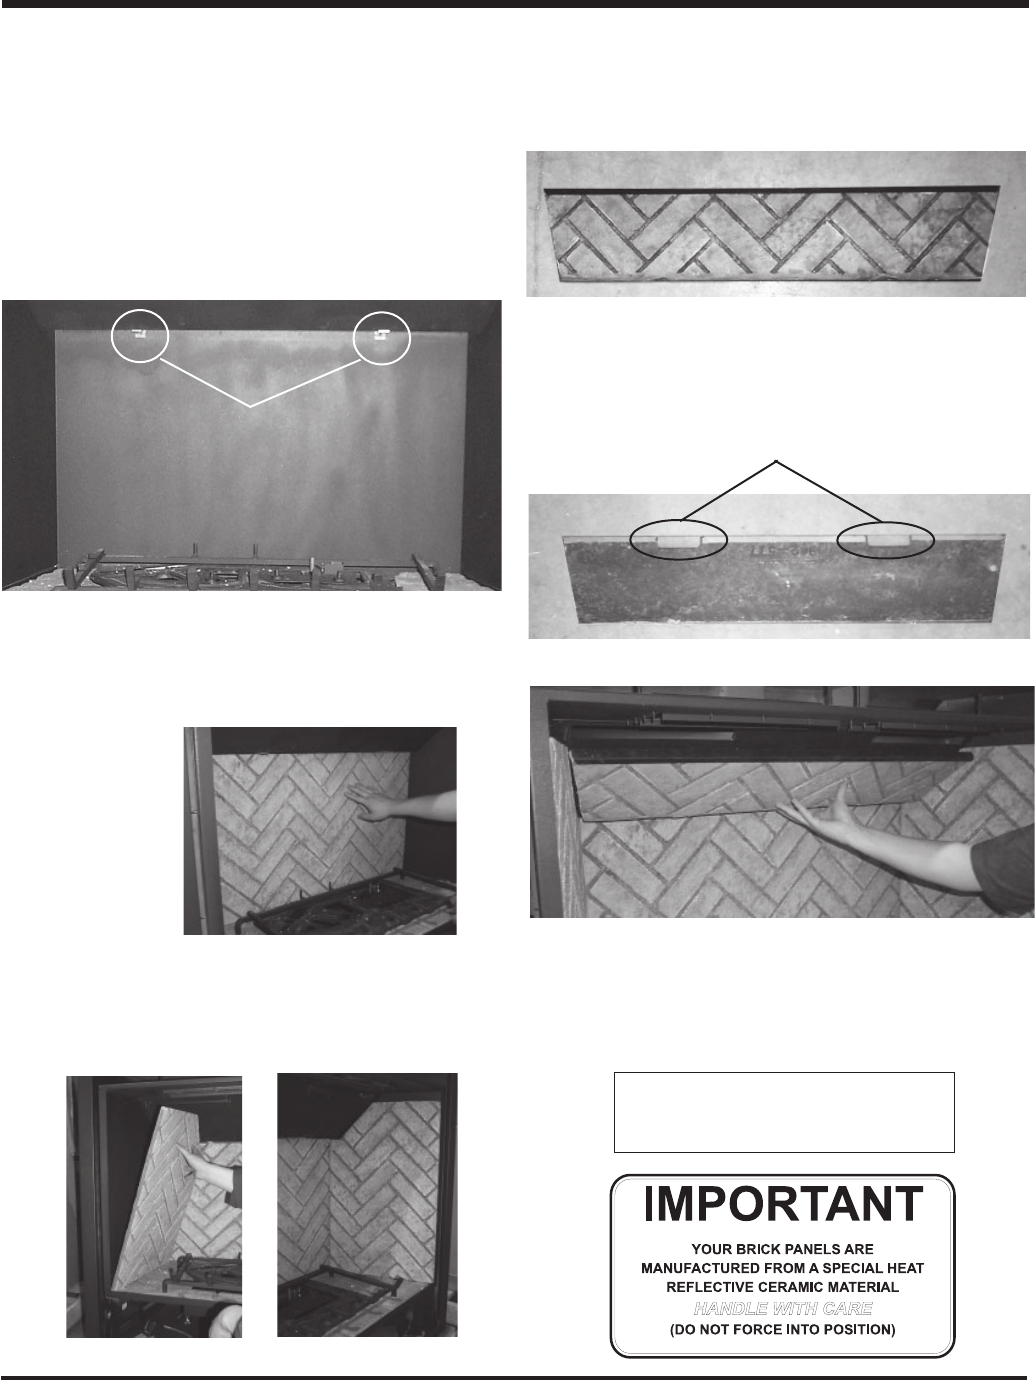
4) Put the side panels in next. Tilt them in towards the middle of the
firebox and put the bottom front corner in first. Be very careful not
to scratch them on the firebox hardware. Place them flat up against
the wall, they should fit snugly against the top of the firebox (refer
to Diagrams 3 & 4).
Diagrams 3 & 4
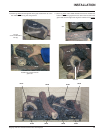
IMPORTANT
Dangerous operating conditions
may occur if the panels are broken.
NOTE: If the bottom brick panel must be removed: Remove
the grate, then remove the Burner Tray. See instructions in
manual.
Diagram 5
Tabs
Diagram 6
Diagram 7