


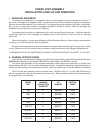
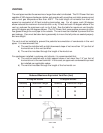
4
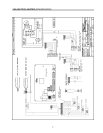
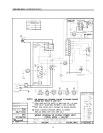
WIRING A POWERVENT ASSEMBLY TO AN APPLIANCE WITH IID IGNITION.
WARNING: Disconnect all electrical power to the unit before servicing to avoid potential shock
injury or damage to the unit. To change voltages, follow wiring diagram for correct voltage
connections. Improper wiring connections can burnout the relay and blower motor.
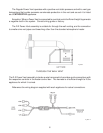
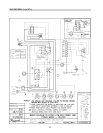
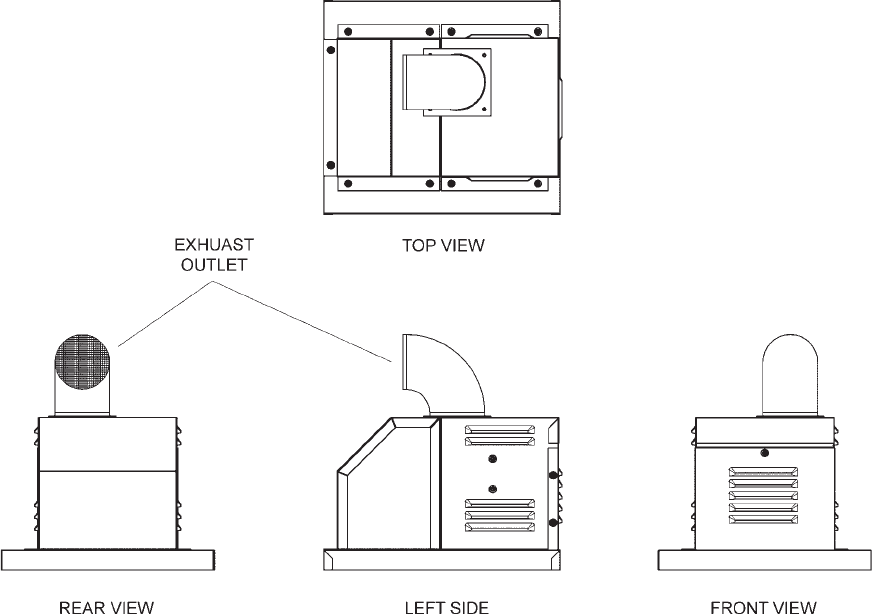
** NOTE: The 90° elbow may be used as a termination cap.
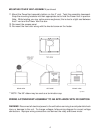
MOUNTING POWER VENT ASSEMBLY-(continued
11. Mount the PowerVent assembly bottom on the 6” vent. Twist the assembly downward.
Snap the mounting brackets into their appropriate slot to hold the Power Vent in position.
Note: While twisting you may notice some roughness, this is due to a tight seal between
the 6” vent and the Power Vent flue box.
12.Re-mount the access panel.
13.Re-mount the front door along with the knurled screw on the heater.
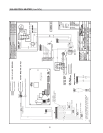
Fig #9356