


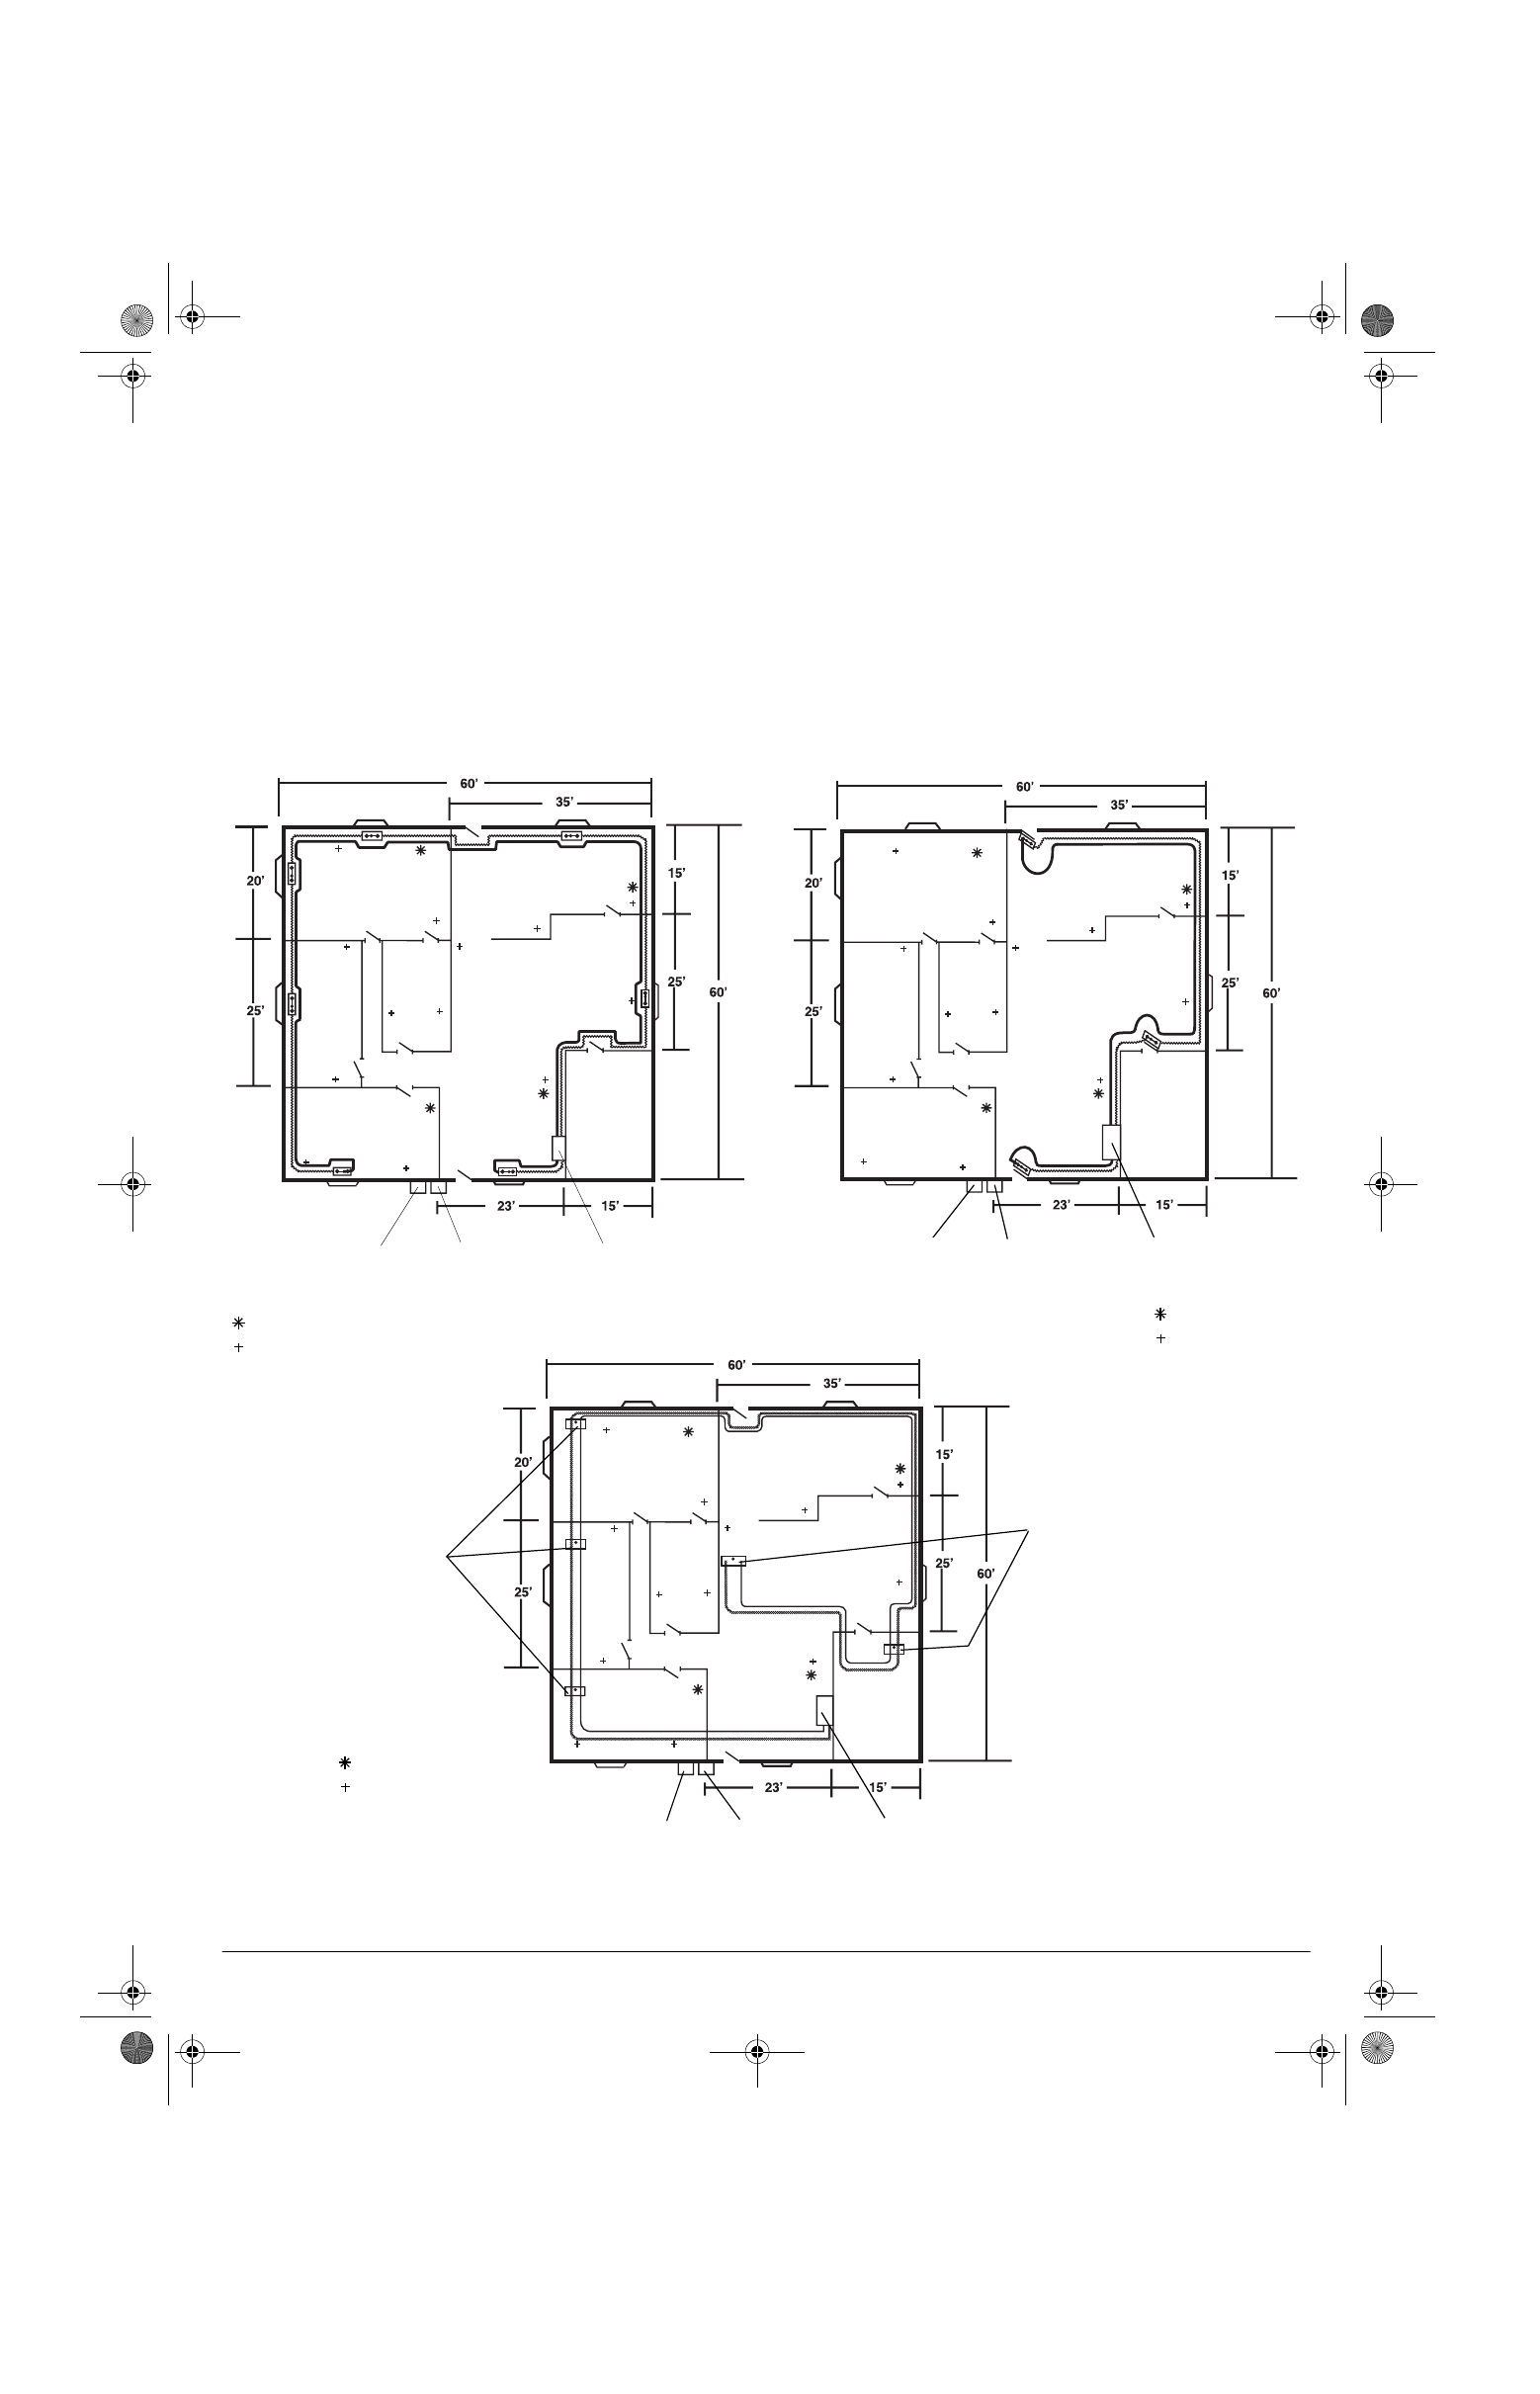
5Preparation
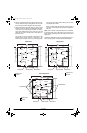
2. After you complete the basic floor plan, make three cop-
ies of it. Label each copy as being the plan for one of the
three zone types (instant, delayed, and panic/tamper).
3. Decide what sensors and other parts you want to install
and where, and mark them on the appropriate floor plan.
Then draw a line connecting the sensors you want to
assign to the labeled zone type on each copy. This will
show how the sensors will be wired to each other and
the alarm center.
For example, if you want to install a panic button in the
bedroom and a tamper switch on a wall safe, on the
Panic/Tamper floor plan, draw a loop connecting those
two sensors and ending at the location where you want
to install the alarm center.
When you finish, these drawings will show the layout of
each zone and the location of each sensor assigned to
that zone.
Note:
Since a violation of the panic/tamper zone immediate-
ly sounds the alarm (even if the system is not armed), do not
assign sensors protecting doors and windows to the panic/
tamper zone.
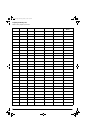
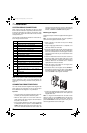
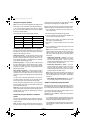
The different illustrations below show possible layouts for a
home security system. Your floor plan will probably differ.
Instant Zone
Delayed Zone
Panic/Tamper Zone
Alarm Siren Exterior Strobe Alarm Center
BR1
Kitchen
BR2
BR3
LR
Dining
Garage
Bath
Telephone Jack
AC Outlet
Alarm Siren Exterior Strobe Alarm Center
BR1
Kitchen
BR2
BR3
LR
Dining
Garage
Bath
BR1
Kitchen
BR2
BR3
LR
Dining
Garage
Bath
Alarm Siren Exterior Strobe Alarm Center
Tamper Switches
Panic Buttons
Telephone Jack
AC Outlet
Telephone Jack
AC Outlet
49-454.fm Page 5 Wednesday, January 17, 2001 10:37 AM