


Page 30
7036-135G
November 22, 2011
R
Mt. Vernon Pellet Insert (AE)
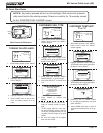
5. Auto-Clean Cycle
The fi repot auto-clean system will cycle:
• When the appliance is fi rst plugged in
• When the house reaches temperature and the appliance
shuts down
• At prescribed intervals, depending on the type of fuel se-
lected
• When starting up after an electrical interruption
If your appliance is running and the auto-clean cycle is initi-
ated, the appliance will revert to shutdown cycle.
• The fl oor of the fi repot will open and dump the ash into
the ash pan
• It takes approximately 2 minutes to complete the auto-
clean cycle
• The fl oor will then shut, and if the thermostat is still call-
ing for heat, the fi re will start again
• During this auto-clean cycle, the convection blower may
continue to run. The combustion blower will continue to
run.
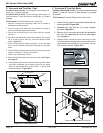
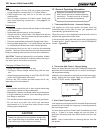
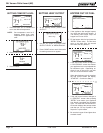
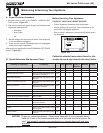
Additional Screen Messages:
READY It is telling you that the home is up to temperature
and doesn’t need any heat.
- - - - - The screen will show 5 dashes when the wall
control and the control board are NOT communicating with
each other. Check that the wiring on the thermostat is prop-
erly connected.
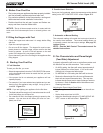
MAINTENANCE BURN This indicates the appliance is
operating on battery backup, prior to the auto-clean. The
maintenance burn will keep the system from shutting down
as the appliance will not automatically re-light in battery
back-up mode.
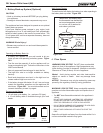
OFF The AUTO/MANUAL SETTING screen has been set
to OFF. Set the appliance to OFF when performing periodic
maintenance to prevent an unexpected startup.
BLANK SCREEN The ON/OFF switch may be in OFF
position. Turn to ON position.
WARNING
Fire Risk
Do NOT operate appliance:
• With appliance door open.
• With fi repot fl oor open.
Do NOT store fuel:
• Closer than required clearances to com-
bustibles to appliance.
• Within space required for loading or ash
removal.
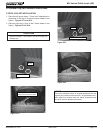
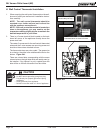
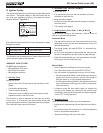
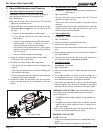
L. Insert Removal
In the case that service or inspection is required the unit may
need to be removed from the wall.
1. Unit must be unplugged before removal of unit is possible.
Unplug the unit from its power source.
2. Remove insert surround from unit, to ease the process of
removal.
3. Unclip the exhaust transition from the exhaust outlet in the
back of the unit. This is what connects the venting to the unit.
Removal of the clips will allow you to remove the unit from the
wall without damaging or adjusting the venting.
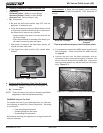
4. Slide unit from the wall and rotate either direction as needed.