


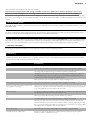


Relax sessions: how often and how long?
If you want to pamper your muscles or joints or want to enjoy the relaxing warmth of the INNERGIZE without getting a tan, only switch on the
infrared lamps to get a deep relaxation. If you want to continue enjoying the INNERGIZE's warmth after your tanning session, switch on the
infrared lamps only for a relax session.
You can take infrared relax sessions several times a day (e.g. 30 minutes in the morning and in the evening).
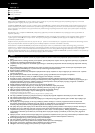
Preparing for use
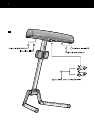
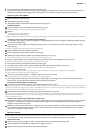
◗ The appliance can be easily moved and stored in transport position (fig. 2).
1 Put the appliance on the floor as shown in the figure (fig. 3).
Make sure there is sufficient room on either side of the appliance to allow the legs to move outwards.
2 Press the dual push button in the handgrip (1) and pull the stand slightly up (2).Then release the push button (fig. 4).
On a smooth floor the legs of the appliance will automatically move outwards. If the floor is not smooth, e.g. a carpeted floor, you may have to
put your foot on one of the legs to allow the other leg to move outwards.
3 Pull the stand up by the handgrip as far as it goes (fig. 5).
The stand will lock into position with a click.
4 Turn the lamp unit in the direction indicated in the figure (fig. 6).
This will require some force at first. Push the lamp unit in the direction indicated until it locks into position with a click.
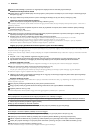
◗ The appliance can only be switched on for a tanning or relax session if the lamp unit is in the correct position.
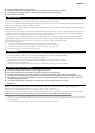
5 Push the legs of the appliance under the bed or sofa you intend to lie down on (fig. 7).
6 Press the release buttons in the recesses of the control panel and push the control panel upwards along the stand. Let go of the release
buttons when the lamp unit is at the required height (fig. 8).
◗ The distance between the UV filters and your body must be 65 cm.The distance between the UV filters and the surface on which you
are lying down (e.g. a bed) must be 85 cm (fig. 9).
◗ You can determine whether the appliance has been set to the required height by pulling out the measuring tape (fig. 10).
◗ The measuring tape will automatically rewind if you operate the red tab (fig. 11).
Using the appliance
Tanning or relaxing (HB933)
1 Fully unwind the mains cord.
2 Put the plug in the wall socket.
3 Set the selector to the desired position (fig. 12).
Choose symbol • if you want to tan your body.
Choose symbol Ç if you prefer a relax session.
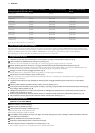
4 Check the chapters 'Tanning sessions: how often and how long?' and 'Relax sessions: how often and how long?' for the correct tanning
or relaxing time.
5 Lie down directly under the lamp unit of the appliance.
6 Always wear the protective goggles provided if you are taking a tanning session.
7 Set the timer to the appropriate time for the session (fig. 13).
B
It can take a few seconds for the lamps to go on.This is normal.
◗ During the last minute of the session you will hear a beeping sound.
◗ During this minute, you can reset the timer to tan the other side of your body. By doing so, you avoid the 3-minute waiting time which
is necessary to allow the tanning lamps to cool down after they have been switched off.This waiting time does not apply to the infrared
lamps.
Tanning or relaxing (HB935)
1 Fully unwind the mains cord.
2 Put the plug in the wall socket.
◗ The display will show all the functions that can be selected by the user (fig. 14).
Adjusting functions
1 Use the ¡™buttons to switch from function to function (fig. 15).
The underlined symbol shows the function you are programming.
2 Choose:
- symbol • if you want to tan your body.
- symbol Ç if you prefer a relax session.
Note: In these directions for use, the function • is used as an example of what may be shown on the display.
Setting the time for a tanning or relax session.
1 Check the chapters 'Tanning sessions: how often and how long?' and 'Relax sessions: how often and how long?' for the correct tanning
or relaxing time.
2 Set the time of the tanning or relax session by pushing the + button to put the time forward or by pushing the - button to put the time
backward (fig. 16).
ENGLISH6