


11
If shaft seal is worn or damaged, repair as follows:
Pump Dissasembly/Removing Old Seal
Disconnect power to pump motor.
Be
sure valves on suction and return piping are
closed before starting work.
Release all pressure by opening all vents before starting
work.
1.
Drain pump by removing drain plugs on bottom of
pump
body and trap body.
2. Be
sure there is no pressure in trap body; remove
cover
(unscrew by turning counterclockwise).
3.
Remove 6 nuts, lockwashers and flat washers holding
seal
plate to pump body. Pull seal plate and motor
away
from pump body. (You may have to CAREFULLY
use
a screwdriver to separate body from seal plate.)
4.
Remove seven screws and washers holding diffuser to
seal
plate. Remove diffuser.
5.
Remove motor canopy. Being careful not to touch ca-
pacitor
terminals, loosen capacitor clamp and move
capacitor
to one side.
6.
Hold shaft with 7/16" open-end wrench on motor
shaft
flats.
7.
Unscrew impeller from shaft (turn counterclockwise
when
facing it).
NOTICE: On
2 HP model, remove impeller screw
(left
hand thread - turn clockwise) and gasket before
removing
impeller. Inspect gasket for damage,
cracks,
etc. Replace if damaged.
8.
Remove four screws holding seal plate to motor.
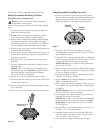
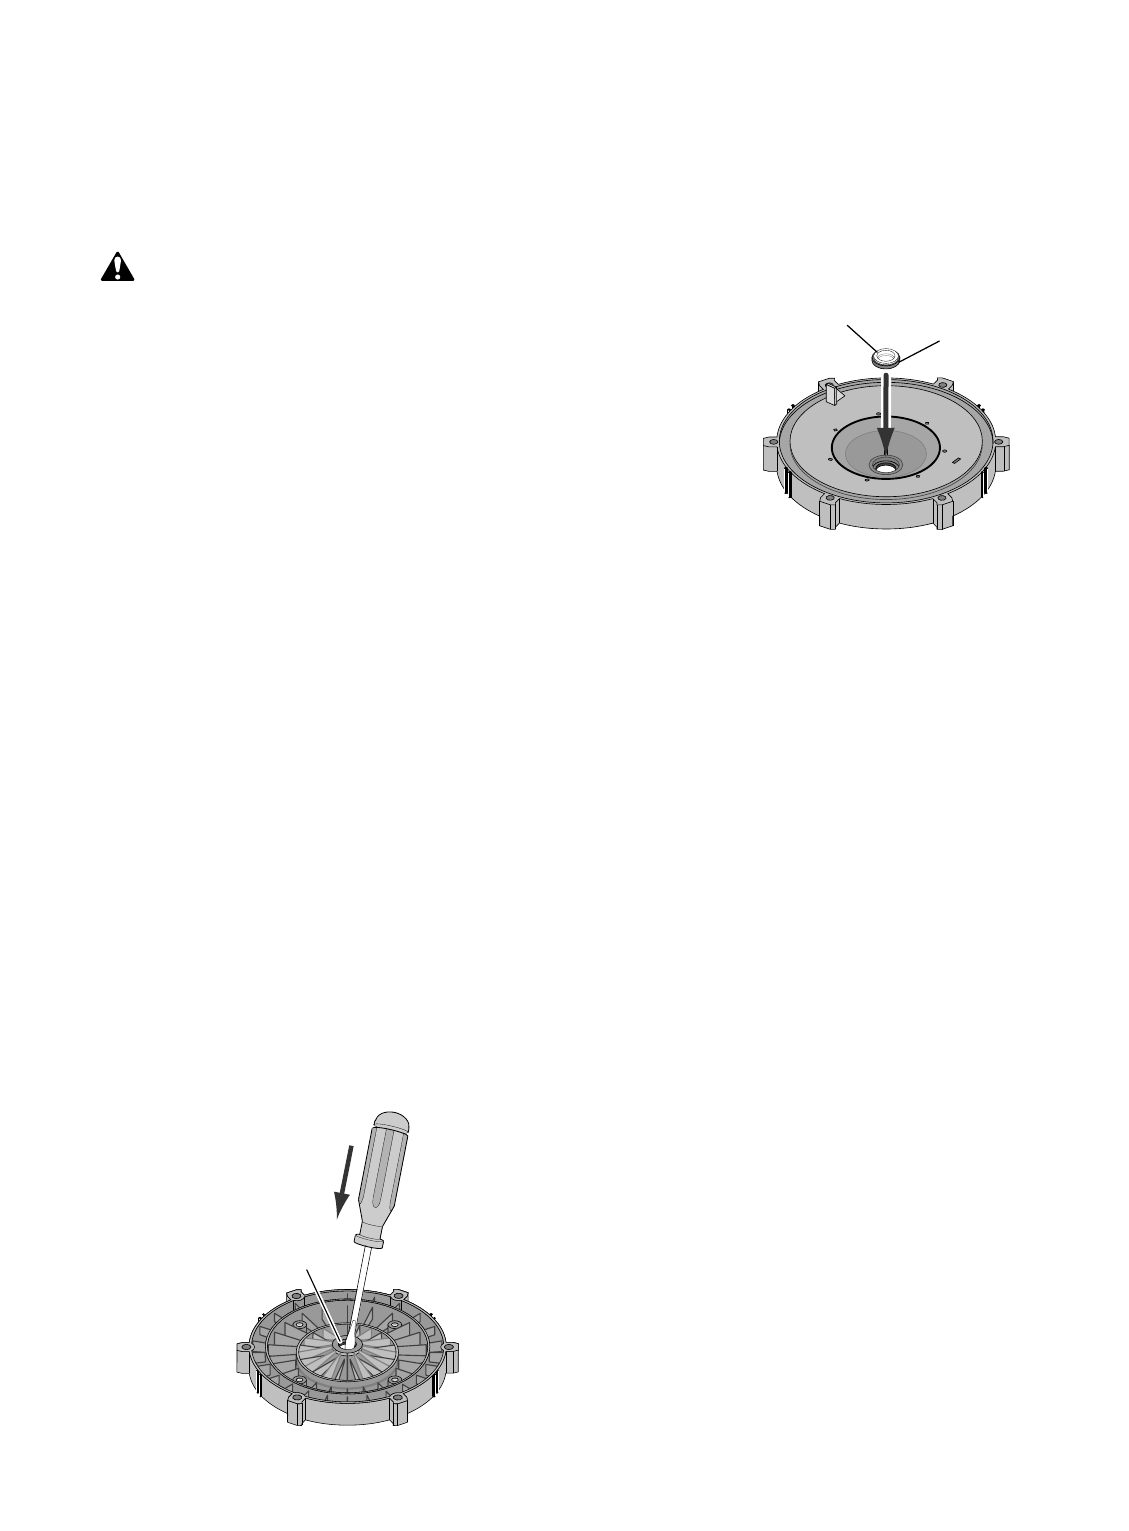
9.
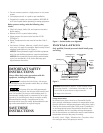
Place seal plate face down on flat surface and tap out
ceramic
seat (Figure 6).
10
. Remove slinger from motor shaft and inspect for dam-
age or abrasion.
11.
Clean seal cavity in seal plate and clean motor shaft.
Pump Reassembly/Installing New Seal
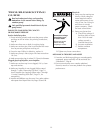
1. Ceramic seat must be clean and free of dirt, grease,
dust,
etc. Wet outer edge with small amount of liquid
detergent;
press ceramic seat into seal plate cavity
firmly
and squarely with finger pressure (Figure 7).
2.
If ceramic seat will not locate properly, remove it,
place face
up on bench and reclean cavity. Ceramic
seat
should now locate.
3.
If seat still will not locate properly, place a cardboard
washer
over the polished face and use a piece of 3/4"
(19mm)
standard pipe for pressing purposes.
NOTICE:
Be sure not to scratch or mar polished sur-
face
or seal will leak.
4.
Replace slinger on end of motor shaft so that impeller
sleeve
will push it into position. If slinger shows signs
of
wear or damage, replace it.
5.
Remount seal plate on motor. Tighten bolts to 60-80
inch-lbs.
(69-92 kg/cm) torque.
6.
Apply a small amount of liquid detergent to inside di-
ameter
of rotating half of seal.
7.
Slide rotating seal member, polished carbon face out,
over
impeller sleeve until rubber drive ring hits back
of
impeller.
NOTICE:
Be sure not to nick or scratch polished seal
face;
seal will leak if face is damaged.
8.
Screw impeller onto shaft (clockwise); this will auto-
matically
locate seal in seal plate.
NOTICE: On
2 and 2-1/2 HP models; install impeller
gasket
and lock screw (left-hand thread - turn coun-
ter
clockwise
). Torque lock screw to 50-55 inch-lbs.
(57.6-63
kg/cm).
9.
Mount diffuser on seal plate; tighten screws to 10-14
inch-lbs.
(11.2-16.1 kg/cm) torque.
10
. Assemble motor and seal plate to pump body with
nuts,
flat washers and lock washers. Torque nuts to
120-130
in-lbs. (138-150 kg/cm).
11.
Prime pump according to instructions on Page 9.
Figure 6
Mechanical seal
ceramic seat
Polished
surface
Rubber
surface
Figure 7