


ASSEMBLY INSTRUCTIONS
To assemble the fan, follow the instructions by referring to the parts diagram below.
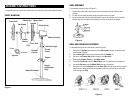
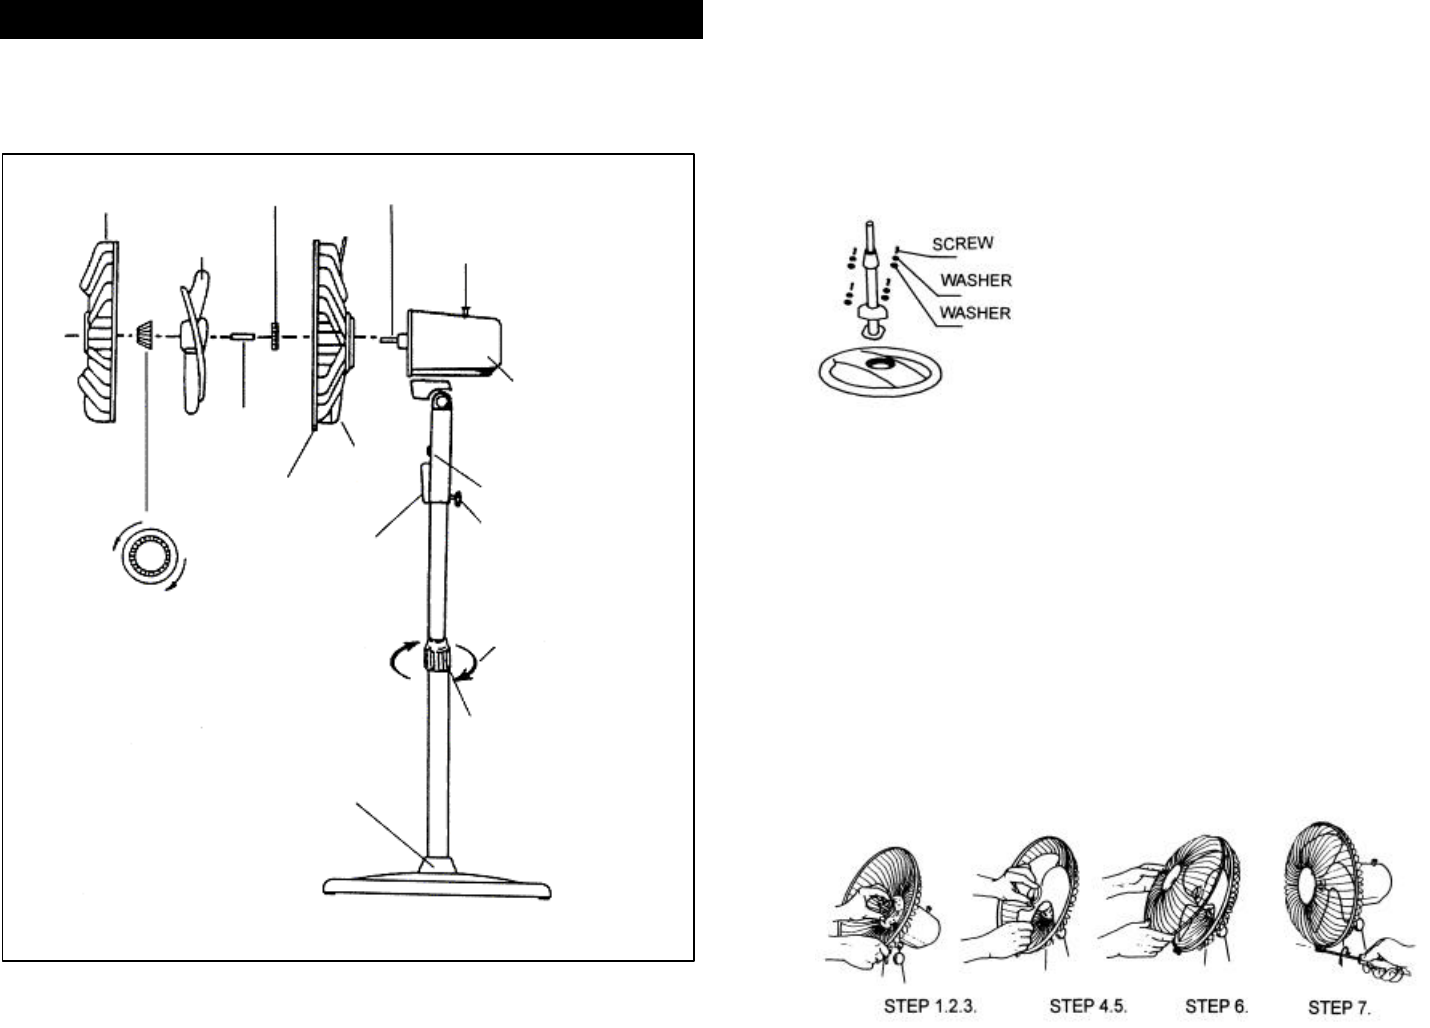
PARTS DIAGRAM
Figure 1
BASE ASSEMBLY
To assemble the base, refer to Figure 2:
1. Unpack the base and column parts from the packing box and loosen the 4
screws.
2. Fix the column onto the base plate using the 4 sets of screws.
3. Unscrew and take off the Height Adjuster, mount the column, and screw the
Height Adjuster to tighten the extension column to the desired height.
Figure 2
GRILL AND FAN BLADE ASSEMBLY
To assemble the grills and fan blade, refer to Figure 3:
1. Unscrew the Spinner clockwise and the Plastic Nut counter clockwise and
remove both of them.
2. Set the Rear grill in the proper position with the Handle up.
3. Screw on the Plastic Nut tightly to attach the Rear Grill.
4. Discard the Plastic Sleeve on the Motor Shaft.
5. Install the Fan Blade onto the Motor Shaft until it reaches the retaining pin.
6. Screw the Spinner onto the Motor Shaft counter clockwise.
7. Press the rim of the Front Grill onto the Rear Grill until the front grill is properly
fitted. Secure both grills firmly by tightening the fan grill locking screws and
nuts through the Clip.
Figure 3
Spinner
Front Grill
Rear Grill
Remote
Control
Thumb
Screw
Plastic
Sleeve
Plastic Nut
Fan Blade
Motor Shaft
Clutch Knob
Motor Housing
Indicator Light
Screw
Stand Ornament
Fasten
Handle
Clip
Height
Adjustment
Ring
Unscrew