


PELCO Manual C486M-B (9/95) 3
4.3 OPTIONAL HK8000/HK8024
HEATER KIT INSTALLATION
The HK8000 and HK8024 heater kits require 117 VAC
or 24 VAC respectively, and both provide 80 watts of
heat which is thermostatically controlled to activate ON
at 40°F (4.44°C) and OFF at 60°F (15.56°C)
The following cable sizes are the minimum recom-
mended for use with heater kits.
120 VAC Operation 24 VAC Operation
22 Awg-400 ft (121.92 m) 20 Awg-35 ft (10.67 m)
20 Awg-650 ft (198.12 m) 18 Awg-60 ft (18.29 m)
18 Awg-1,100 ft (335.28 m) 16 Awg-80 ft (24.38 m)
To install the HK8000/HK8024, perform the following
steps:
1. Open the cover.
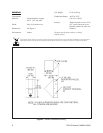
2. Attach the heater pads to each side of the tilt table
bracket (see Figure 2).
3. Press the PC board assembly into the four (4) holes
provided in the tilt table bracket.
4. Wire according to the diagram shown in Figure 1.
4.4 CAMERA/LENS INSTALLATION
Once the enclosure has been secured to the mounting
surface you can install the camera/lens. Follow the steps
outlined below.
NOTE: The tilt table bracket and tilt table
may be removed from the enclosure to aid in
camera/lens installation.
1. Loosen the tilt table mounting bolts.
2. Securely attach the camera/lens to the desired lo-
cation on the tilt table.
3. Make all necessary electrical connections (video,
camera power, etc.)
4. Position the tilt table at the desired location and
angle, then tighten the 1/4-20 fasteners to secure
the tilt table in place.
5. Close the lid to ensure that there is no interference.
6. Provide power to the camera and check for ad-
equate video image.
7. Secure the cover with the 1/4-20 “Tampruf” screws
provided.
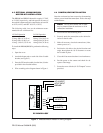
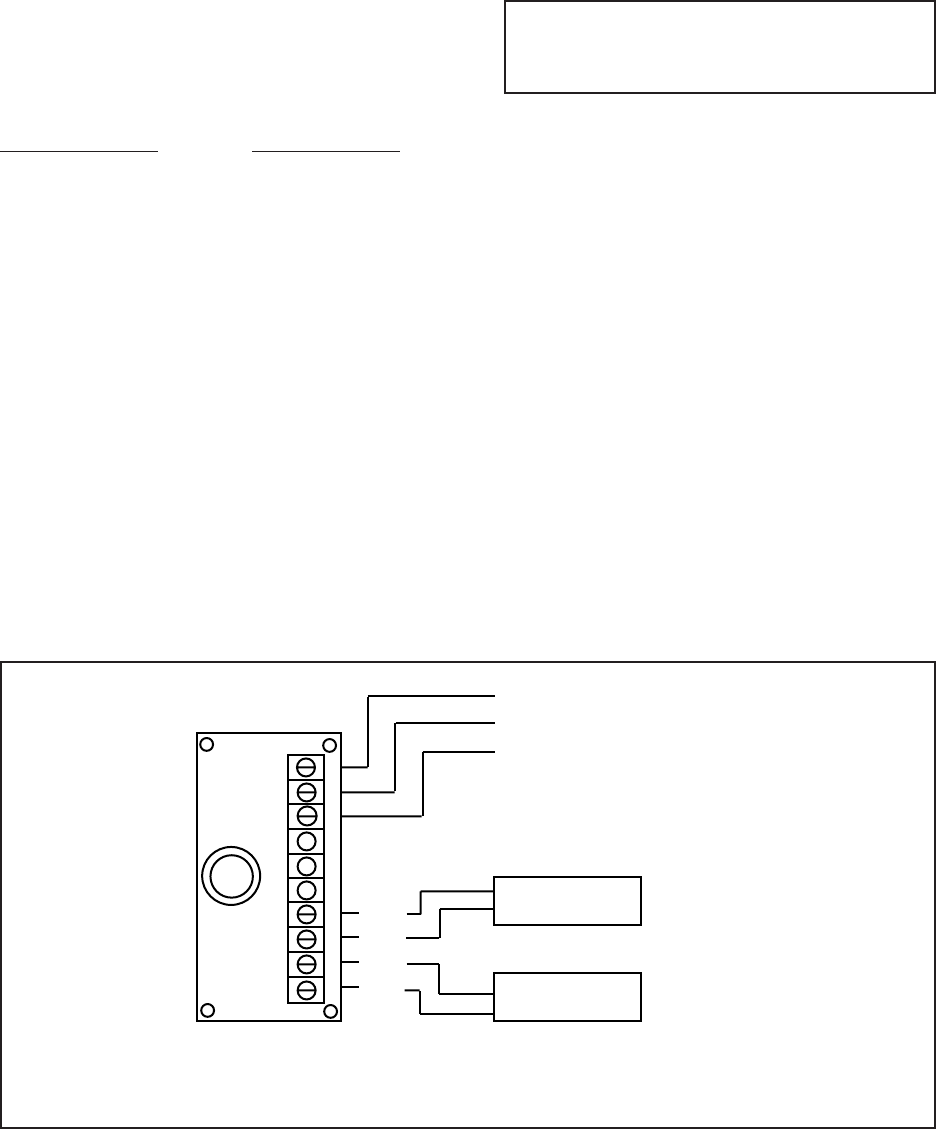
Figure 1. HK8000/HK8024 Heater Kit Wiring Diagram
PC BOARD ASSY
1
2
3
4
5
6
7
8
9
AC HI INPUT
AC NT INPUT
GROUND
HEATER
40 WATTS
HEATER
40 WATTS
WHT
WHT
WHT
WHT
10