


4 Pelco Manual C494M-D (1/96)
5.0 CARE AND MAINTENANCE
Maintenance performed at regularly scheduled inter-
vals will help prolong the operational life and appear-
ance of the equipment.
1. Clean the Lexan window with a mild non-abra-
sive detergent in water and a soft cloth regularly to
help maintain picture clarity. For a heavily soiled
window, use vinyl cleaner.
NOTE: Pelco offers a 24-hour, seven-day-a
week Technical Assistance Program (TAP) de-
signed to assist any customer with a technical
problem involving Pelco equipment whether it’s
the weekend or late at night. For technical as-
sistance dial (800) 289-9100 and you will be
connected to a Pelco TAP member who is
trained to answer your questions.
Pelco also guarantees one-day turnaround on
any Pelco equipment sent in for repair. This
includes warranty and non-warranty items.
Refer to the section on “Warranty and Return
Information” in this manual for the proper pro-
cedure.
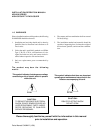
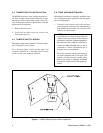
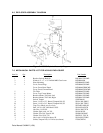
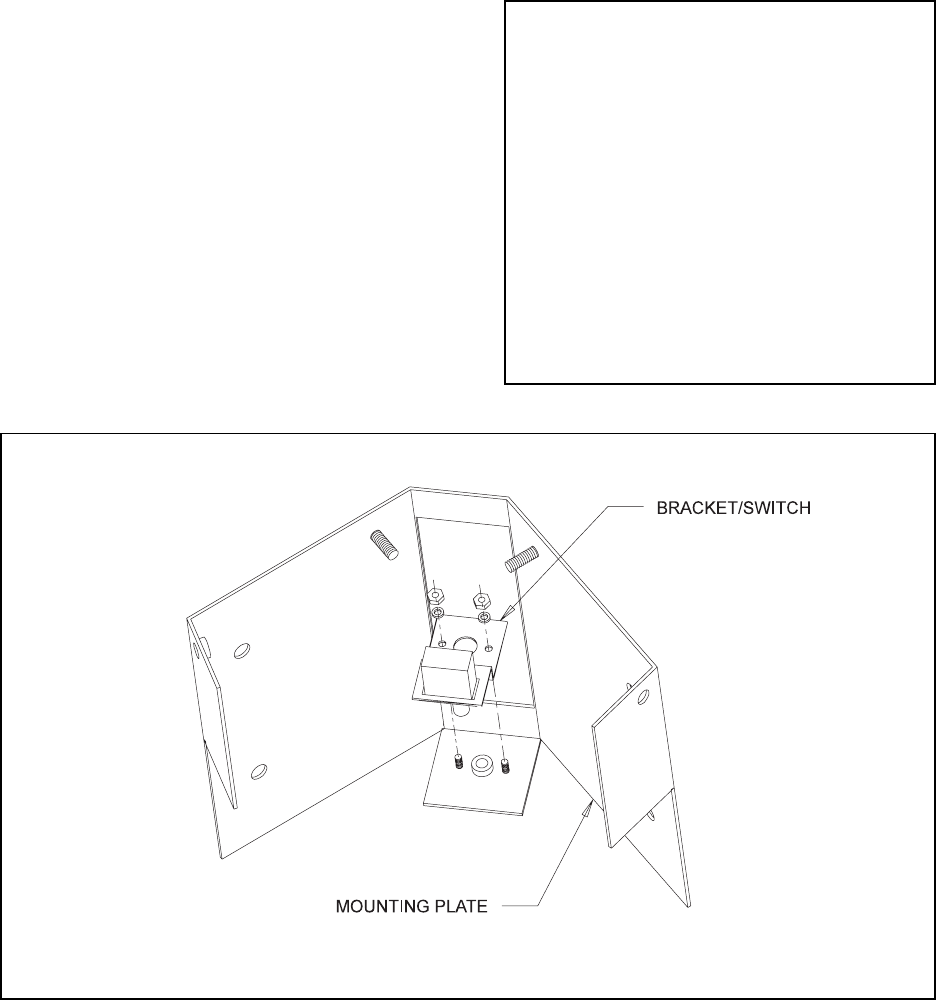
Figure 1. HS2000 Series Tamper Switch Installation
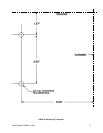
4.5 TAMPER SWITCH WIRING
The tamper switch comes with both a “Normally Open”
and a “Normally Closed” contact.
For a “Normally Open” circuit, use the “open” and
“common” terminals; for a “Normally Closed” circuit,
use the “closed” and “common” terminals.
4.4 TAMPER SWITCH INSTALLATION
The HS2000 enclosures come standard from the fac-
tory with a tamper switch installed. Should it become
necessary to install a replacement switch, refer to Fig-
ure 1 for the correct position of the bracket/switch and
perform the following steps:
1. Remove the front cover.
2. Install the bracket/switch and secure with
lockwashers and nuts.