6 C644M (1/04)
GHOST PROCEDURE
This procedure allows you to configure your master viewstation.
1. Close all applications on the viewstation.
2. Insert Viewstation Disk #1 (CD-DX9000RM-VS1) into the CD-ROM drive of the viewstation.
3. Go to Start > Shutdown > Restart.
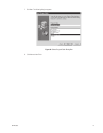
4. Press Enter at the Norton Ghost boot screen. Ghost starts the installation process.
5. Insert Viewstation Disk #2 (CD-DX9000RM-VS2) when requested, and then press Enter.
6. Insert Viewstation Disk #3 (CD-DX9000RM-VS3) when requested, and then press Enter. You will see the A:\>Prompt when
the process is complete.
7. Remove Viewstation Disk #3, and then press Ctrl+Alt+Del. The viewstation starts and performs a scan disk operation,
restarts automatically, and then prompts you to restart again.
8. Left-click the Yes button, and then close any error messages that appear.
9. Configure the date and time, IP address, network identification, and Client Configuration Utility on your master
viewstation. Refer to the DX9000 Viewstation Operation manual.
10. Configure the web page address, Internet Explorer settings, the recorders, and the Event Notification settings. Refer to
the
RAID Manager Utility
and
RAID Manager Home Page
sections in the DX9200 Digital Video Recorder & DX9100
Viewstation Installation manual.
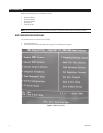
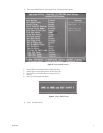
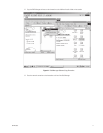
LOADING RAID MANAGER SOFTWARE
The following steps show how to install the RAID Manager software on DX9000 recorders.
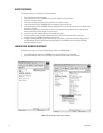
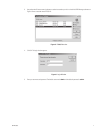
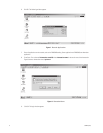
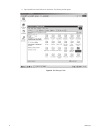
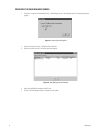
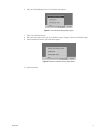
1. Load the RAID Manager software (CD-DX9000RM-R1) into the CD-ROM drive of any viewstation.
2. Copy the Raid Manager folder from the CD-ROM to the C:\Additional Installs folder on the viewstation.
Figure 4. Raid Manager Folder Copy Procedure