


C2493M (12/05) 5
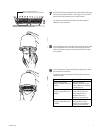
7
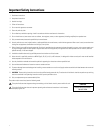
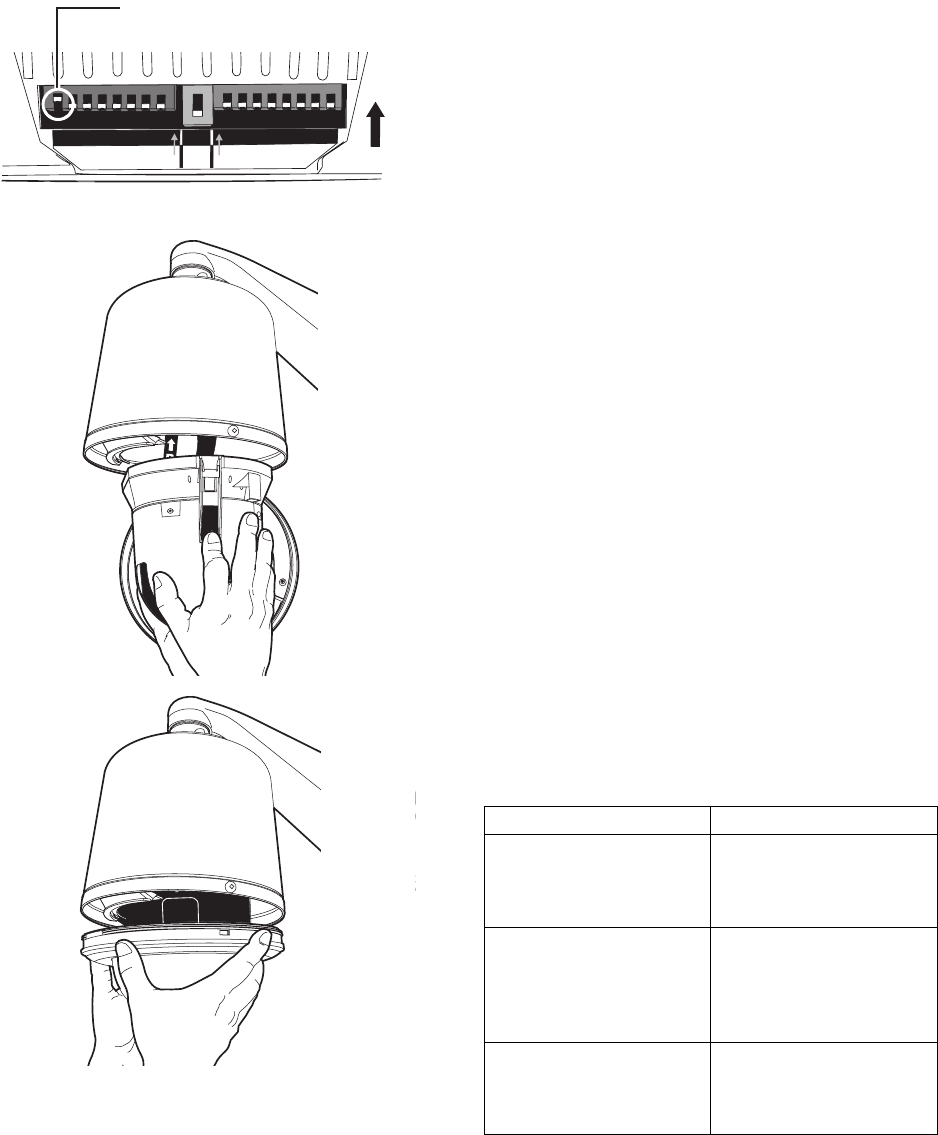
No DIP switch settings are required for the system. Before installing the
dome drive verify that switch SW1-1 (SW1, switch 1) is set to the ON
position and all other switches are set to the OFF position.
The switches set the dome drive for Pelco’s D protocol, address 1,
2400 baud, and no termination.
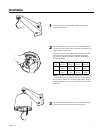
8
Install the dome drive. Line up the blue (A) and red (B) tabs with the blue
(A) and red (B) labels. Push in the tabs. Insert one side and then the
other side. Continue pushing on the ends of the tabs until both sides
click into place.
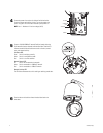
9
Install the lower dome. Tighten the Phillips pan head screws to secure
the lower dome to the back box.
To operate or program your Spectra III EVS dome drive, refer to the
following manuals:
SW1
SW2
SW3
1
2
3
4
5
6
7
8
1
2
3
4
5
6
7
8
1
on on
ON
SW1-1 is set to the ON position.
All other switches are set to the OFF position.
A
Information Required Where to Find Information
Spectra’s programmable
features, commands, and menu
structure
Spectra III Operation/
Programming manual supplied
with the dome drive or available
at www.pelco.com
How to control the dome drive
and access preset 95 with the
WS5050
Endura
™
WS5000 Advanced
System Software Operation
manual supplied with the
WS5050 workstation or
available at www.pelco.com
How to control the dome drive
and access preset 95 with the
VCD5000
Endura VCD5000 Video Control
Display Operation manual
supplied with the VCD5000 or
available at www.pelco.com