


- 5 -
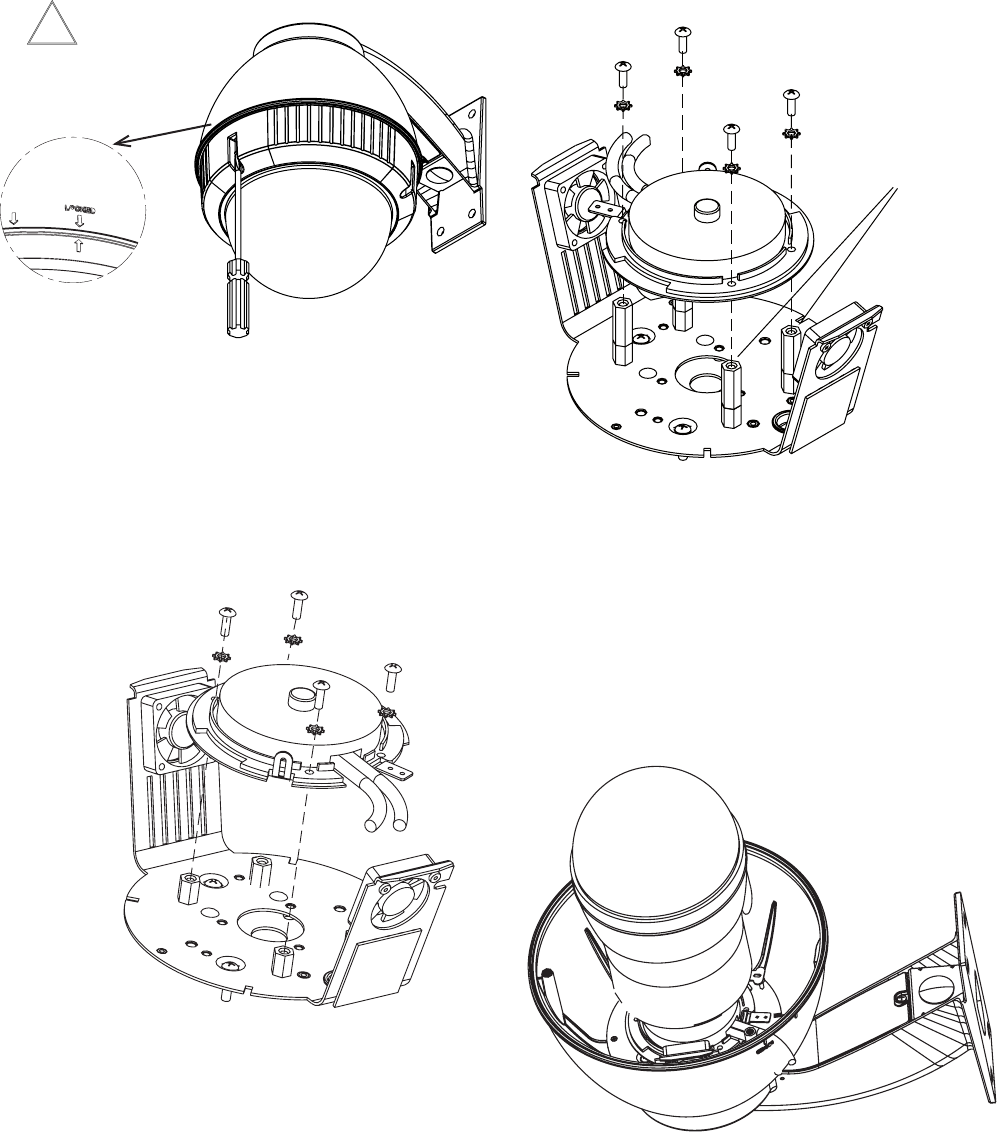
Figure 1a
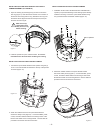
INSTALLATION FOR WV-CS574 UNITIZED CAMERA
1. Installation for WV-CS574 Unitized Camera. Add additional 1"
spacers (from packet assembly) to the existing spacer already
installed in housing. Connect he quick release bracket using
the (4) 8x32x1/2 bolts and #8 star washers (Figure 1b).
INSTALLING QUICK RELEASE BRACKET AND PAN/TILT
CAMERA ASSEMBLY (ALL MODELS)
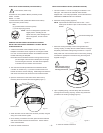
1. Open the housing by loosening the (3) screws on the dome
trim ring (Figure 1). Note the arrows and the word "Locked" on
the side of the housing and trim ring. Rotate the trim ring until
the bottom arrow aligns with the second top arrow, then pull
the dome and trim ring off.
2. Install the pan/tilt unit quick- release bracket. It is recom-
mended that this be done before installing the housing.
Figure 1
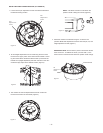
INSTALLATION FOR WV-CS954 UNITIZED CAMERA
1. Connect the quick-release bracket to the spacers using the (4)
8 x 32 x 1/2" bolts and #8 star washers to the top of the spacers
as shown (Figure 1a).
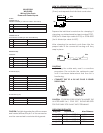
2. Attach the unitized camera to the quick-release bracket.
Secure the safety screw (Figure 2). Connect the BNC, power,
control, and alarm cables. Make sure all wiring is clear of the
blowers and heater on the housing bracket. Use the cable tie
provided to secure the wires and connectors.
Add 1" Spacers
Figure 1b
Figure 2
2. Attach the unitized camera to the quick-release bracket.
Secure the safety screw (Figure 2). Connect the BNC, power,
control, and alarm cables. Make sure all wiring is clear of the
blowers and heater on the housing bracket. Use the cable tie
provided to secure the wires and connectors.
!
Make sure all (3)
captive bolts drop
away from trim ring
before turrning!