


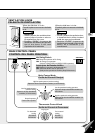
26
”
to 46-
1
/
16
”
26
”
a 46-
1
/
16
”
18-
1
/
16
”
18-
1
/
16
”
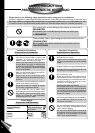
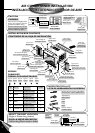
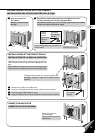
• Hot sun rays hitting the outside surface of the cabinet will create considerable heat
load. If the outside of the cabinet is exposed to direct sunlight, consider building an
awning to shade the cabinet while providing ample area for the heated air to be
exhausted from the condenser (both sides) and the top.
This unit is designed for installation in standard double hung windows.
NOTE: The unit may also be installed “through the wall”. You should, however,
observe standard carpentry practices and frame the opening without violating
local ordinances.
WINDOW REQUIREMENTS
REQUISITOS DE LA VENTANA
• Los rayos solares que tocan la superficie exterior de la caja crearán una considerable carga de calor. Si la parte que da al
exterior de la caja está bajo la luz directa del sol, considere el construir un toldo para dar sombra pero dejando espacio
suficiente para que el aire caliente pueda ser expulsado del condensador (en ambos lados) y parte superior.
Este aparato está diseñado para ser instalado en ventanas levadizas dobles.
NOTA: Esta unidad tambíen se puede instalar a través de la pared. En este caso, se deberán realizar trabajos de carpintería
y construir una estructura en la abertura deacuerdo con los reglamentos locales.
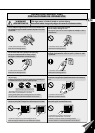
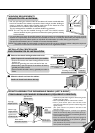
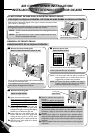
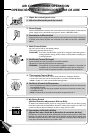
INSTALLATION PROCEDURES
PROCEDIMIENTOS DE INSTALACIÓN
• Unscrew and remove the chassis locking brackets and save
for later use.
• Remove the grounding wire screw and save for later use.
• Desatornille y quite los soporte de cerradura del chasis y
guárdela para volver a usarla.
• Quite el tornillo del cable a tierra y guárdela para volver a
usarla.
Remove the chassis locking bracket and screw.
Quite el soporte de cerradura del chasis y los tornillos.
Counter clockwise.
En sentido contrario al reloj.
Slide the chassis out from the cabinet.
Deslice el chasis hacia afuera del caja.
Chassis locking bracket
Soportes que cierran
el chasis
Power cord
Cable de
alimentación
Grounding wire location
Conexión del cable a tierra
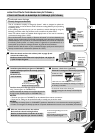
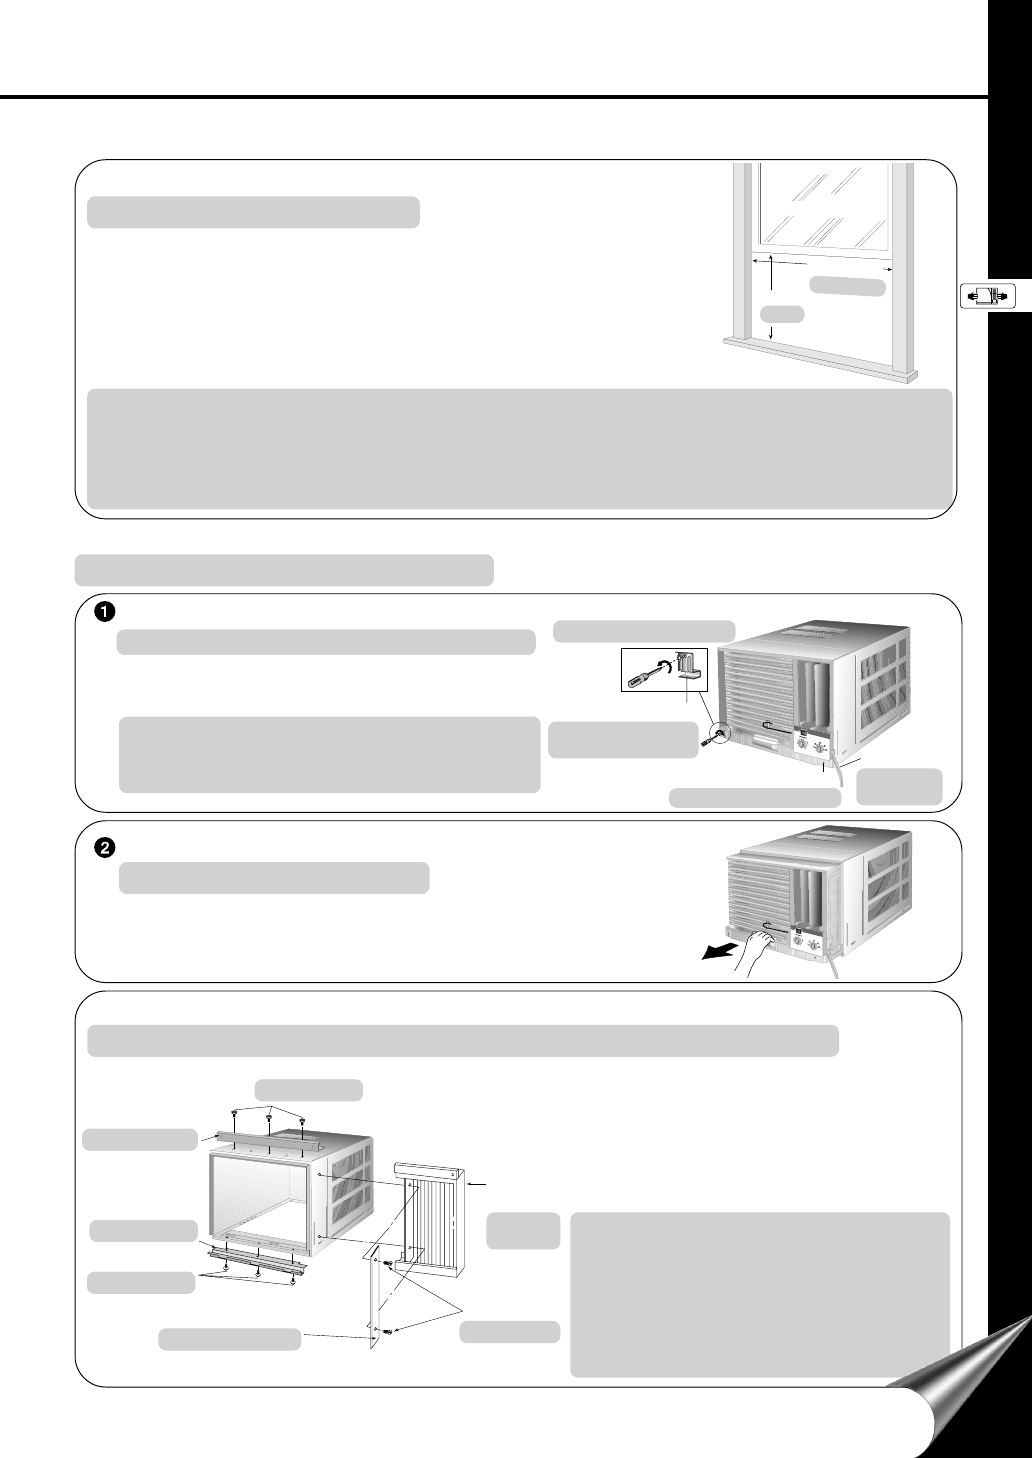
HOW TO ASSEMBLE THE EXPANDABLE PANELS (LEFT & RIGHT)
COMO ARMAR LOS PANELES EXPANSIBLES (IZQUIERDO Y DERECHO)
Top angle
Angulo superior
Type C screw
Tornillo tipo C
Bottom angle
Angulo interior
Type B screw
Tornillo tipo B
Panel retainer
Retenedor del panel
Expandable
panel
Panel
expansible
Type E screw
Tornillo tipo E
• Attach the top and bottom angles to cabinet using screws
type B and C (3pcs each).
• Insert expandable panels to cabinet sides as shown.
• Insert a panel retainer plate in the first fold of each
expansion panel and secure panels to cabinet using screw
type E (2 each).
(The panel retainers are packed in the folds of the
expansion panels)
• Coloque el ángulo superior e inferior en el gabinete
usando los tornillos tipo B (3) y los tornillos tipo C (3).
• Inserte los paneles expansibles a los lados del gabinete tal
como se indica en la figura.
• Inserte un retenedor de panel en cada primer pliegue de
cada panel de expansión y fije los paneles al gabinete
usando el tornillo tipo E (2).
(Los retenedores de panel se encuentran en los pliegues
de los paneles de expansión)
8