


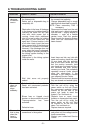
6. POWER UNIT INSTALLATION (CONT’D)
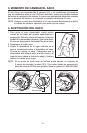
4. Use the mounting bracket as a template to
mark the position of its screws. Drill the
upper and lower screw holes into the stud
using a 3/16” drill bit.
5. Using a Phillips screwdriver, secure the mounting bracket to the wall with
2 no. 14 x 2” screws (included). Make sure that the bracket is tight against the
wall.
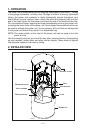
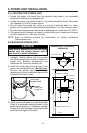
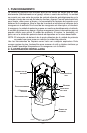
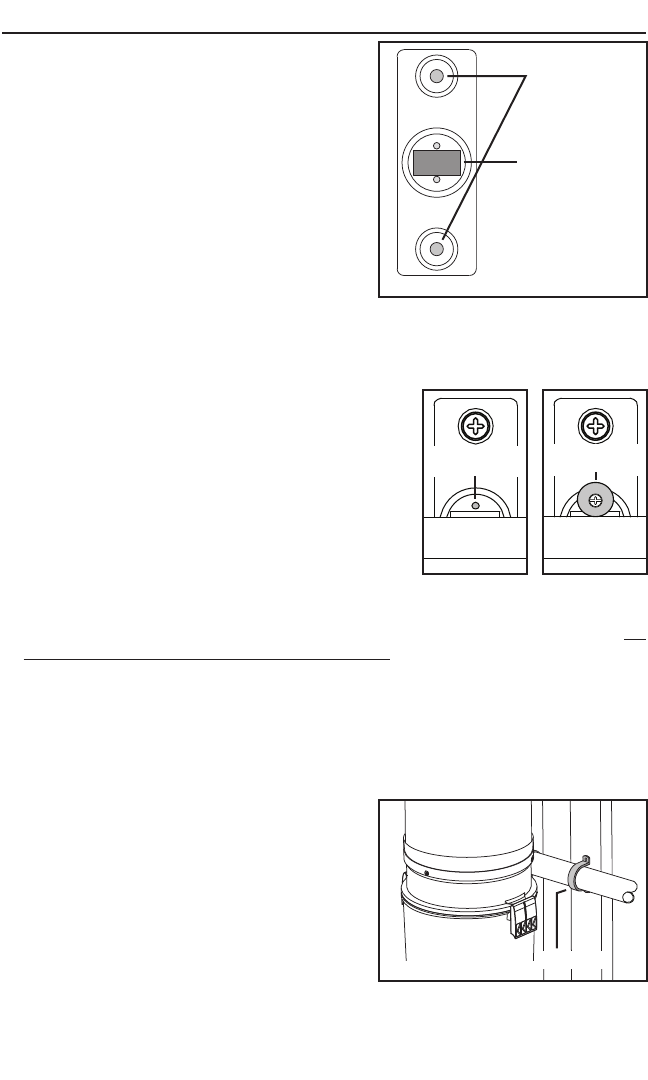
6. Hang the power unit by inserting its back hook
into the center opening of its mounting bracket.
Make sure hook is securely engaged in bracket.
Secure the power unit to the mounting bracket,
with the provided no. 6 x 3/8” screw and washer
into the small remaining hole using a Phillips
screwdriver (see illustrations beside).
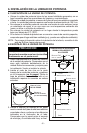
7. Run house vacuum line up to the 3-way elbow behind the power unit. Secure
house vacuum line to the appropriate 3-way elbow opening with PVC glue (do
not glue the 3-way elbow to the power unit).
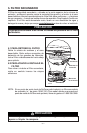
8. Connect muffler (if desired) and exhaust tubing to exhaust outlet on top of the
power unit. The exhaust should not be vented into a wall, ceiling or concealed
space in the house. Exterior vented exhaust lines should end using model
CI330 exhaust vent.
NOTE: Exhausting the power unit to the outside is recommended for optimal
performance but is not required.
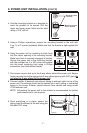
9. Once everything is in place, secure the
piping (near the elbow) to the wall using the
included PVC strap.
- 7 -
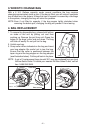
AD0041
WASHER/SCREW
LOCATION
AD0042
WASHER/SCREW
INSTALLED
AA0006
RETAINING SCREW
LOCATIONS
MOUNTING BRACKET
CENTER OPENING
AO0035
PVC STRAP
TOP OF THE
UNIT
TOP OF THE
UNIT