


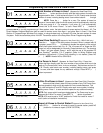
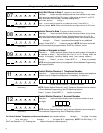
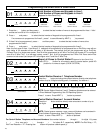
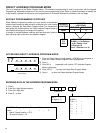

Total Number of Zones and Keypads in Area 1.
Total Number of Zones and Keypads in Area 2.
(Appears for New Panel Only)
1 Press the A button and then press 3 to select the total number of zones to be programmed for Area 1. Valid
entries are from 08 to 24 in multiples of 4.
2 Press 2 and press 3 to select the total number of keypads to be programmed for Area 1.
If no zones are to programmed for Area 2, pressJ to save followed by NEXT (E) to proceed.
3 If Area 2 is to be programmed, press 2 and then press 3 to select the total number of zones to be
programmed for Area 2.
4 Press 2 and press 3 to select the total number of keypads to be programmed for Area 3.
Note: the first zone of Area 1 (and Area 2, if selected) will automatically be programmed as an Exit/Entry zone with an
entry delay of 30 seconds and an exit delay of 60 seconds. The second zone will be programmed as an Exit/Entry
Follower Zone. In a single-area system, Zone 8 will be programmed as a 2-Wire Fire Zone (set Jumper JP7 to configure
zone 8 for 2 Wire Fire). In a two-area system, zones 7 and 8 will be programmed as 2-Wire Fire Zones and will be
common to both areas (set Jumper JP7 to configure zone 7 and 8 for 2 Wire Fire).
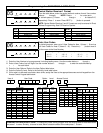
Report all Zones to Central Station?(Appears for New Panel Only)
Press YES (E) button for all zones to report to central station; press NO
(F) button for no zones to report (LOCAL SYSTEM).
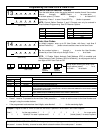
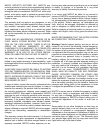
Central Station Receiver 1 Telephone Number
Press the A button and using the number buttons, directly enter telephone
number of up to 16 digits including prefix, if necessary, for receiver 1.
NOTE: Central Station Receiver 2 and 3 Telephone Numbers can be entered
in Direct Address Programming. See CS Reporting Options.
Press Jto save . Press NEXT (E) button to proceed.
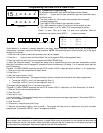
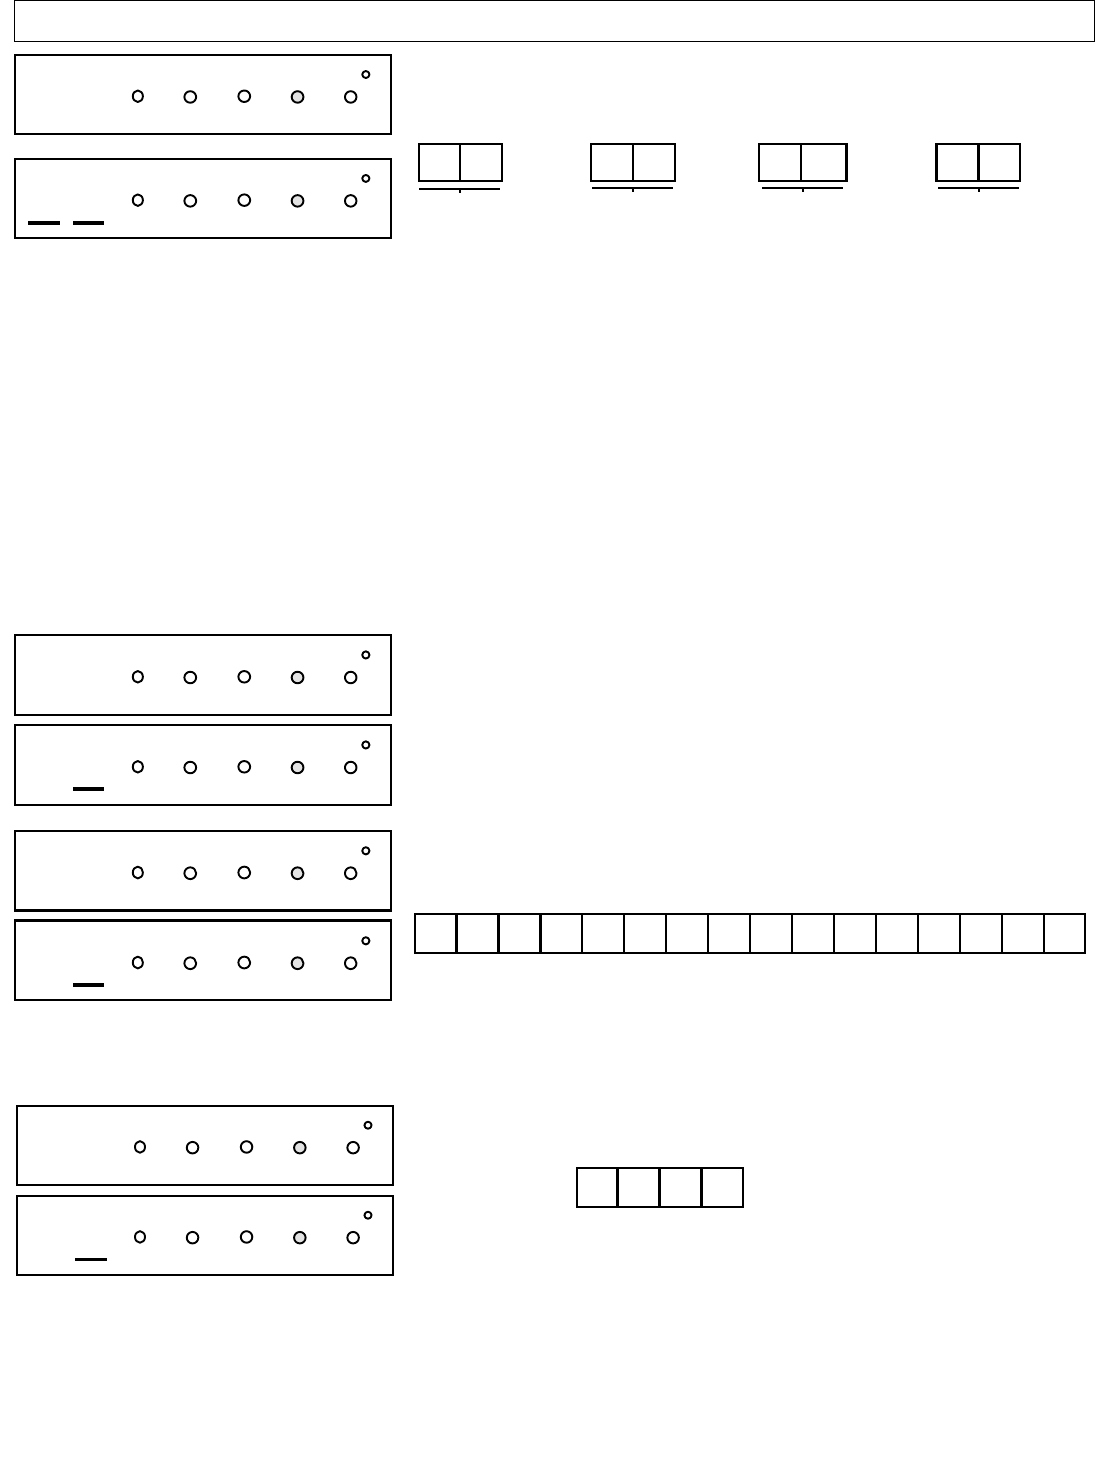
Central Station Receiver 1 Account Number
Press the A button and then directly enter an account number of up to
four digits.
NOTE: Central Station Receiver 2 and 3 Account Numbers can be entered in
Direct Address Programming. See CS Reporting Options.
Press Jto save. Press NEXT (E) button to proceed.
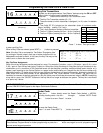
(Direct Entry)
01
INTERIOR
BYPASS FIRE/TBL SYS TBL CHIME
INTERIOR
BYPASS SYS TBL CHIME
FIRE/TBL
Programming the GEM-P3200 & GEM-P9600
2 2 2
J
Press 3 to
select # of
zones in Area 1
Press 3 to
select # of
K/Ps in Area 1
Press 3 to
select # of
zones in Area 2
Press 3 to
select # of
K/Ps in Area 2
(Yes or No)
02
INTERIOR
BYPASS FIRE/TBL SYS TBL CHIME
INTERIOR
BYPASS SYS TBL CHIME
FIRE/TBL
(Direct Entry)
03
INTERIOR
BYPASS FIRE/TBL SYS TBL CHIME
INTERIOR
BYPASS SYS TBL CHIME
FIRE/TBL
(Direct Entry)
04
INTERIOR
BYPASS FIRE/TBL SYS TBL CHIME
INTERIOR
BYPASS SYS TBL CHIME
FIRE/TBL
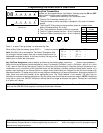
Central Station Receiver 1 Telephone Number
Central Station Account #
For Central Station Telephone and Account Numbers: Use number buttons 1 through 9 for digits 1–9; press
G0 for a zero and G 1 through G 5 for letters B–F, respectively. NOTE: Pre-Dial Delay = “D”;
Dial-Tone Detection = “E”. Pressing the 0 button will produce a blank space (•).
10