5
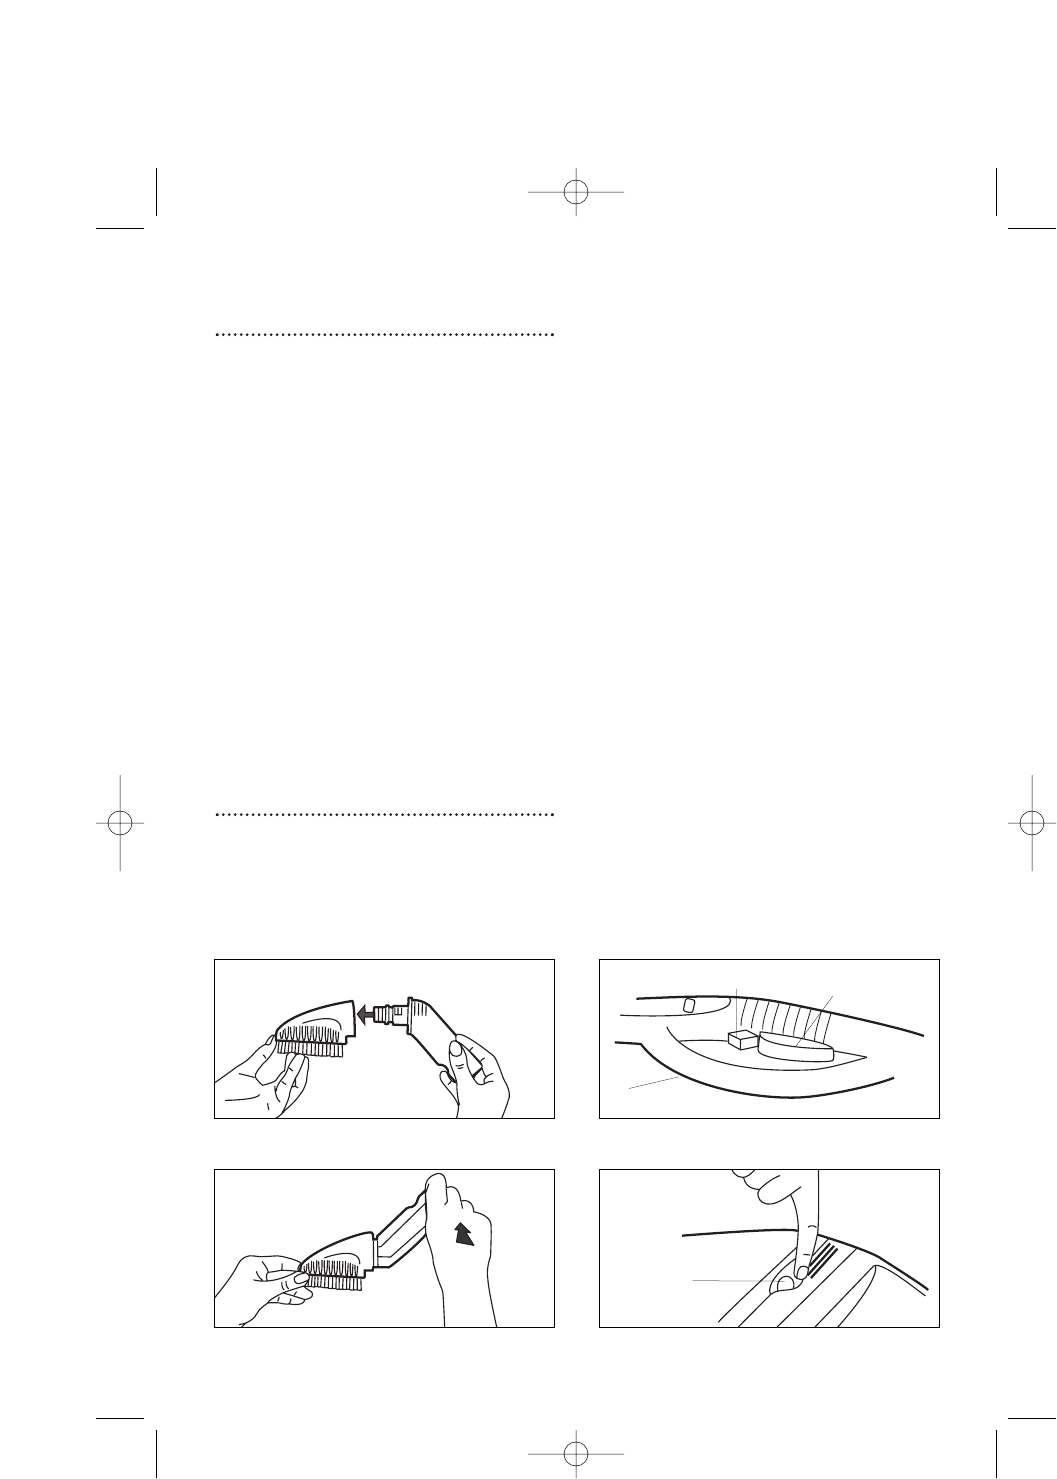
To fit the connector
1 Push the connector end, holding it
upside down, fully into the brush inlet E.
2 Twist the connector
1
/
2
a turn, until it is in
place. F
• The fit between the connector and the
tubes and/or handle is tight to ensure no
steam leaks. It is recommended to keep
both parts lubricated to facilitate
connecting and disconnecting.
3 To detach the accessories, press the
release button È and pull the items
apart.
WARNING: Accessory heads may be
hot. Please be careful not to trap your
fingers.
• The triangular nozzle also has a cotton
sock which fits over the bristles. Ideal for
use on upholstery and bedding.
Operating your steam
cleaner
1 Connect the unit to the mains and switch
on the boiler heater by pressing the
heater on/off button ¤. The ‘heater on
light’ is illuminated.
• Steam will be available in approx 10
mins. When the steam is ready for use
the ‘steam ready’ light fl will turn green.
2 Make sure that the locking mechanism
Á on the handle has been released. If
you push the lock Á towards the rear,
the steam switch cannot be operated.
Push the lock forward so that the steam
switch is released. G
3 To make steam ready, press the ‘steam
on/off’ button ‹ and the orange light ·
will come on. Steam is now ready to be
released.
4 To release steam, press the handle
control switch Ê. At the start, always
point the steam handle at a cloth until a
steady flow of steam comes out.
• During steam release the green heater
light will turn off.
5 To stop releasing steam, simply release
the handle control switch Ê.
Certain models only
• If your cleaner features a vari-steam
knob Í the steam flow can be adjusted
to specific requirements.
6 Turn the vari-steam knob fully anti-
clockwise for maximum steam and
clockwise for minimum steam flow H.
• If the ‘refill’ indicator light ‡ turns red,
the boiler must be refilled.
E
F
G
H
Â
Ê
Á
Í
70515+70516 Rev 1 19/5/04 3:59 PM Page 5


