4
Assembly
WARNING: Do not plug in
the cleaner until it is
assembled.
1 Carefully unpack all
components.
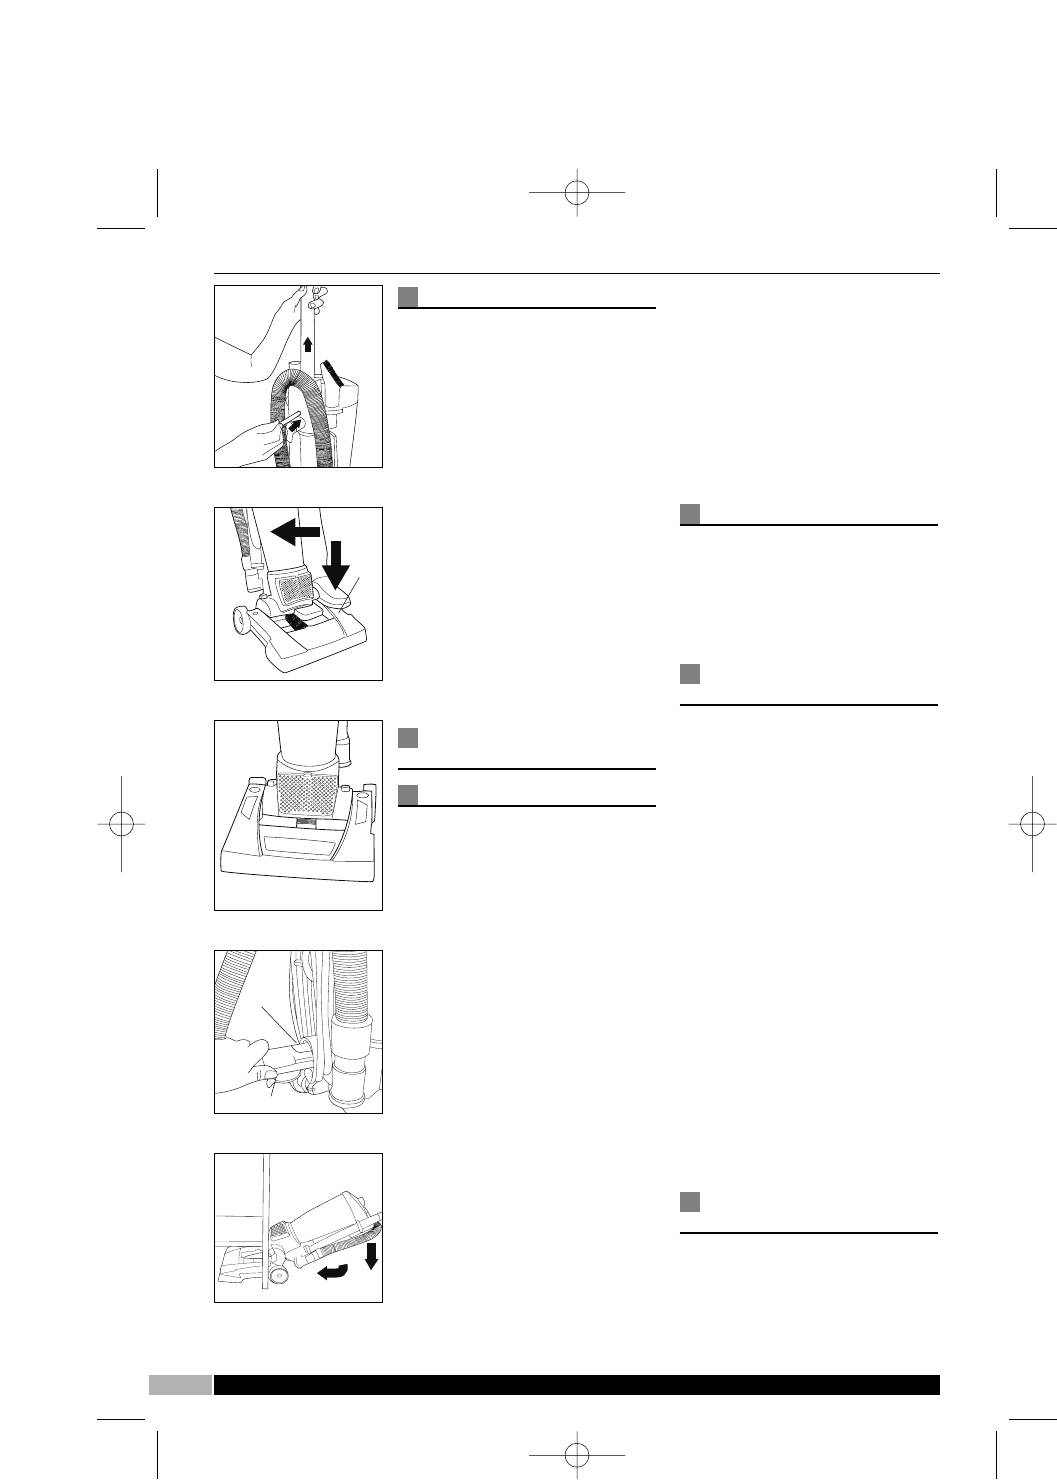
2 Lift cleaner body to upright
position.
3 Insert the handle into the hole
on the top of the product. Push
down until it clicks.
NOTE: The handle may be
removed by lifting while
simultaneously pushing the
release button with a suitable
tool eg. a small screwdriver A.
The release button is located in
a hole at the rear of the product
just above the cable cleat.
Rotate the cable cleat
downwards for easier access.
OPERATING THE
APPLIANCE
Using on carpets
1 Place cleaner in its upright
position.
2 Release the mains cable by
turning the quick release cleat
Á half a turn and extend the
cable fully.
3 Plug the mains cable into the
mains socket.
4 Clip the cable into the cable clip
holder Ò at the rear of the
handle.
5 Place your foot on the foot pad
· on the floorhead whilst
pulling the handle towards you
to release the handle into the
cleaning position B.
6 Press the power on/off switch
¤ C on the floorhead for the
main power. Then press the
brush-bar on/off switch ‹ to
activate the brush-bar motor for
carpet cleaning.
IMPORTANT: To prevent
damage to carpets, never
leave the cleaner switched
on in one place for an
extended period.
IMPORTANT: The rotating
brush bar will automatically
stop when the cleaner is
put into the upright
position.
Using on hard floors
Follow steps 1-5 from the
instructions for ‘Using on
carpets.’
Press the brush bar on/off pedal
‹ to turn the brush bar off.
Using the hose and
attachments
1 Take the flexible hose Ê out of
the storage holder.
2 Pull down the hose connector
inlet flap È and insert the hose
connector with its ‘mouth’
pointing upwards D. Push the
hose connector fully in such that
the flap latches on to the
connector.
3 Add the required accessory
directly to the tube connector Í
or fit the extension tubes for
maximum reach.
4 When removing the connector,
gently lower the flap slightly to
release the catch then withdraw
the connector.
IMPORTANT: With the hose
connector fitted all of the
suction is directed to the
hose. Remove the
connector before returning
to general cleaning with the
floor nozzle ‰.
Under furniture
cleaning
E
The unique pivot point on this
product allows the whole head
to fit under low furniture for
better cleaning performance.
B
A
D
È
Ë
C
E
‹
¤
·
‰
UUKK HHeellpplliinnee 00884444 887711 00994499 RReeppllaacceemmeenntt PPaarrttss 00884444 887733 00771155 IIrreellaanndd HHeellpplliinnee 11880000 440099 111199
73380 rev4 15/2/08 09:23 Page 4


