77
wwwwww..mmoorrpphhyyrriicchhaarrddss..ccoomm
7
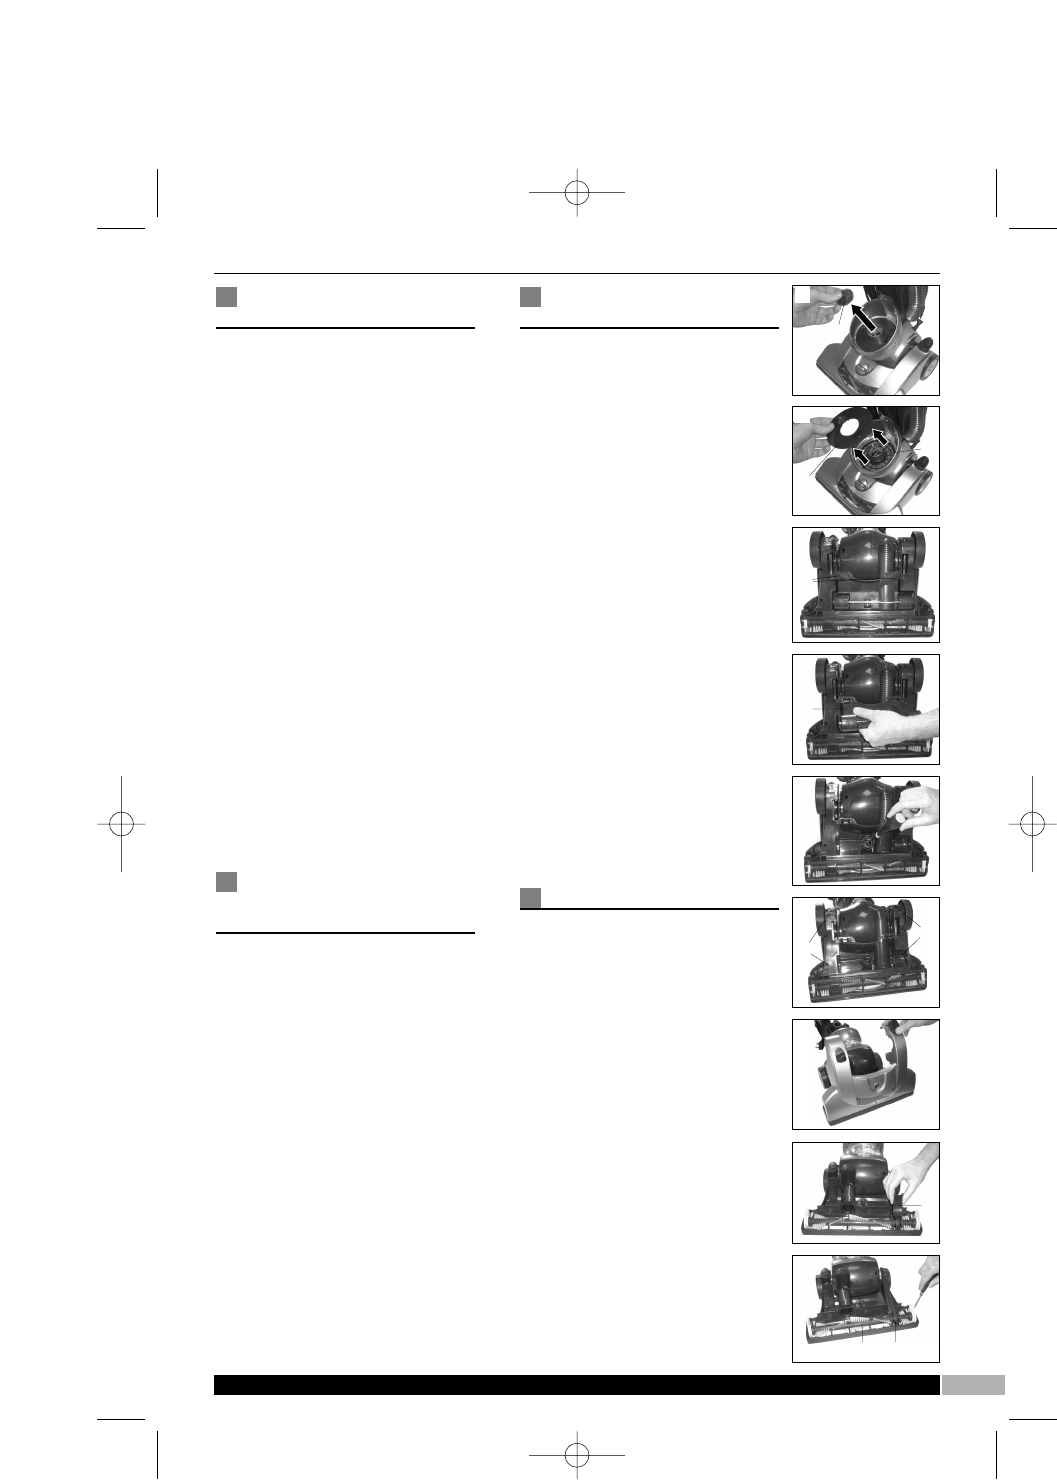
Accessing the floor
nozzle
1 Disconnect the cleaner from the
mains supply.
2 Press the handle release pedal
and place the cleaner face down
on a soft surface, eg. carpet.
3 Remove the four screws holding
the two undercarriage plates
ˆ
in position. Remove the plates P.
4 Lift up the undercarriage
˜
and
unclip from it’s location
Q
.
5 Underneath the undercarriage is
the height adjustment cam. In the
centre of the cam is a screw,
remove this screw
R
.
6 Next, remove the four remaining
floor nozzle screws
¯
, two
located by the rear wheels and
two halfway along the floor nozzle
S
.
7 Turn the product over and pull off
the height adjustment knob.
8 Lift the rear of the floor nozzle
cover and unclip from the front.
Put safely to one side
T
.
Removing and
re-fitting the rotating
brush bar & belt
1 Lift out the belt cover
˘ U
.
2 Gently lever out the right hand
side of the brush-bar, followed by
the left hand side
V
.
3 To re-fit, thread the brush-bar
through the belt. Place the left
hand side of the brush-bar into
location, then place the belt
around the motor shaft. Pull the
brush-bar forwards (stretching the
belt) and locate the right hand
side of the brush-bar.
4 IMPORTANT: Make sure both
ends of the brush-bar are fully
and correctly located, and the
belt is not trapped. The
brush-bar should be able to be
rotated by hand.
5 Re-fit the belt cover carefully,
noting it’s location.
Refitting the floor
nozzle cover
1 Hook the front of the cover into
the floor nozzle, then lower the
rear of the cover. Note: it may be
necessary to lift the upright
portion of the product to allow
the cover to fully close.
2 Refit the four main screws.
3 Turn the product over and check
that the front of the cover is fully
closed.
4 Insert the height adjustment
knob, carefully turning it until it
locates into the mating keyway
on the cam.
5 Turn the product back over and
locate the screw into the centre
of the cam and tighten.
6 Clip the undercarriage into
location and close into position.
7 Re-fit the two undercarriage
plates and tighten the four
screws.
Return the cleaner to the upright
position. Connect to the mains
supply and switch on to test.
HELPLINE
If you have any difficulty with your
appliance, do not hesitate to call
us.
We are more likely to be able to
help than the store from where
you bought it.
Please have the following
information ready to enable our
staff to deal with your query
quickly.
• Name of the product
• Model number as shown on the
rear of the appliance.
• Serial number as shown on the
rating label.
UK Helpline 0844 871 0949
Replacement Parts 0844 873 0715
Ireland Helpline 1800 409 119
N
O
Ò
Ú
Û
ı
ˆ
˜
¯
¯
˘
Ù
P
Q
R
T
U
V
S
73281 rev1 13/3/08 16:22 Page 7


