


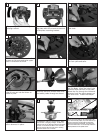
Tighen set screws and lock nuts to
secure downrod in place.
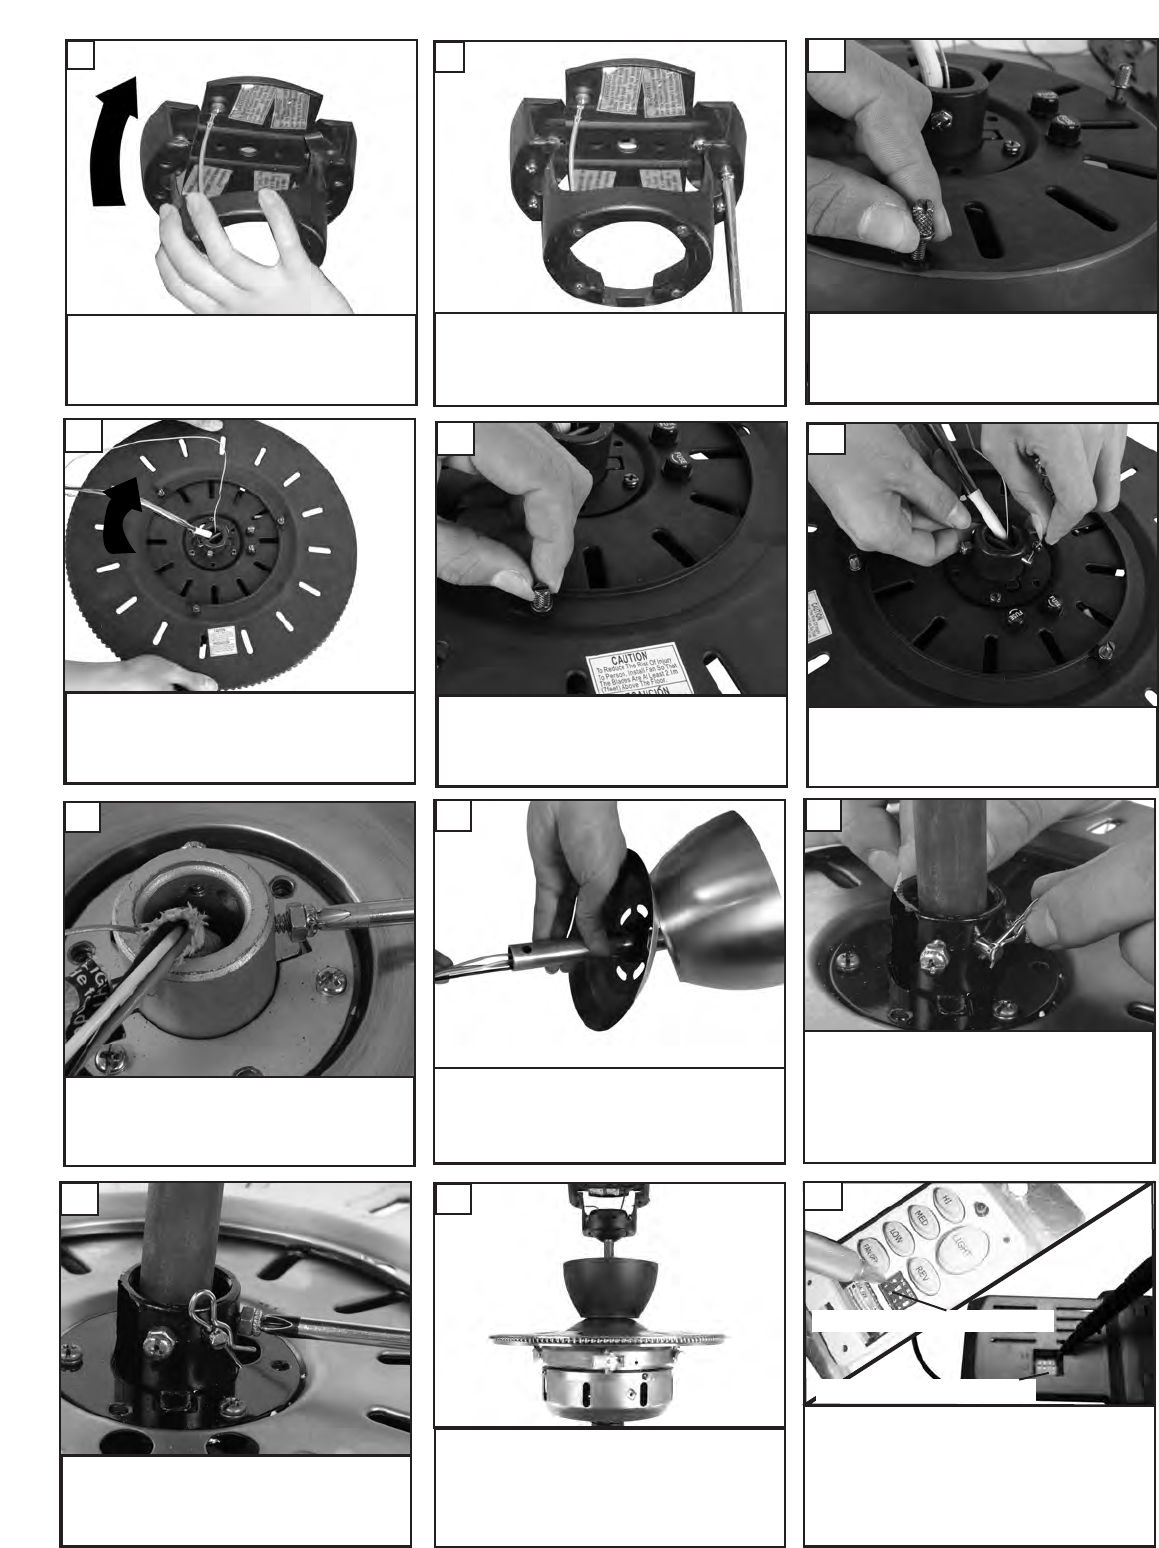
Loosen 2 set screws with lock nuts in
y
oke till y
ou can not feel them on
inside of y
oke.
Install canopy and yoke cover over
downrod and then thread lead wires
and safety cable through as shown.
Remove keeper from pin and then
pin from yoke and save.
12
13
14
16
L
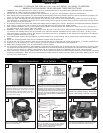
ift mounting neck to mounting Plate
and align screws.
7
Secure mounting neck to the mount-
ing plate with four screws to become
a complete mounting bracket.
8
Insert downrod into yoke on top of
the Fan Body. Align the hole in the
Downrod with the hole in the Yoke.
Insert the Pin through the Yoke and
Downrod until the point appears on
the other side. Install the Keeper
Pin
15
L
oosen 3 thumb screws with key
hole slots.
9
Place the key hole slots over the 3
screws on fan body and twist upper
cover in direction of arrow.
10
Tighten all 3 thumb screws securely.
11
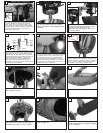
Set dip switches on the R
emote T
r
ansmitter and R
emote
R
eceiv
er to the same settings. This must be done so the
units will communcate properly. If you have other fans you
can set to control from one tr
ansmitter by setting both
receiv
ers the same as the tr
ansmitter
. If you have more
than one fan with remote. You can set the dip switches to
different positiosns to have seperate control.
Remote Transmitter Dip swtiches
Remote Receiver Dip switches
18
Hang assembled fan from the mounting br
ack
-
et installed to ceiling in previous step. Make
sure the fan is hanging straight. Rotate fan
until the tab on the Mounting br
ack
et engages
the slot on the Downrod Ball. This must be
done to prev
ent the fan body from rotating
when the blades are in motion.
17