


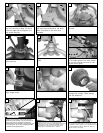
Lift Canopy to ceiling aligning the key hole slots
with the screws on the bottom of the Mounting
bracket. Rotate the canopy Counter Clockwise
to lock in place. Tighten the screws to secure
the Canopy. See inset for Keyhole shape
34
Attach blade brackets to blades using
the blade bracket screws and wash-
ers provided.
35
Install all 5 fan blade assemblies to
the motor as shown above. Tighten
screws securely.
36
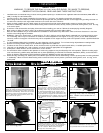
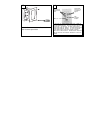
F
or Canadian installation in both flush and
downrod mode the safety cable must be
i
nstalled into the house structure beams using
the 3” lag screws provided. Make sure that
when the safety cable is fully extended the
l
eadwires are longer than the cable and no
stress is placed on the leadwires.
31
C
anadian mounting only
S
afety Cable
Lag Screw
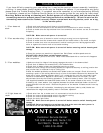
M
ake wire connections to power source using
wire nuts provided. Make sure that no filiments
a
re outside of the wirenut. After making the
w
ire connections, the wires should be spread
apart with the grounded conductor and the
e
quipment-grounding conductor on one side of
the outlet box and ungrounded conductor on
the other side of the outlet box.
33
white
b
lack
M
ake wiring connections as indicated above.
White from fan to white from remote marked
N. Orange from fan to Orange from remote
m
arked Light/up. Blue from fan to blue from
remote marked down light. Black from fan to
Black from remote marked L. White from
h
ouse to white from remote marked AC N .
Black from house to Black from remote
marked AC L. Connect all green ground wires
t
o Ground wire from House.
o
range
b
lue
G
reen
w
hite
b
lack
House
Fan
32
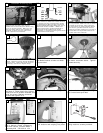
Loosen 2 screws and remove one
and save it. Place plate’s key slotted
holes over the 2 screws loosened and
twist into place. Replace removed
screws and tighten all 3.
37
Attach switch housing to fan using
the three screws provided.
39
Plug 9 pin wire connections together.
38
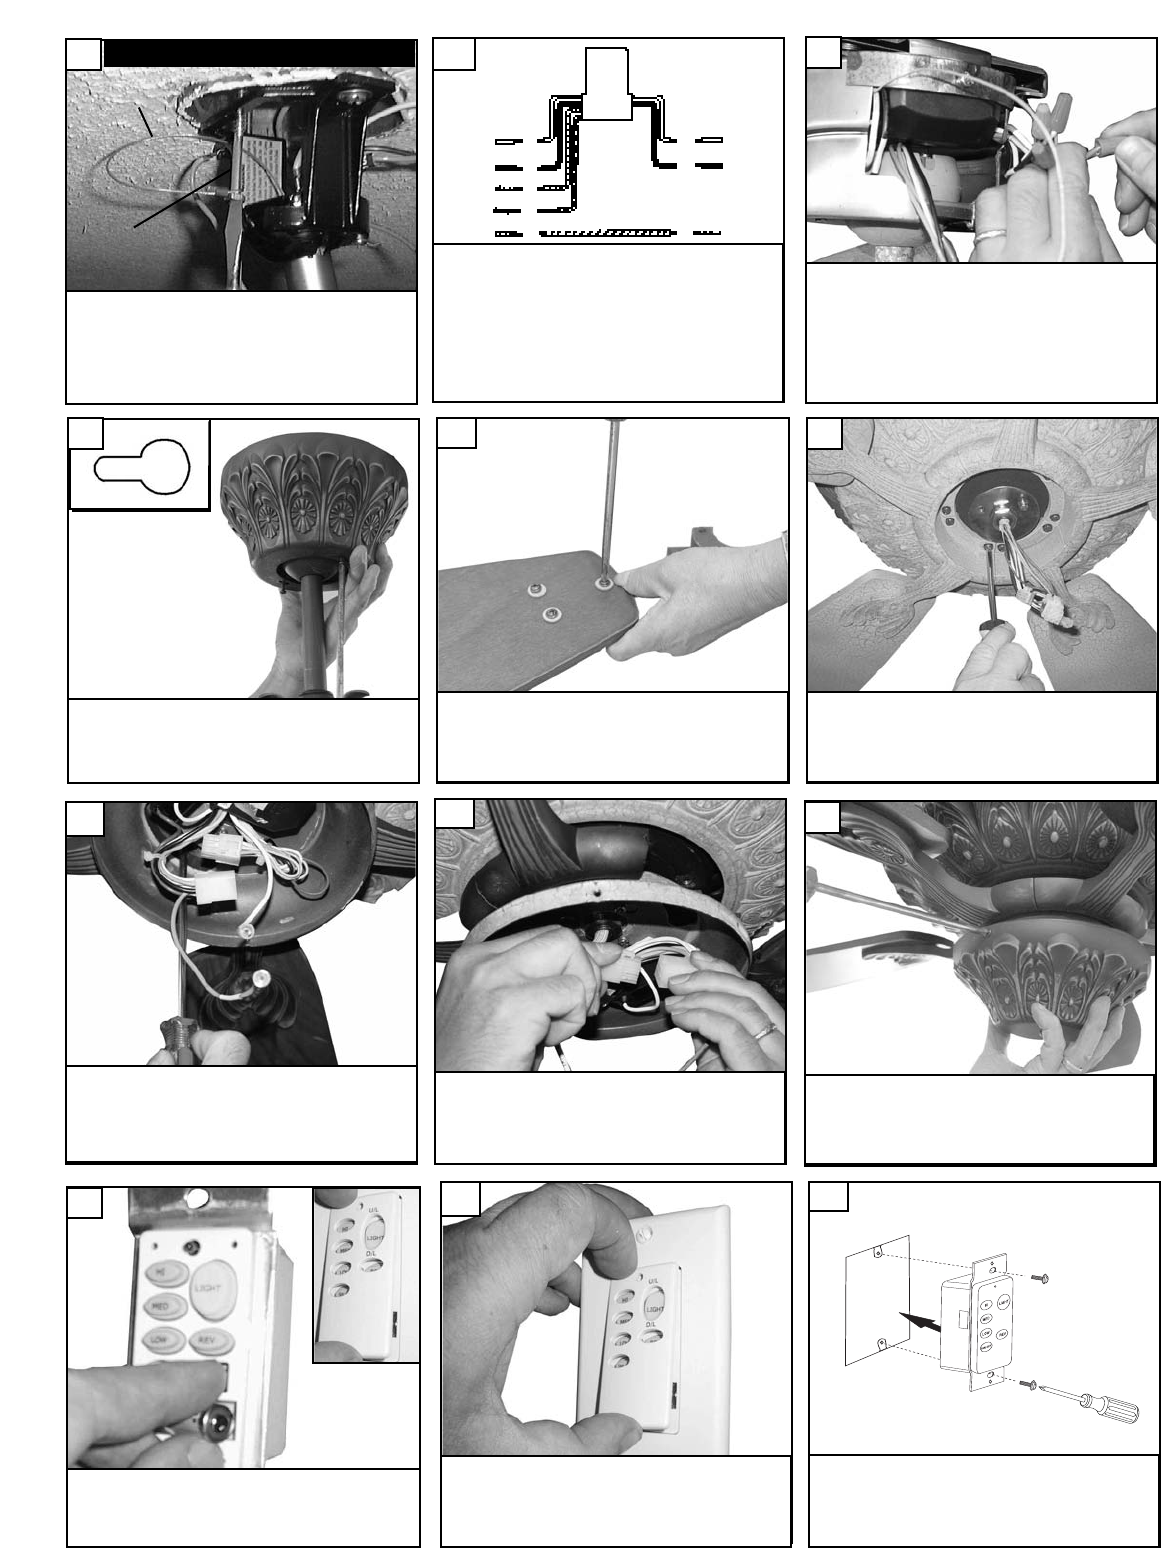
Remove cover by snaping off from
top or bottom. Install 12V battery
into wall remote. Duracell MN21 /
Ev
eready A23 / GP 23A all 12V
.
40
Install w
all control unit to outlet box
using machine screws pro
vided.
42
Attach cover of remote by placing
over buttons and snaping into place.
41