


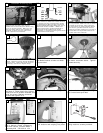
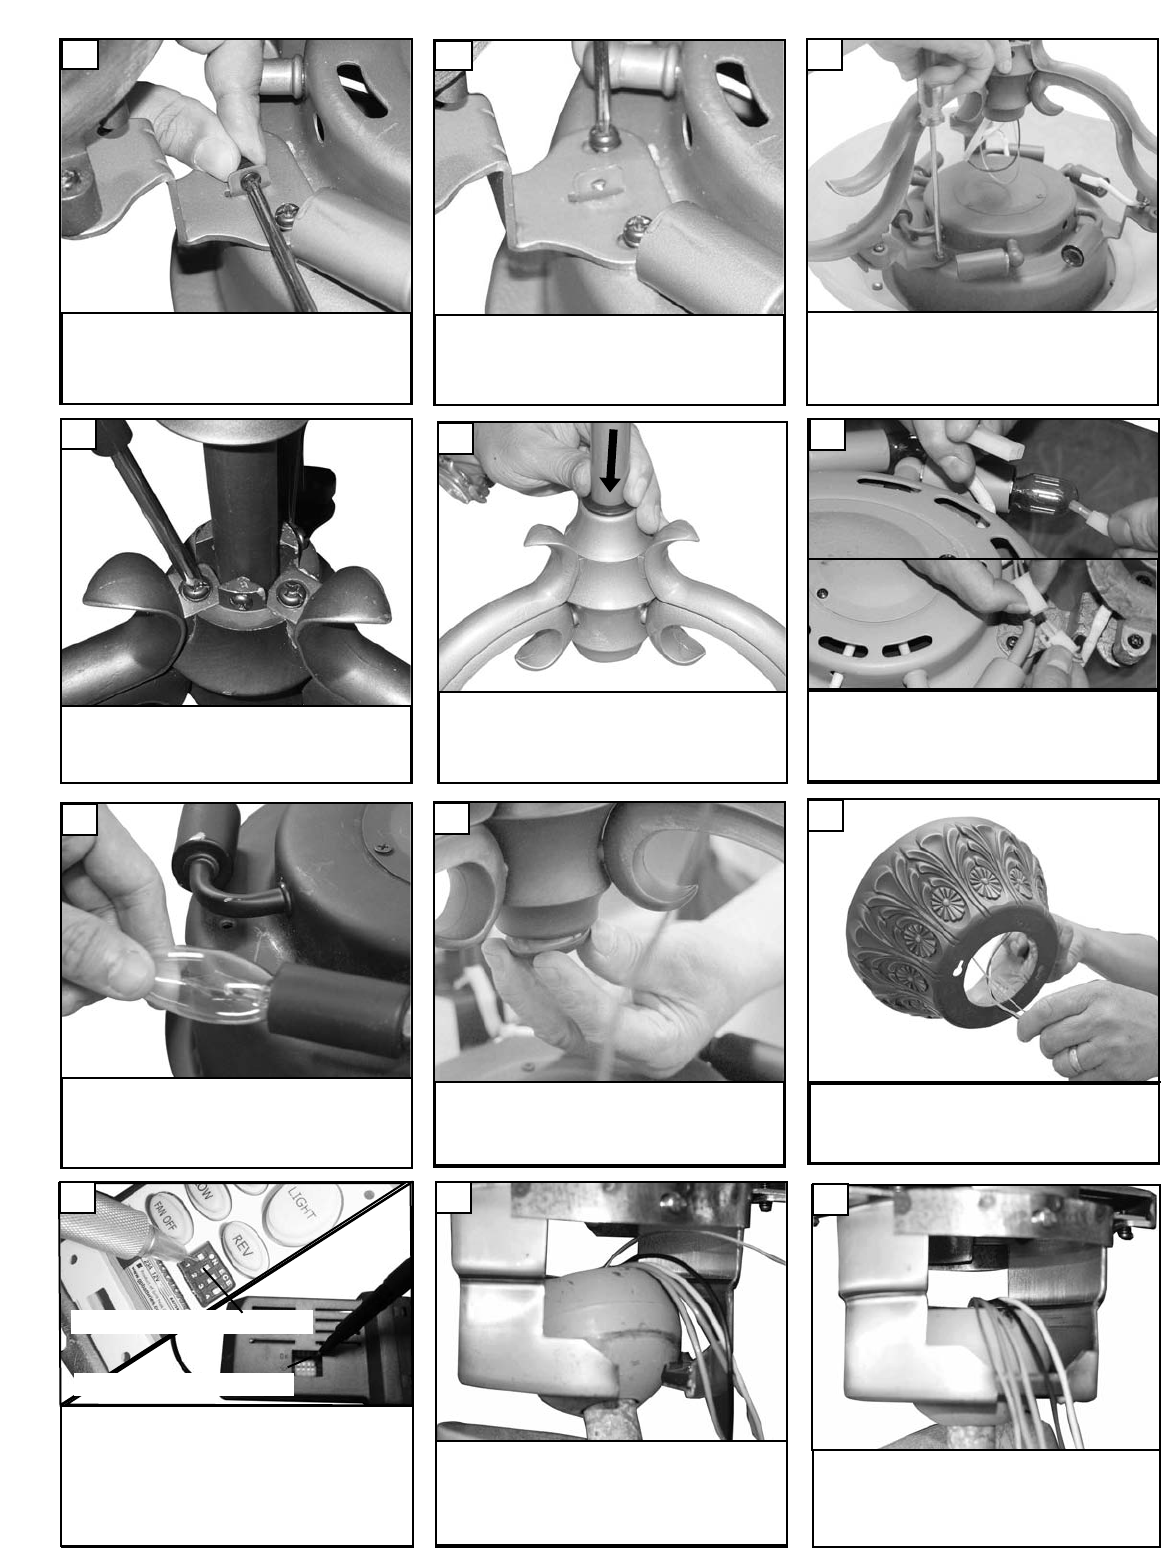
Install decorative cap.
26
Hang assembled fan from the mounting brack-
et. Mak
e sure the fan is hanging straight.
Rotate fan until the tab on the Mounting bracket
engages the slot on the Downrod Ball. This
must be done to prevent the fan body from
rotating when the blades are in motion.
29
R
otate slide on mounting br
ack
et till it stops so
the screw holes will align for 2 canopy screws
in hardw
are pack. Tighten the 2 screws secure
-
ly. These will lock slide in place till ready to
mount canopy. (step 34)
30
Tighen the 3 screws holding the arch
arms securely.
22
Set dip switches on the R
emote T
r
ansmitter and R
emote
R
eceiv
er to the same settings. This must be done so the
units will communcate properly. If you have other fans you
can set to control from one tr
ansmitter by setting both
receiv
ers the same as the tr
ansmitter
. If you have more than
one fan with remote. You can set the dip switches to differ-
ent positiosns to have seperate control.
Remote Transmitter Dip swtiches
Remote Receiver Dip switches
28
Thread leadwires and safety cable
through the canop
y
. Place canop
y
over the downrod.
27
Push the yoke cover down into
place.
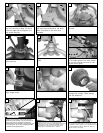
23
Install arch mount by using screw
and nut removed in step 16. Place
s
crew through tab and tighten nut
and screw securely.
19
A
lign holes in arch arm and slot for
tab with holes and tab on fan body.
S
tart all screws in the arch arm
brackets.
20
Plug in electrical connections there
are 2 double plugs from arch assem-
bly one for the fan and one for the
up and down lights.
Install 6 x 15 watt candelabr
a tor-
pedo shape bulbs.
25
24
Tighen all 6 screws for arch arms
securely.
21