


70D0004 13
Heater in
Fireplace or
Firebox
8" or More of
Heat Resista
n
Material
Hood
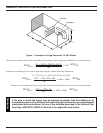
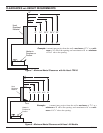
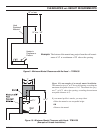
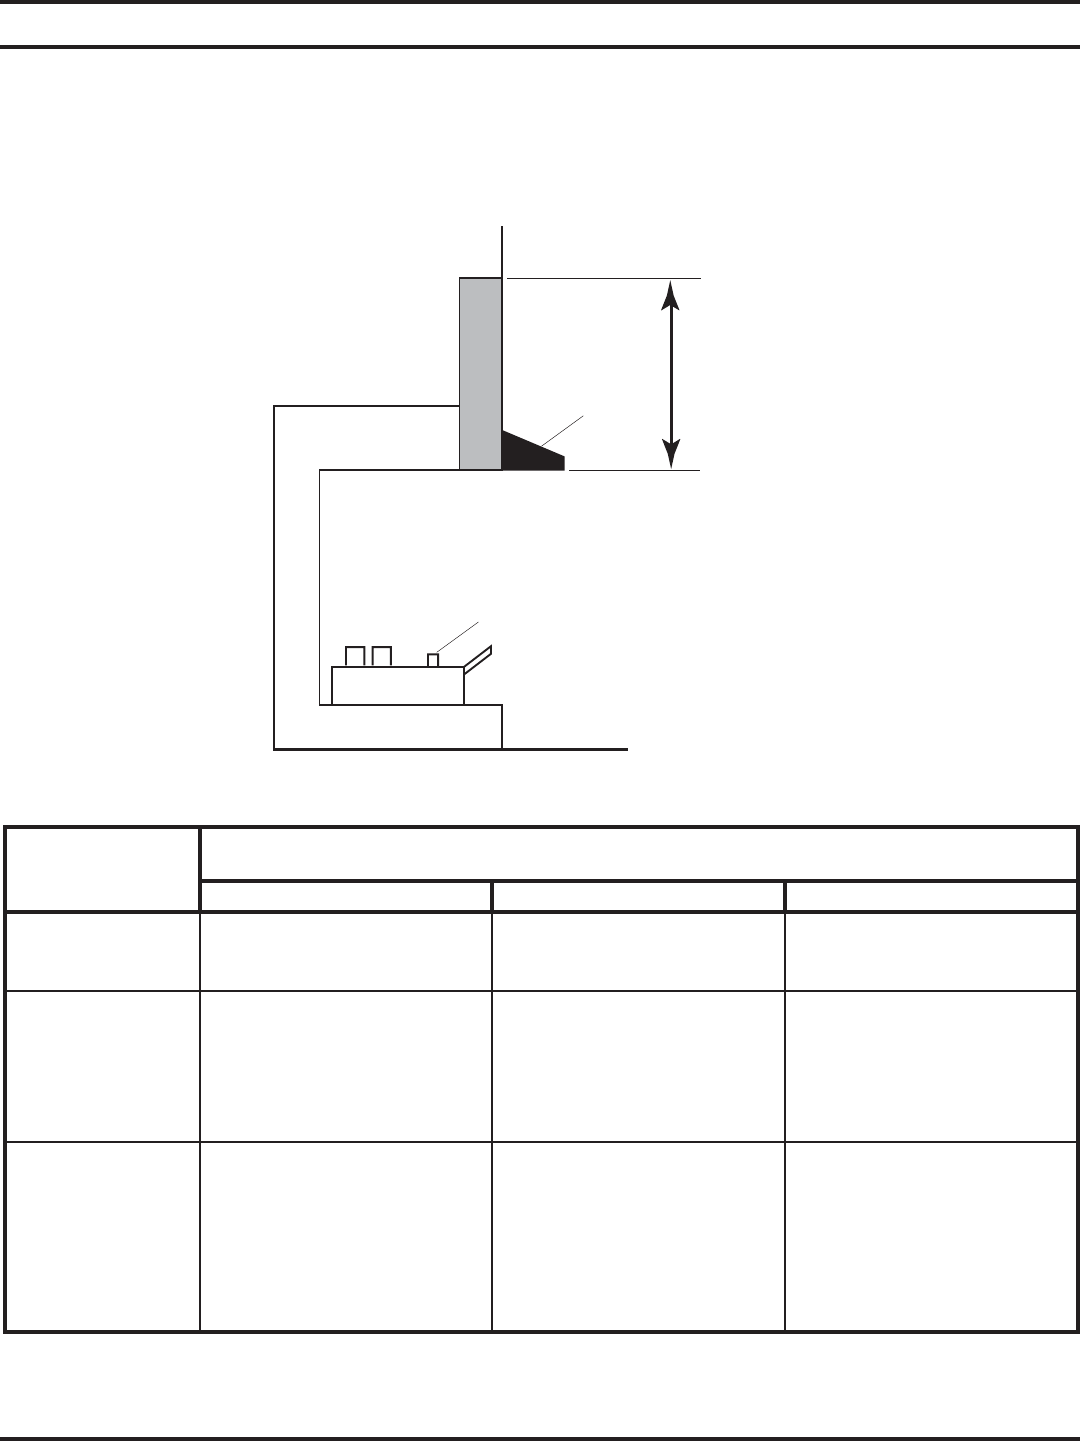
CLEARANCES and HEIGHT REQUIREMENTS
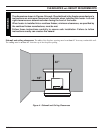
Figure 6 - Measuring Heat Resistant Material for Mantel
Heat resistant material (minimum requirements) with wooden mantel or other combustible projection:
To install the heater with a wooden mantel, shelf or other combustible projection above, first measure the heat resistant mate-
rial shown in Figure 6, then refer to Table B.
TABLE B - Heat Resistant Material Heights and Mantel Location
HEAT RESISTANT
MATERIAL
MEASUREMENT
REQUIREMENTS FOR SAFE INSTALLATION WITH WOODEN MANTEL, SHELF
OR OTHER COMBUSTIBLE PROJECTIO
TBP18 TBP24 TBP30
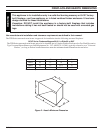
12" or more Hood not required. Observe
profi les (side elevations)
shown in Figure 7, page 14.
Hood not required. Observe
profi le (side elevations) shown
in Figure 9, page 15
Hood not required. Observe
profi le (side elevations) shown
in Figure 9, page 15
8" to less than 12" Install hood and observe pro-
fi les shown in Figure 8, page
15; OR extend heat resistant
material to at least 12" and
observe profi les shown in
Figure 7, page 14.
Install hood and observe pro-
fi les shown in Figure 7, page
15; OR extend heat resistant
material to at least 12" and
observe profi les shown in
Figure 9, page 15.
Install hood and observe pro-
fi les shown in Figure 7, page
15; OR extend heat resistant
material to at least 12" and
observe profi les shown in
Figure 9, page 15.
Less than 8" Extend heat resistant mate-
rial to at least 8", install hood
and observe profi les shown in
Figure 8, page 15; OR extend
heat resistant material to at
least 12" and observe profi les
shown in Figure 8, page 14
Extend heat resistant mate-
rial to at least 8", install hood
and observe profi les shown in
Figure 7, page 15; OR extend
heat resistant material to at
least 12" and observe profi les
shown in Figure 9, page 15.
Extend heat resistant mate-
rial to at least 8", install hood
and observe profi les shown in
Figure 7, page 15; OR extend
heat resistant material to at
least 12" and observe profi les
shown in Figure 9, page 15.