MT659C
Stop Operation
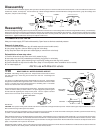
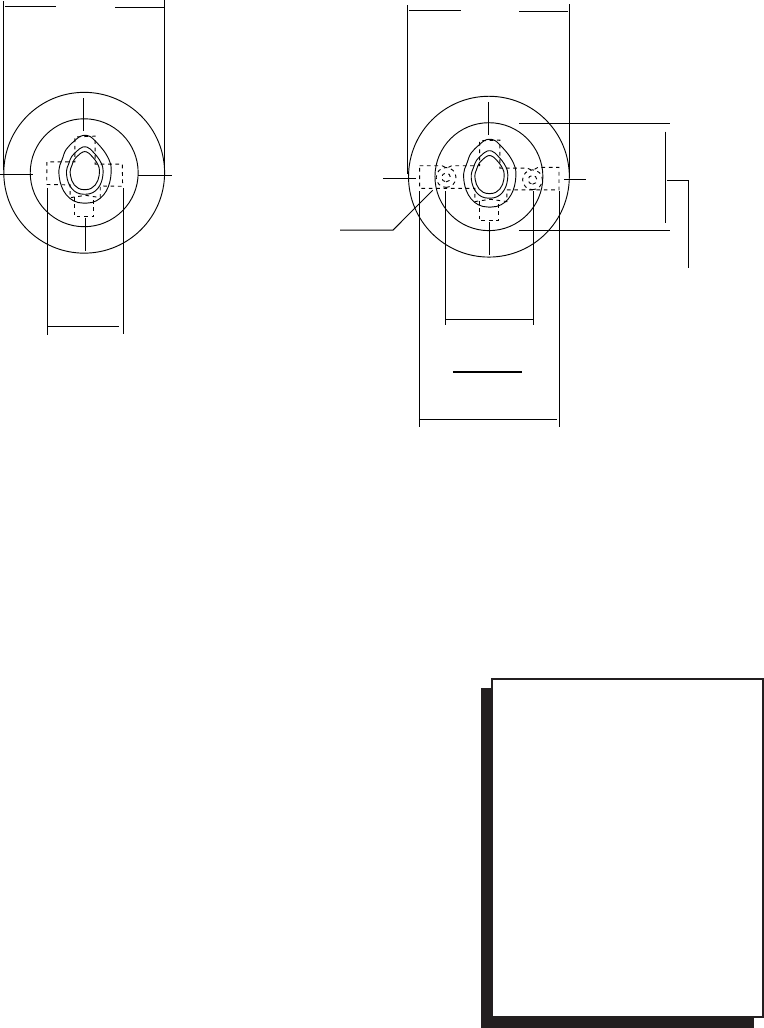
CC - This type is integral with casting, actuated by screwdriver, and require a 90° turn to open or close. When the screwdriver slot is vertical, the rubber
stop is closed, and when the slot is horizontal, the rubber stop is open.
IPS - This type has been added to the basic shower casting and is actuated by screwdriver. The stop is opened by rotating in a counterclockwise
direction until it stops and closed by rotating in a clockwise direction until it bottoms.
To Rough-in Body Casting
MAKE SURE ALL WATER SUPPLIES ARE OFF.
Note the "UP" arrow on the casting. Install with the arrow UP. If the valve is to be
used for a Shower only, plug the bottom outlet with a pipe plug. If the valve is to be
used as a Tub Filler only, put the pipe plug in the top outlet. If the valve is to be used
for both a Shower and a Tub, connect the top outlet to the shower, using either 1/2
inch iron pipe size, or 1/2 inch copper water tube. Connect the bottom outlet to the
tub spout using 1/2 inch iron pipe size. 1/2 inch copper water tube can be used with
the Moen Slip Fit Spout.
WARNING: Secure all pipes and the shower and tub drop ells. Use Teflon tape on
all threads. Use a plain ell on the tub drop. A twin ell is not needed. Check system
for leaks before closing wall.
(Built in diverter models will use a tub filler spout while all other models will use
diverter tub spouts.)
CAUTION
These valves are equipped with
Moen's long life 1225 cartridge,
designed for smooth, trouble free
operation. When soldering, do not
heat valve any higher than neces-
sary to flow the solder. Overheating
may damage the cartridge or rub-
ber stop valves. Following this di-
rection will allow you to solder with-
out removing the cartridge or rub-
ber stop valves.
WARNING: The cartridge and rub-
ber stop valves MUST be removed
before either brazing or resistance
(electric) soldering.
Flushing
IMPORTANT: Before closing all wall openings, pressure test valve and complete system for
leaks using flushing instructions
IMPORTANT:
Pipe chips, sand, stones, and other solids found in new or renovated plumbing can damage the sealing surface of the faucet cartridge and cause a leak.
To avoid damage, DO NOT OPERATE VALVE until you have followed these instructions:
1. After installing and connecting your new faucet, install shower arm but not showerhead before flushing.
2. Turn the valve on in the full cold position (handle pointing to the right) and turn on the cold supply for 15 seconds. Without closing
the valve, turn to the full hot position (handle pointing to the left) and turn on the hot supply for 15 seconds.
3. Turn the valve to the mixed position, divert water to the shower and run for an additional 15 seconds.
4. Turn off the water and check for leaks.
5. Install showerhead.
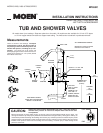
7" DIA
(178mm)
SHOWER
TUB
2" CC
(51mm)
2-3/16" IPS
(56mm)
SUPPLY
SUPPLY
➤
➤
➤
➤
➤
➤
➤
➤
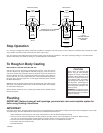
7" DIA
(178mm)
SHOWER
TUB
2-1/8" CC
(54mm)
3-3/4" IPS
(95mm)
4-5/8" FOR C.C.
(117mm)
6" FOR I.P.S.
(152mm)
SUPPLY
SUPPLY
➤
➤
➤
➤
➤
➤
➤
➤
➤
➤
➤
➤
➤
5-1/2"
(140mm)
PLASTER GROUND
SIZE AND WALL
OPENING
WITHOUT STOPS WITH STOPS
RUBBER STOP VALVE
(WITH SCREWDRIVER SLOT)
➤


