


–26–
CAUTION
• Do not wash the air inlet panel with water.
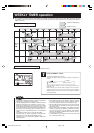
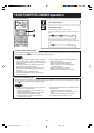
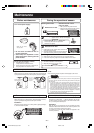
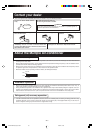
Turn off the power supply.
Remove the air filter
Maintenance
Cleaning the air filter
Do not use the following articles:
• Hot water (40°C or more)
It may deform or discolour the unit.
• Petrol, paint thinner, benzine or cleanser, etc.
They may deform or scratch the unit.
• Do not spill any liquid.
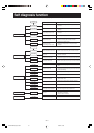
• Do not touch the aluminum fins on
the heat exchanger.
• Stand firmly on a stepladder or other
stable object when removing the inlet
panel and filter.
Cleaning
CAUTION
• Do not clean the filters with boiling water.
• Do not dry them over an open flame.
• Pull them out gently.
Cleaning the unit
• Wipe the unit with a soft, dry cloth, or use a vacuum cleaner.
• If the unit is very dirty, wipe it with a cloth soaked in warm water.
1
2
3
Before maintenance
Reinstall the air filter
• Hold firmly the filter at both sides as shown at
right and insert securely.
• Operating without putting back the air filters will
make the unit dusty, and may cause damage.
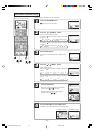
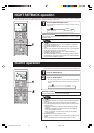
Cleaning the air inlet panel
• Removal, installation of air inlet panel.
• Wipe the panel with a soft, dry cloth.
Wipe the unit with a
soft, dry cloth.
During the operational season
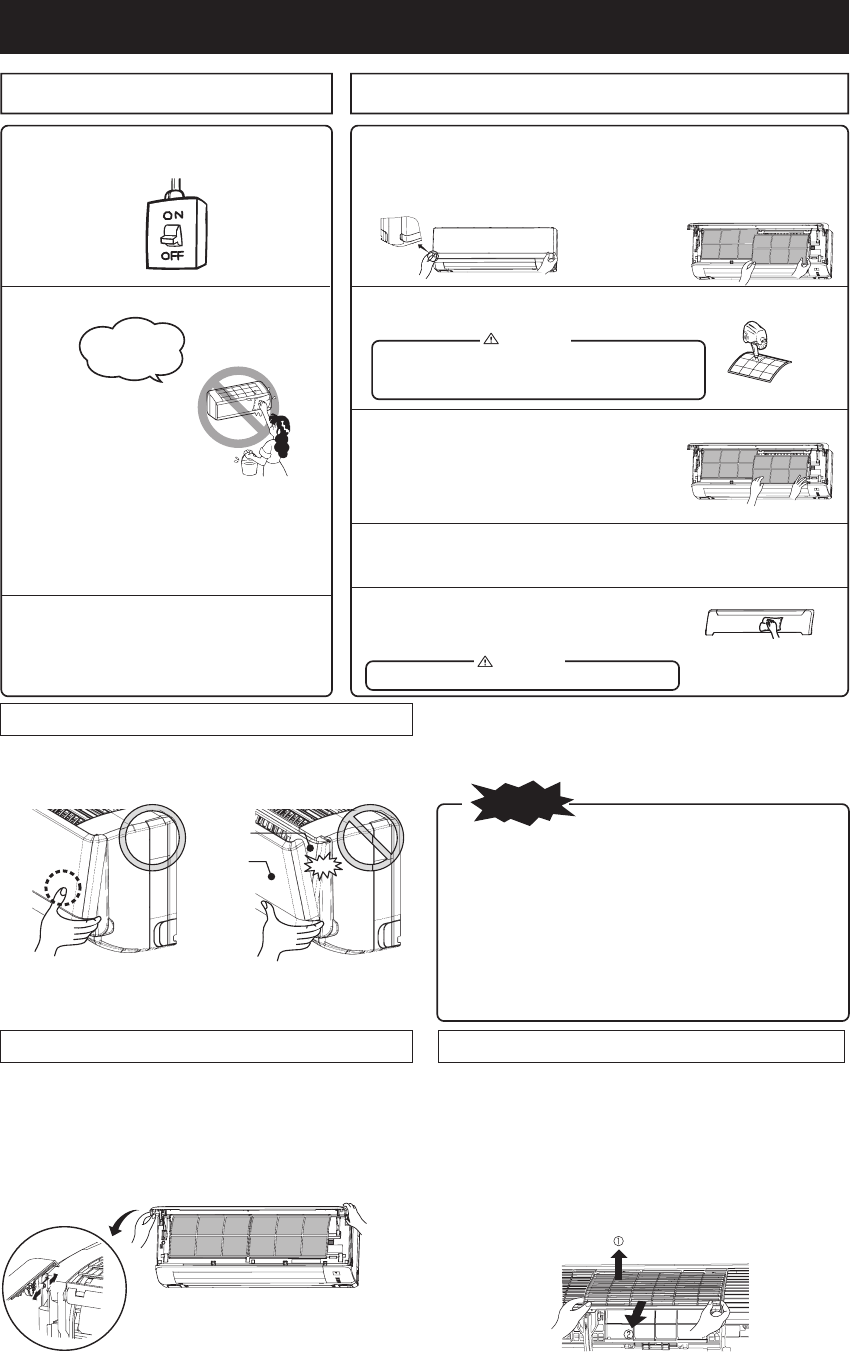
• Pull up the air inlet panel forward.
•
Lightly hold the knobs both sides and lift
a little to remove the panel forward.
If the filter is very dirty, clean it with warm water
(approx. 30°C), and dry it thoroughly.
There's a dan-
ger of electric
shock.
Standard interval is once
every two week
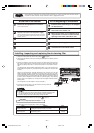
Open
Place fingers at the recesses on both sides of the panel and pull
up the panel forward so that it will be open by about 60 degrees.
How to open, close the air inlet panel
Close
Push both ends evenly and press further lightly at the center.
Removal
When removing the air inlet panel for internal cleaning or others,
open the panel by 80 degrees and then pull it forward.
Installation
Secure the upper edge of the air inlet panel by lightly pushing it
in, and then close the panel.
Removal, installation of air inlet panel
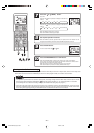
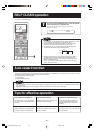
NOTE
The air inlet panel consists of two parts, the outer air inlet panel (which
can always be seen) and the inner air inlet panel (which is usually hid-
den from view).
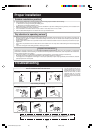
•
To open and close the air inlet panel, please place your fingers in the
grooves near the bottom on both sides of it and pull. At the same time,
please also support the face of the outer air inlet panel with your thumbs.
This will prevent the outer air inlet panel from suddenly opening, which
can occur without support from the thumbs, as seen in the picture on the
right. Proper finger placement can be seen in the picture on the left.
• The outer air inlet panel will automatically shut about 5 seconds after
you shut the inner air inlet panel (if the unit is plugged in). Please do
not shut forcibly. Doing so will likely damage the unit.
• Please do not wash the air inlet panel.
Please support
with the thumbs
The inner air
inlet panel
The outer air
inlet panel
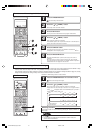
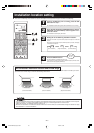
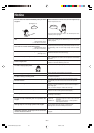
Removal
Remove the air inlet panel. 1 Hold the handle of the air inlet
top panel and lift up until you hear a click and the tabs come
out. 2 Pull the panel towards you.
Installation
Align the air inlet top panel with the rail and slide the panel
towards the back until in strikes the end. Push the panel in until
you hear a click and the tabs lock into place.
(To install the air inlet top panel. Follow the opposite of the
removal procedure.)
Removal, installation of air inlet top panel
RKY012A012B_EN_001-032 4/18/14, 16:5026