


–14–
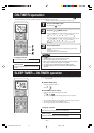
Airflow direction adjustment
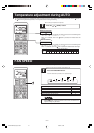
Adjusting airflow direction
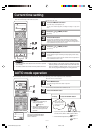
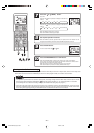
■ Up/down direction can be adjusted with the AIRFLOW U/D(UP/DOWN) button on the remote control. Every time you press this
button the mode changes as follows:
Change on AIRFLOW (UP/DOWN) mode.
■ Left/right direction can be adjusted with the AIRFLOW L/R (LEFT/RIGHT) button on the remote control. Every time you press this
button the mode changes as follows:
Change on AIRFLOW (LEFT/RIGHT) mode.
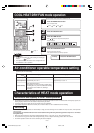
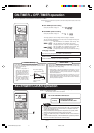
MEMORY FLAP (FLAP OR LOUVER STOPPED)
When you press the AIRFLOW (U/D or L/R) button once while the flap or louver is operating, it stops swinging at the position. Since this angle is
memorized in the microcomputer, the flap or louver will automatically be set at this angle when the next operation is started.
WARNING
• Do not expose directly to airflow from the air-conditioner for a long time.
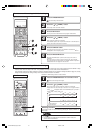
CAUTION
• When in COOL or DRY operation, do not operate for a long period with the
airflow blowing straight down. Otherwise, condensation may appear on
the outlet grill and drip down.
• Do not try to adjust the flaps and louvers by hand, as the control angle may
change or the flap or louver may not be closed completely.
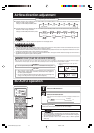
HEAT
(Horizontal
blowing)
(Slant forward
blowing)
COOL, DRY
• Recommended angle of the flap when
stopping
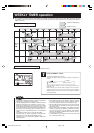
• When operation starts, the flap and louver direction is fixed at the horizontal / center position in order to avoid cold draft, and return
to the set the position that was set after the warm air supply is starting.
• The flap and louver direction will be controlled to the horizontal/center position when the room temperature reaches the set tem-
perature and compressor stops or when defrosting is in operation.
• The airflow direction cannot be set during the period mentioned above. Change the airflow direction settings after the warm air is
supplied and the flap/louver goes to the set position.
(Swing)
(Flap stopped)
(Louver stopped)
(Swing)
NOTE FOR HEATING OPERATION
• The actual position of the flap and louver may differ from the display shown.
NOTE
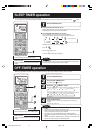
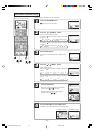
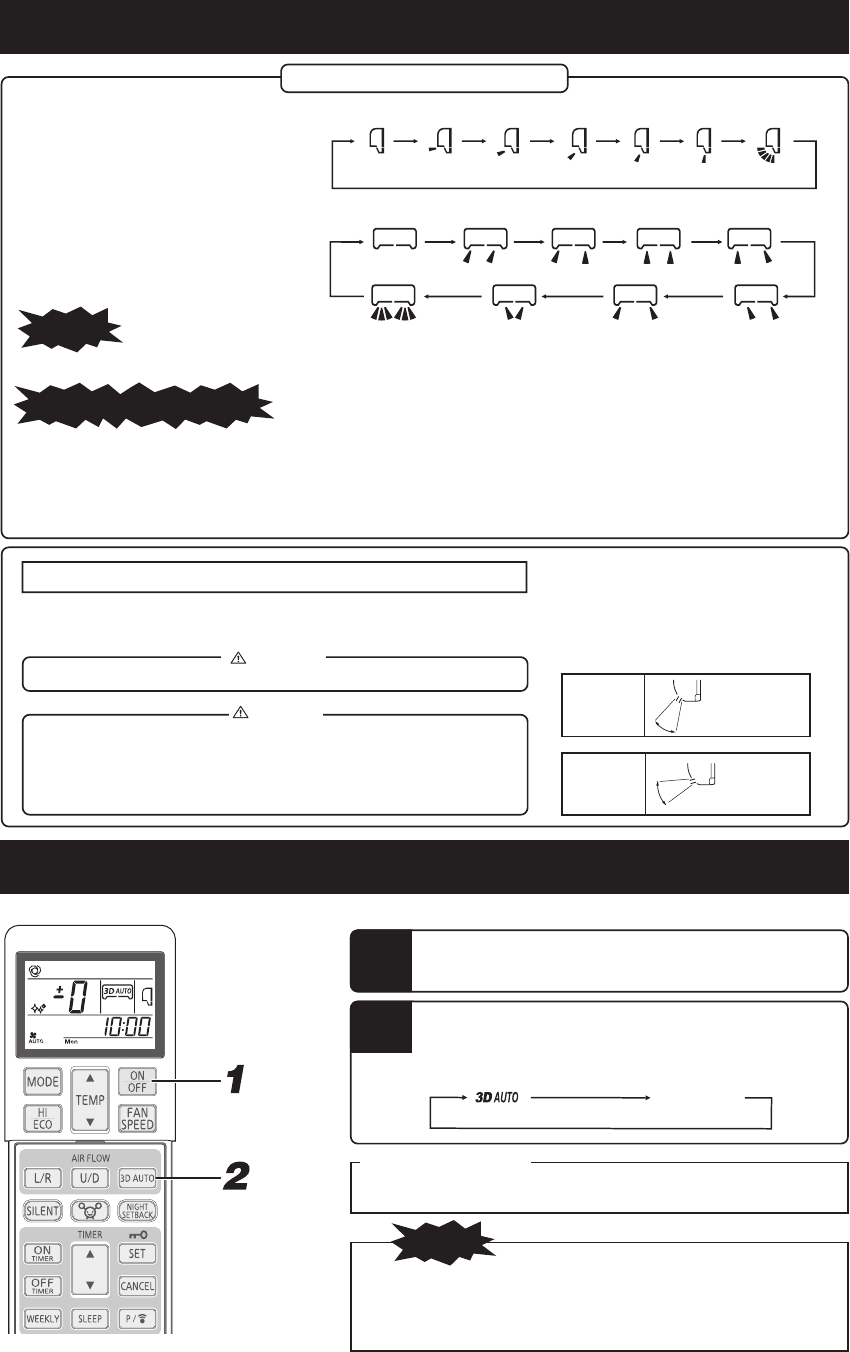
3D AUTO operation
■
Fan speed and air flow direction are automatically controlled, allowing the entire room to be efficiently conditioned.
Press the ON/OFF button.
Press the 3D AUTO button.
Each time the 3D AUTO button is pressed, the display is switched in the
order of:
1
2
(Normal operation)
(3D AUTO)
No display
• 3D AUTO operation is cancelled when you switch the operation mode.
• If 3D AUTO operation is cancelled then the air flow direction changes to
that used before 3D AUTO was set.
• 3D AUTO operation can be set in AUTO, COOL, or HEAT operation
mode only.
NOTE
Releasing procedure
Press the 3D AUTO button to turn off the 3D AUTO display.
RKY012A012B_EN_001-032 4/18/14, 16:4914