


8
6.1. For Wired Remote-controller
You can use Function Selection of remote controller to select which of
three types of timer to use: 1 Weekly timer, 2 Simple timer, or 3 Auto Off
timer.
6.1.1. Weekly Timer
■ The weekly timer can be used to set up to eight operations for each day
of the week.
• Each operation may consist of any of the following: ON/OFF time
together with a temperature setting, or ON/OFF time only, or tempera-
ture setting only.
• When the current time reaches a time set at this timer, the air
conditioner carries out the action set by the timer.
■ Time setting resolution for this timer is 1 minute.
Note:
*1. Weekly Timer/Simple Timer/Auto Off Timer cannot be used at the same time.
*2. The weekly timer will not operate when any of the following conditions is in
effect.
The timer feature is off; the system is in an malfunction state; a test run is
in progress; the remote controller is undergoing self-check or remote con-
troller check; the user is in the process of setting a function; the user is in
the process of setting the timer; the user is in the process of setting the
current day of the week or time; the system is under central control. (Spe-
cifically, the system will not carry out operations (unit on, unit off, or tem-
perature setting) that are prohibited during these conditions.)
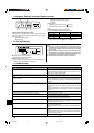
˚F
SUN
ON
WEEKLY
PAR-21MAA
ON/OFF
FILTER
CHECK
OPERATION
CLEAR
TEST
TEMP.
MENU
BACK DAY
MONITOR/SET
CLOCK
ON/OFF
2
¢™ £
q9 78
0
4
1
3
w
¡
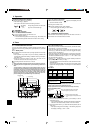
Operation No.
Day Setting
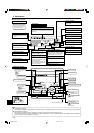
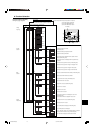
<How to Set the Weekly Timer>
1. Be sure that you are at a standard control screen, and that the weekly
timer indicator ¡ is shown in the display.
2. Press the Timer Menu button w, so that the “Set Up” appears on the
screen (at ™). (Note that each press of the button toggles the display
between “Set Up” and “Monitor”.)
3. Press the Timer On/Off (Set Day) button 9 to set the day. Each press
advances the display at £ to the next setting, in the following sequence:
“Sun Mon Tues Wed Thurs Fri Sat” → “Sun” → ... → “Fri” → “Sat” → “Sun
Mon Tues Wed Thurs Fri Sat”...
4. Press the
or Operation button (7 or 8) as necessary to select the
appropriate operation number (1 to 8) ¢.
* Your inputs at Steps 3 and 4 will select one of the cells from the matrix
illustrated below.
(The remote-controller display at left shows how the display would
appear when setting Operation 1 for Sunday to the values indicated
below.)
6. Timer
5. Operation
▲
▲
Low High
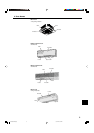
<To Change the Right/Left Air Direction>
■ Press the louver button 7 as necessary.
• The louver image ¶ appears.
Each press of the button switches the setting as follows.
(ON) (OFF)
During swing operation, the arrow dis-
play move to the left and right.
No display
(Stop)
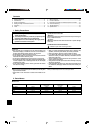
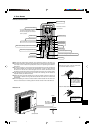
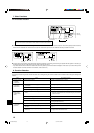
5.6. Ventillation
ss
ss
sFor LOSSNAY combination
5.6.1. For Wired Remote-controller
● To run the ventilator together with the indoor unit:
■ Press the ON/OFF button 1.
• The Vent indication appears on the screen (at •). The ventilator will
now automatically operate whenever the indoor unit is running.
5.6.2. For Wireless Remote-controller
● The ventillator will automatically operate when the indoor unit turns on.
● No indication on the wireless remote controller.
● To run the ventilator independently:
■ Press the Mode button 2 until
appears on the display. This will
cause the ventilator to start.
● To change the ventilator force:
■ Press the Ventilation button 8 as necessary.
• Each press toggles the setting, as shown below.
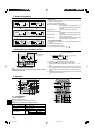
Note:
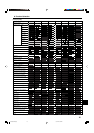
By setting the day to “Sun Mon Tues Wed Thurs Fri Sat”, you can set the same
operation to be carried out at the same time every day.
(Example: Operation 2 above, which is the same for all days of the week.)
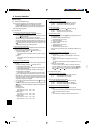
<Setting the Weekly Timer>
Op No.
Sunday Monday … Saturday
No. 1
No. 2
…
No. 8
• 8:30
• ON
• 73 °F
• 10:00
• OFF
• 10:00
• OFF
• 10:00
• OFF
• 10:00
• OFF
▲
Setup Matrix
<Operation 1 settings for Sunday>
Start the air conditioner at 8:30, with
the temperature set to 73 °F.
▲
<Operation 2 settings for every day>
Turn off the air conditioner at 10:00.
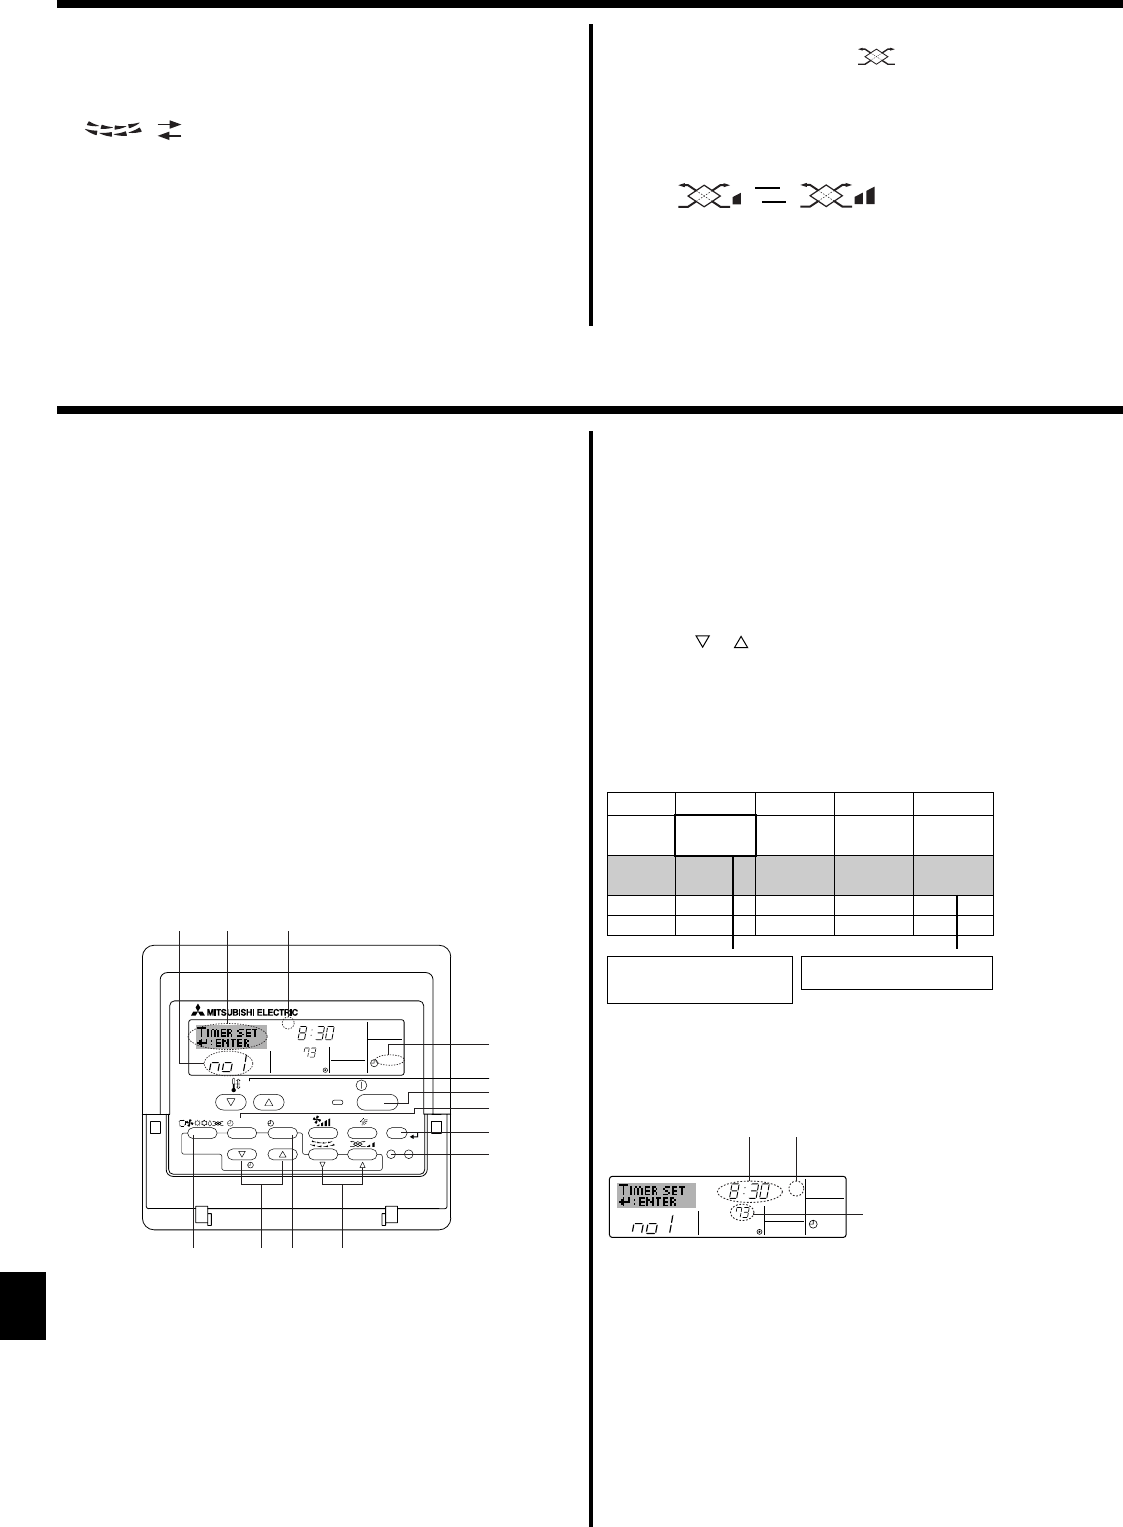
˚F
SUN
ON
WEEKLY
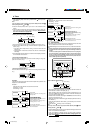
§
¶
∞
Shows the selected operation (ON or OFF)
* Does not appear if operation is not set.
Shows the temperature setting
* Does not appear if temperature is not
set.
Shows the time
setting
5. Press the appropriate Set Time button q as necessary to set the
desired time (at ∞).
* As you hold the button down, the time first increments in minute inter-
vals, then in ten-minute intervals, and then in one-hour intervals.
6. Press the ON/OFF button 1 to select the desired operation (ON or
OFF), at §.
* Each press changes the next setting, in the following sequence:
No display (no setting) → “ON” → “OFF”
BG79U794H02_en 05.12.22, 2:02 PM8