


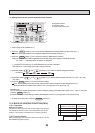
OPERATING PROCEDURE
PHOTOS & ILLUSTRATIONS
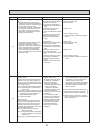
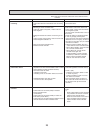
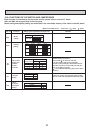
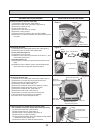
9. Removing the drain pump (DP) and float switch (FS)
(1) Remove the drain pan. (See photo 6)
(2) Cut the hose band and remove the hose.
(3) Remove the drain pump assembly (3 screws and 2 hooks).
(4) Remove the drain pump (3 screws).
(5) Remove the float switch (2 screws).
Photo 8
Photo 9
Drain pump
Hose band
Float switch
Drain pump
assembly fixing screw
Drain pump
fixing screw
Float switch
fixing screw
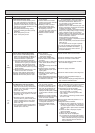
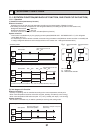
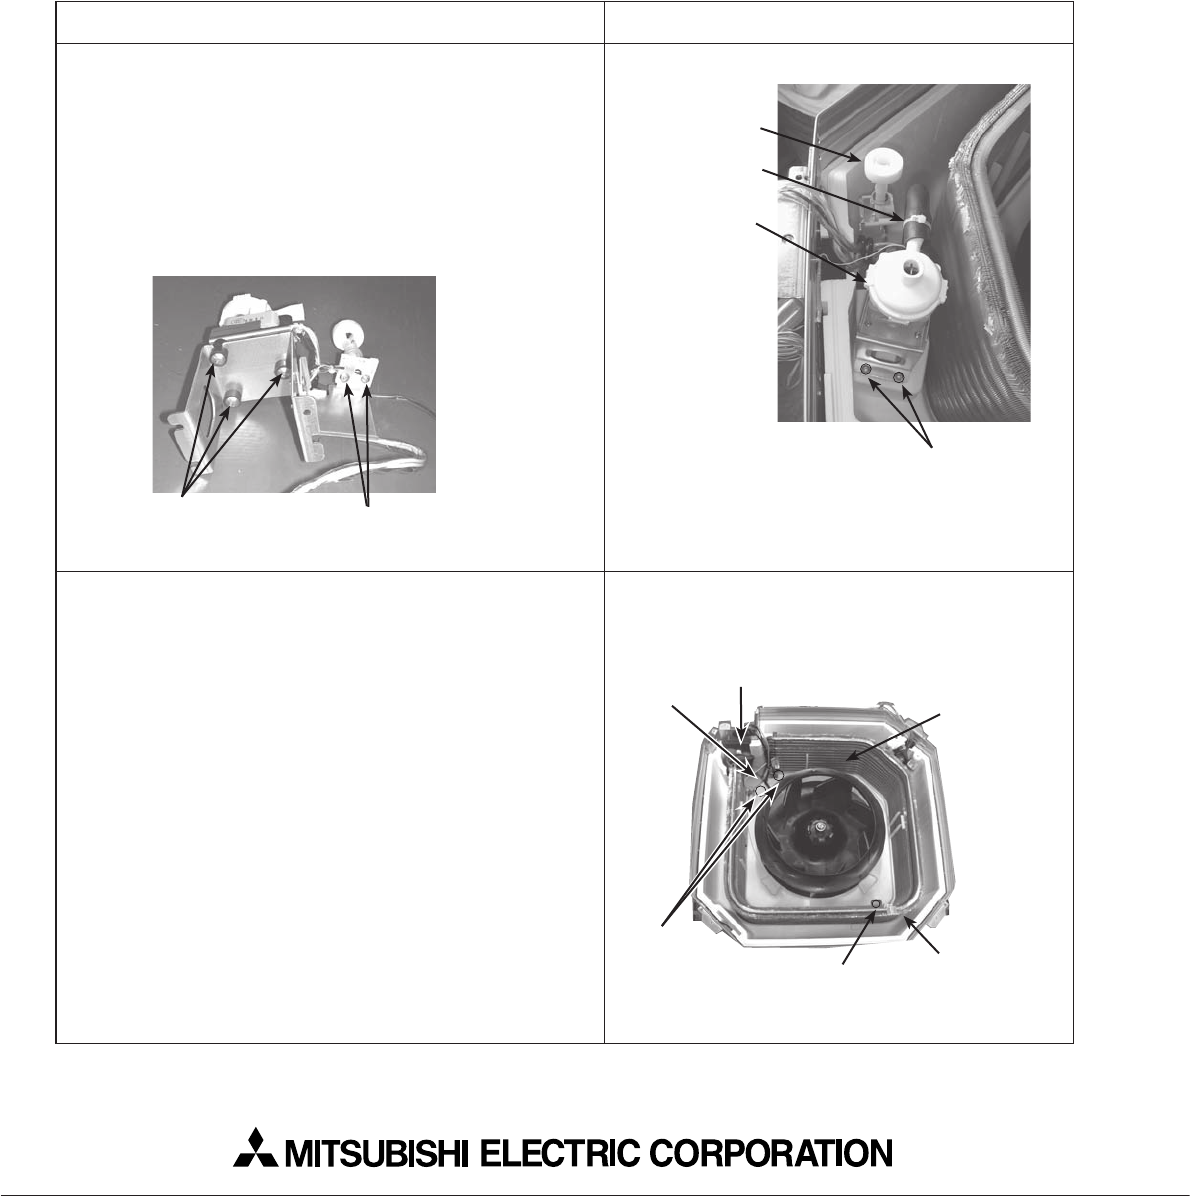
10. Removing the heat exchanger
(1) Remove the drain pan. (See photo 6)
(2) Remove the 3 screws of the piping cover, and pull out
piping cover.
(3) Remove the 2 screws of coil plate.
(4) Remove the 2 screws of the coil.
(5) Remove the screw of the coil support.
(6) Pull out the heat exchanger.
Photo 10
Coil support
fixing screw
Heat exchanger
fixing screw
Coil support
Heat exchanger
Coil plate
Piping cover
HEAD OFFICE : TOKYO BLDG., 2-7-3, MARUNOUCHI, CHIYODA-KU, TOKYO 100-8310, JAPAN
Copyright 2007 MITSUBISHI ELECTRIC ENGINEERING CO., LTD.
Distributed in Oct. 2007 No.OCH420 REVISED EDITION-A PDF 9
Distributed in Jul. 2007 No.OCH420 PDF 9
Made in Japan
New publication, effective Oct. 2007
Specifications subject to change without notice.