- 92 -
(3) LCD remote controller.
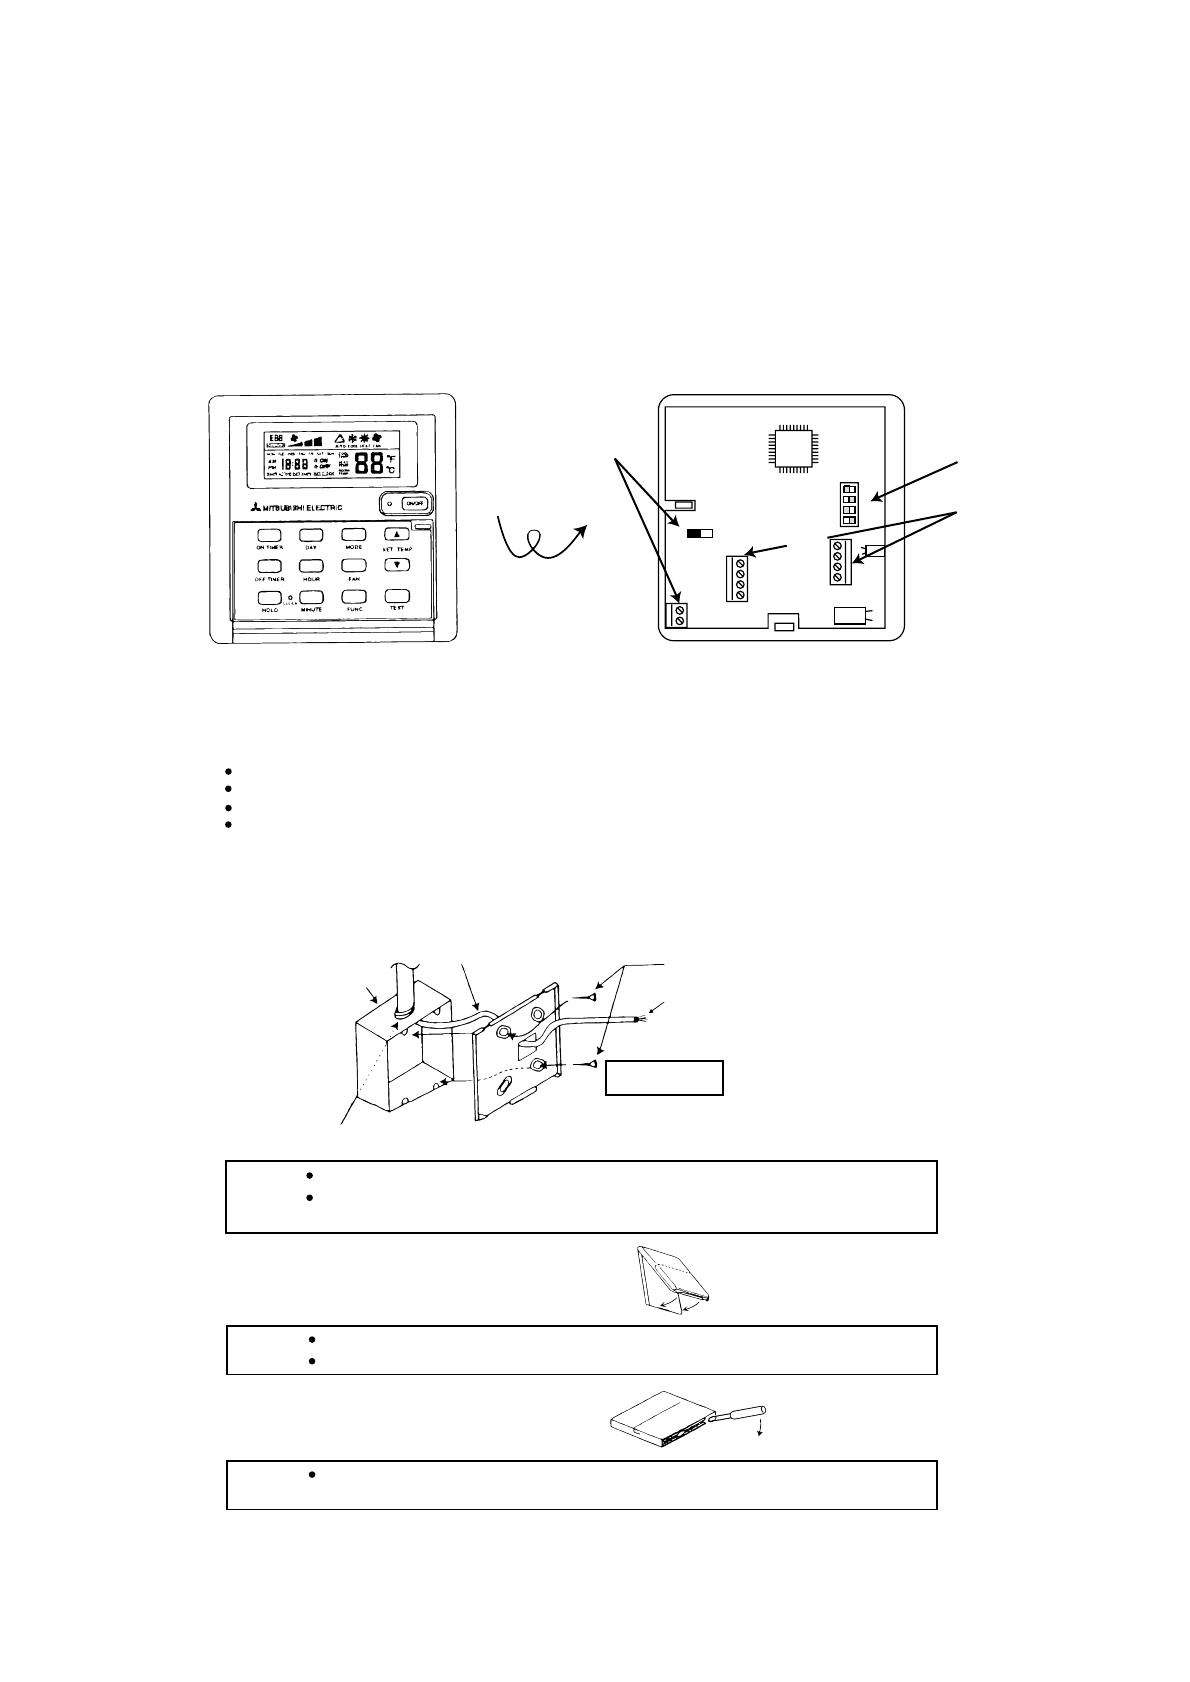
(3)-2. Outline and inside drawing
(3)-1. Confirmation of parts
The following parts are contained in the carton box together with this manual.
Please check to make sure that everything is included.
1
2
3
4
Remote controller (upper case, lower case)
Pan-head screw with cross hole M4
Wooden screw 4.1 ✕ 16 (for installing unit directly on a wall)
Instruction manual
······································· 1
··················································· 2
············· 2
················································································ 1
Q'TY
(3)-3. Installation
(1) Decide where you want to install the LCD remote controller (switch box)
In deciding, please observe the following precautions:
Do not install the LCD remote controller in locations, which are:
Exposed to direct sunlight.
Susceptible to humidity and moisture.
Near a source of heat.
Near machines emitting high-frequency waves. (High-frequency welders, etc.)
Switch box for two units
Connecting wire (Length : below 20m size : 0.75mm
2
)
Lock nut, bushing
(2) Install the lower case on the switch box.
Caution :
Over-tightening the screws can cause deformation and / or cracks on the lower case.
Install the LCD remote controller on a wall with flat surface.
Installation on an uneven surface can cause cracks on the LCD and other failure.
Switch box for
two units
Connecting wire
Pan-head screws
with cross holes
When installing
on switch box
Snap the upper case into place.
Hook the two upper claws into their slots, and shut
the lower part as shown in the right diagram.
Caution :
Press the case until it snaps shut.
To use, remove the protective sheet on the operation section.
Connect to terminal
1) Procure the following parts locally :
Seal the wire lead-in hole completely with putty
Caution :
Do not turn the screwdriver while it is inserted into the slot.
Doing so can result in damage to the slot.
TB1
DIP SW
TB2
1
ON
234
Controller boardOutline (Key cover open)
COMP2
COMP1
4W V
ERROR
24VAC(N)
24VAC(L)
FAN HI
FAN LO
EXT
SENSOR
JH
INT / EXT
Refer to (3)-4
Refer to (3)-3
Refer to (3)-5
To remove the upper case, insert a screwdriver(-)
into one of the slots and slide it in the direction
of the arrow shown in the diagram on the right.


