37
OPERATING PROCEDURE PHOTOS
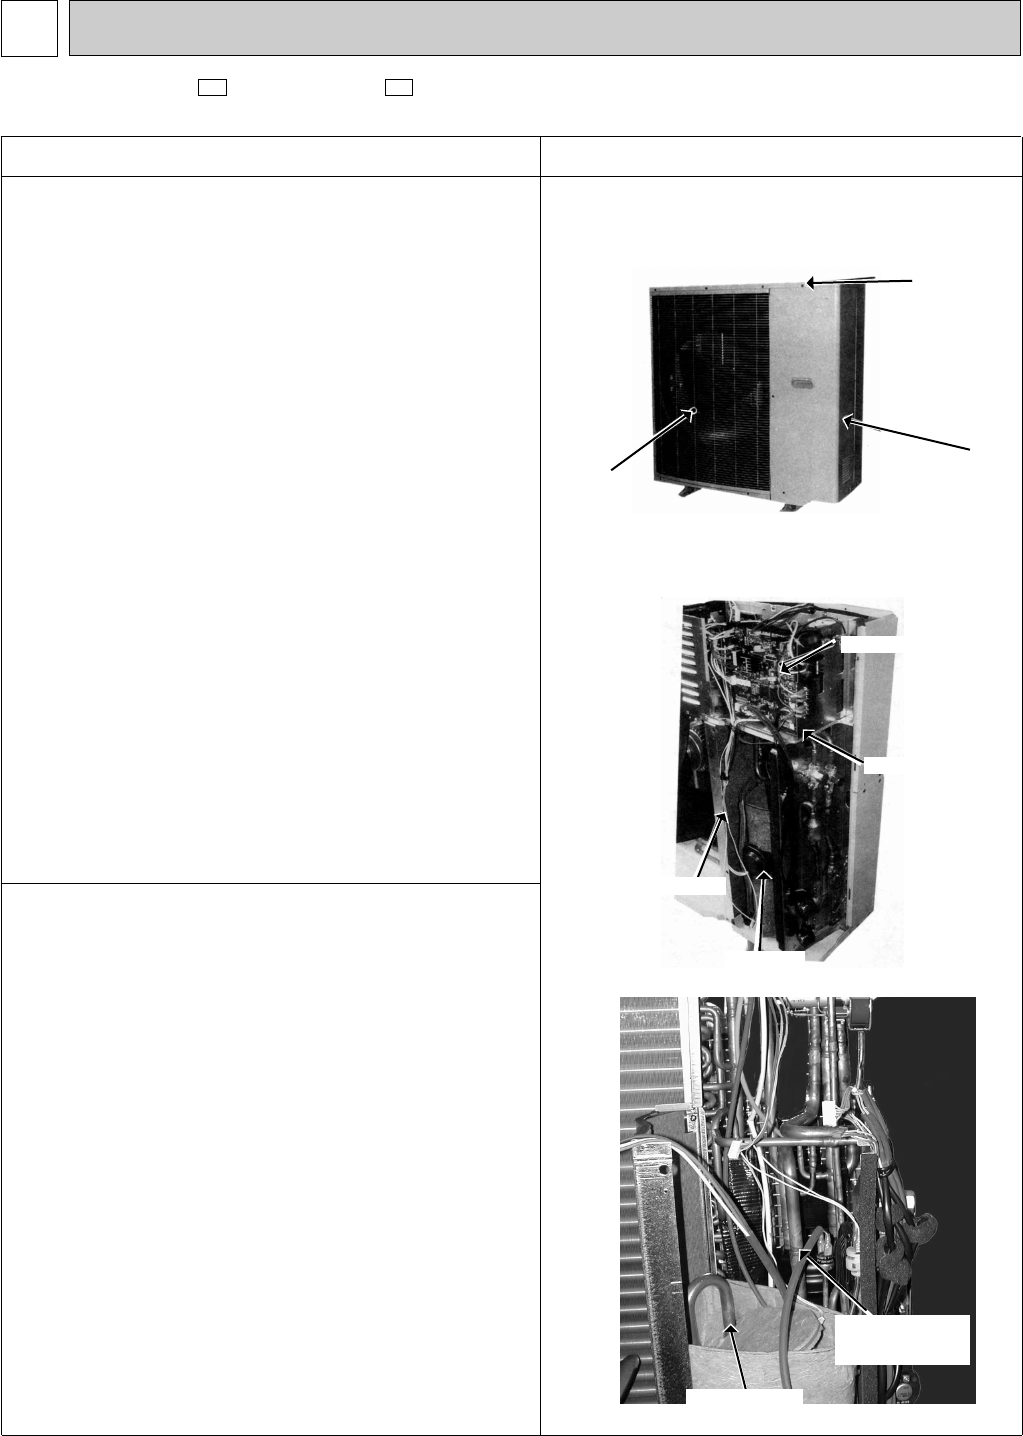
1.Removing the compressor
(1)Remove the screws fo the service panel, and remove it.
Release refrigerant gas.
(2)Remove the screws of the top panel, and remove it.
(3)Remove the screws of the front panel, and remove it.
(4)Disconnect the compressor lead wire. (TAB64,TAB65,TAB66)
(5)Disconnect the ourdoor electronic control P.C. board
connectors CN791, CN792, CN793, CN794, CN662,
CN722, and CN661. Disconnect the noise filter P.C. board
connectors CN913.
(6)Remove the four screws of the electrical parts, and remove
them.
(7)Remove the propeller.
(8)Remove the screws of the separator, and remove it.
(9)Detach the brazed joints of the compressor suction and dis-
charge pipes. (See Photo 3.)
(10)Remove the three compressor nuts and remove the com-
pressor.
Photo 1
Top panel
Service panel
Front
panel
Photo 2
Control P.C.board
Electrical parts
Terminal
Sepatator
Discharge pipe
brazed part
13-1 MXZ-32SV - , MXZ-32SV -
OUTDOOR UNIT
E2E1
13
DISASSEMBLY INSTRUCTIONS
Photo 3
Suction pipe
braxed part
OB254-2.qxp 03.1.16 4:37 PM Page 37


