7
NOTE: DIAGRAMS & ILLUSTRATIONS NOT TO SCALE.
Log Placement
ENSURE THAT THE FRONT GLASS PANEL IS IN
PLACE AND SEALED DURING ADJUSTMENT.
Adjustment
CAUTION: THE ADJUSTMENT ROD AND
NEARBY APPLIANCE SURFACES ARE HOT.
EXERCISE CAUTION TO AVOID INJURY WHILE
ADJUSTING FLAME APPEARANCE.
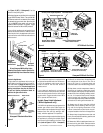
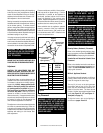
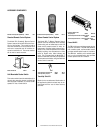
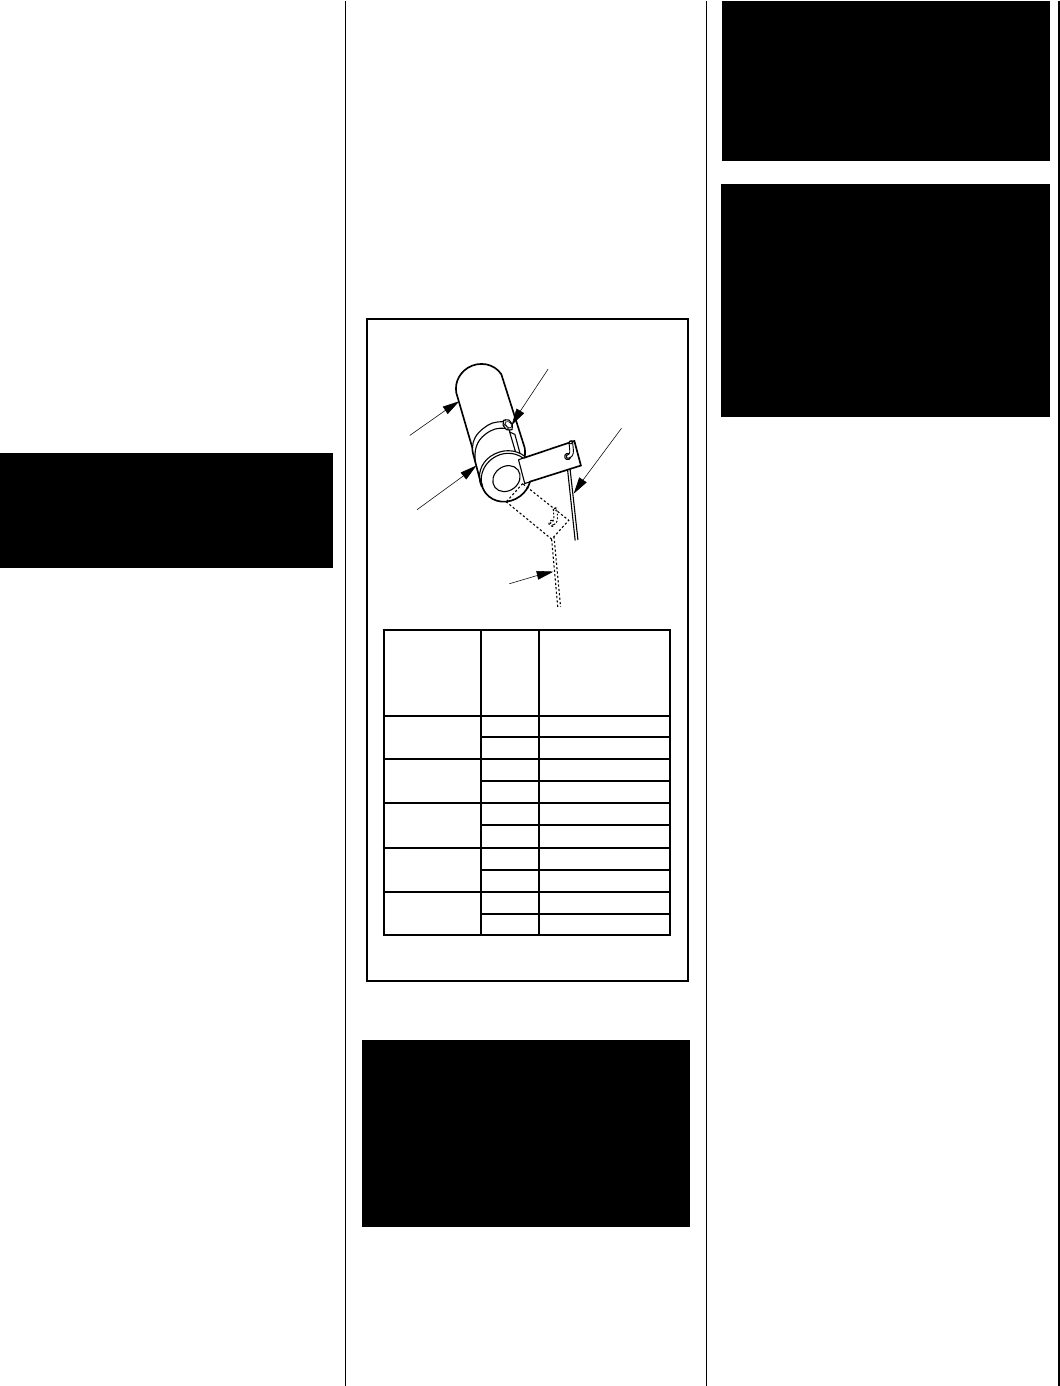
To adjust the flame, move the adjustment rod
(located in the lower control area) up or down
to increase or reduce the air shutter opening,
respectively. Initially, always position the air
shutter to the factory setting (the minimum
air opening position) as shown in
Figure 6
.
This can be done by pulling the adjustment
rod all the way down. Allow the burner to
operate for at least 15 minutes. Observe the
flame continuously. If it appears weak or sooty
as previously described, adjust the air shutter
by pushing or pulling on the adjustment rod
until the flame appearance is as desired.
The adjustment rod and associated adjustable
air shutter is patented technology. Flame ad-
justments can be made quickly and accurately
to taste without the need of disassembling the
appliance and waiting for 30 minutes after
each adjustment.
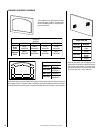
Figure 6
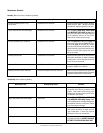
sledoM
saG
epyT
RIAYROTCAF
RETTUHS
GNITTES
)mm(sehcni
8233-TDPM
.taN23/1)8.O(
.porP61/3)67.4(
8233-RDPM
.taN23/1)8.O(
.porP61/3)67.4(
0353-DPM
.taN23/1)8.O(
.porP61/3)67.4(
5304-DPM
.taN8/1)2.3(
.porP2/1)31(
0454-DPM
.taN8/1)2.3(
.porP2/1)31(
If the logs are properly positioned and sooting
conditions exist, the air shutter opening on the
main burner tube should be adjusted. Normally,
the more offsets in the vent system, the greater
the need for the air shutter to be opened further.
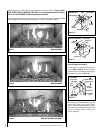
Glowing Embers (Rockwool) Placement
Refer to the detailed glowing embers place-
ment instructions provided in the LOG PLACE-
MENT GUIDE accompanying this document.
Vermiculite and Decorative Volcanic Stone
Placement
Refer to the detailed vermiculite and decora-
tive volcanic stone placement instructions pro-
vided in the LOG PLACEMENT GUIDE accom-
panying this document.
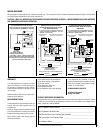
Millivolt Appliance Checkout
The pilot flame should be steady, not lifting or
floating. Flame should be blue in color with
traces of orange at the outer edge.
The top ³⁄₈" (10 mm) at the pilot generator
(thermopile) and the top ¹⁄₈" min (tip) of the
quick drop out thermocouple should be en-
gulfed in the pilot flame. The flame should
project 1" (25 mm) beyond the hood at all three
ports
(see Figure 10 - SIT, and Figure 11 -
Honeywell, on page 8 )
.
To light the burner, refer to the lighting in-
structions on
pages 12 and 13.
When satisfied that the appliance operates
properly, proceed to finish the installation.
Leave the control knob in “ON” position and
turn the remote switch “OFF.” Close the lower
control compartment door.
Propane models may exhibit a flame pattern
that may candle or appear stringy. If this is
problematic or persists as the appliance is
continually operated, adjust the air shutter
closed as described in the previous para-
graphs. Operate the appliance for a period of
time as the effect diminishes, ensuring that the
appliance does not develop sooty flames.
Sooting is indicated by black puffs developing
at the tips of very long orange flames. Sooting
results in black deposits forming on the logs,
appliance inside surfaces and on exterior sur-
faces adjacent to the vent termination.
Sooting is caused by incomplete combustion in
the flames and a lack of combustion air entering
the air shutter opening. To achieve a warm
yellow to orange flame with an orange body that
does not soot, the shutter opening must be
adjusted between these two extremes. No smoke
or soot should be present. Reposition the logs if
the flames impinge on any of them.
WARNING: AIR SHUTTER ADJUST-
MENT SHOULD ONLY BE PERFORMED
BY A QUALIFIED PROFESSIONAL SER-
VICE TECHNICIAN.
WARNING: LOGS GET VERY HOT AND
WILL REMAIN HOT UP TO ONE HOUR
AFTER GAS SUPPLY IS TURNED OFF.
HANDLE ONLY WHEN LOGS ARE COOL.
TURN OFF ALL ELECTRICITY TO THE
APPLIANCE BEFORE YOU INSTALL
GRATE AND LOGS.
WARNING: THIS APPLIANCE IS NOT
MEANT TO BURN WOOD. ANY AT-
TEMPT TO DO SO COULD CAUSE IR-
REPARABLE DAMAGE TO YOUR AP-
PLIANCE AND PROVE HAZARDOUS TO
YOUR SAFETY.
WARNING: THE SIZE AND POSITION ON
THE LOG SET WAS ENGINEERED TO
GIVE YOUR APPLIANCE A SAFE, RELI-
ABLE AND ATTRACTIVE FLAME PAT-
TERN. ANY ATTEMPT TO USE A DIF-
FERENT LOG SET IN THE FIREPLACE
WILL VOID THE WARRANTY AND WILL
RESULT IN INCOMPLETE COMBUSTION,
SOOTING, AND POOR FLAME QUALITY.
Adjustment Rod
Up (Fully Open
Position)
Air Shutter
Venturi
Adjusting
Set Screw
Adjustment Rod Down
(minimum air
opening position)


