


5
2.4 Mounting the XDA on the Interior of the Rear
Cabinet Door
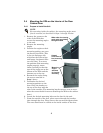
2.4.1 Prepare to Install the Unit
1. Remove the screws on the
sides of the XDA that
secure the mounting angles
to the unit.
2. Remove the mounting
angles.
3. Position the angles so their
mounting surfaces are near
the front of the XDA. (This
is the air discharge side,
which has the Liebert logo
and longer, horizontal slots
over the fans.) To reverse
the position of the mounting
angles properly, rotate
them vertically so that the
tops of the angles are at the
bottom of the XDA and the
bottoms are at the top.
4. Reattach the angles using
the screws removed in
Step 1 above.
5. Determine the desired
mounting position on the
door. Place the bracket on
the top of the door with the
tabs on the outside. (The mounting bracket will be used to deter-
mine the correct holes for screws attaching the XDA to the cabinet
door.)
6. Locate the desired mounting holes on the door for the unit.
7. From the outside of the door, place screws through the bracket,
then through the door. Place nuts on the screws and tighten them.
The nuts should now be visible on the inside surface of the door.
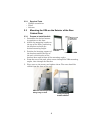
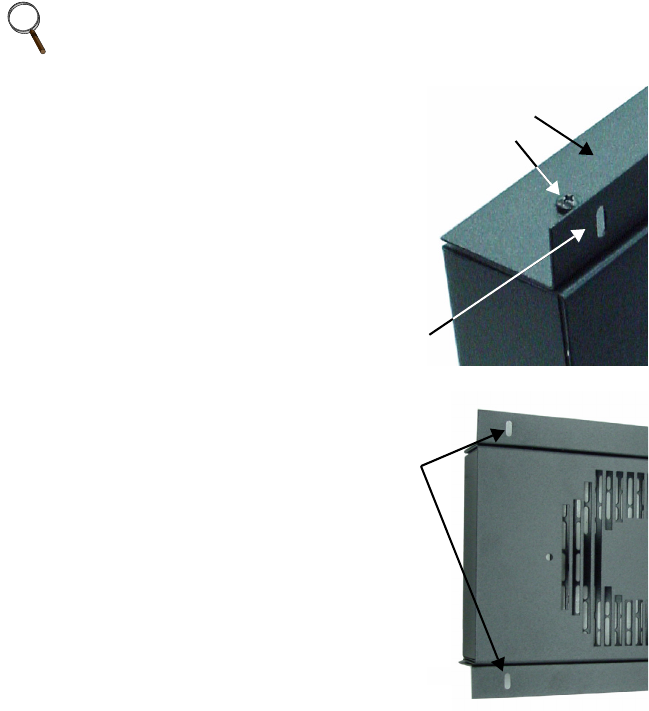
NOTE
For mounting inside the cabinet, the mounting angles must
first be reversed, as described in Steps 1 through 4 below.
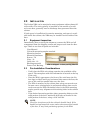
Wider side of mounting
angle with round holes
fits against XDA
Slotted
holes must
face mounting
surface
Mounting
angles
attached
for interior
mounting