NOTE: DIAGRAMS & ILLUSTRATIONS NOT TO SCALE.
7
WARNING: ALWAYS DISCONNECT
POWER AND ALLOW THE ELEC-
TRIC FIREPLACE TO COOL BEFORE
PERFORMING ANY CLEANING,
MAINTENANCE OR RELOCATION
OF THIS ELECTRIC FIREPLACE.
TURN CONTROLS TO OFF AND RE-
MOVE PLUG FROM OUTLET OR
TURN OFF CIRCUIT BREAKER TO
ELECTRIC FIREPLACE.
BACK GLASS
1. The glass is cleaned in the factory during
assembly. During shipment, installation , han-
dling, etc.. the glass surface may collect dust
particles. These can be removed by buffing
lightly with a clean dry cloth. To access the
back glass,
refer to Figure 6
and the removal
process in the next section.
2. To remove fingerprints or other marks, the
glass can be cleaned with a damp cloth using
a good quality household glass cleaner. The
glass should be completely dried with a lint
free cloth or paper towel.
3. In the event of glass breakage, vacuum all
remaining glass pieces with a shop vac. DO
NOT VACUUM WHILE PIECES ARE HOT! Re-
move glass only with replacement parts spe-
cifically for this heater. Never substitute ma-
terial. Only fully tempered safety glass may be
used on this heater.
BULB REPLACEMENT
WARNING: THE HALOGEN LIGHT
BULBS IN YOUR UNIT CAN BECOME
EXTREMELY HOT. ALLOW AT
LEAST 10 MINUTES BETWEEN
TURNING OFF THE HEATER AND
REMOVING THE LIGHT BULBS TO
AVOID ACCIDENTAL BURNS.
There are a total of 4 halogen light bulbs (type
GX6.35 rated 120 volts, 35 watts) required for
the operation of your unit:
*2 bulbs provide illumination for the ember
bed beneath the log set.
*2 bulbs provide illumination for the flame
generation assembly.
*2 bulbs for replacement are also supplied.
WARNING: DO NOT INSTALL RE-
PLACEMENT BULBS THAT EXCEED
SPECIFIC MAXIMUM WATTS.
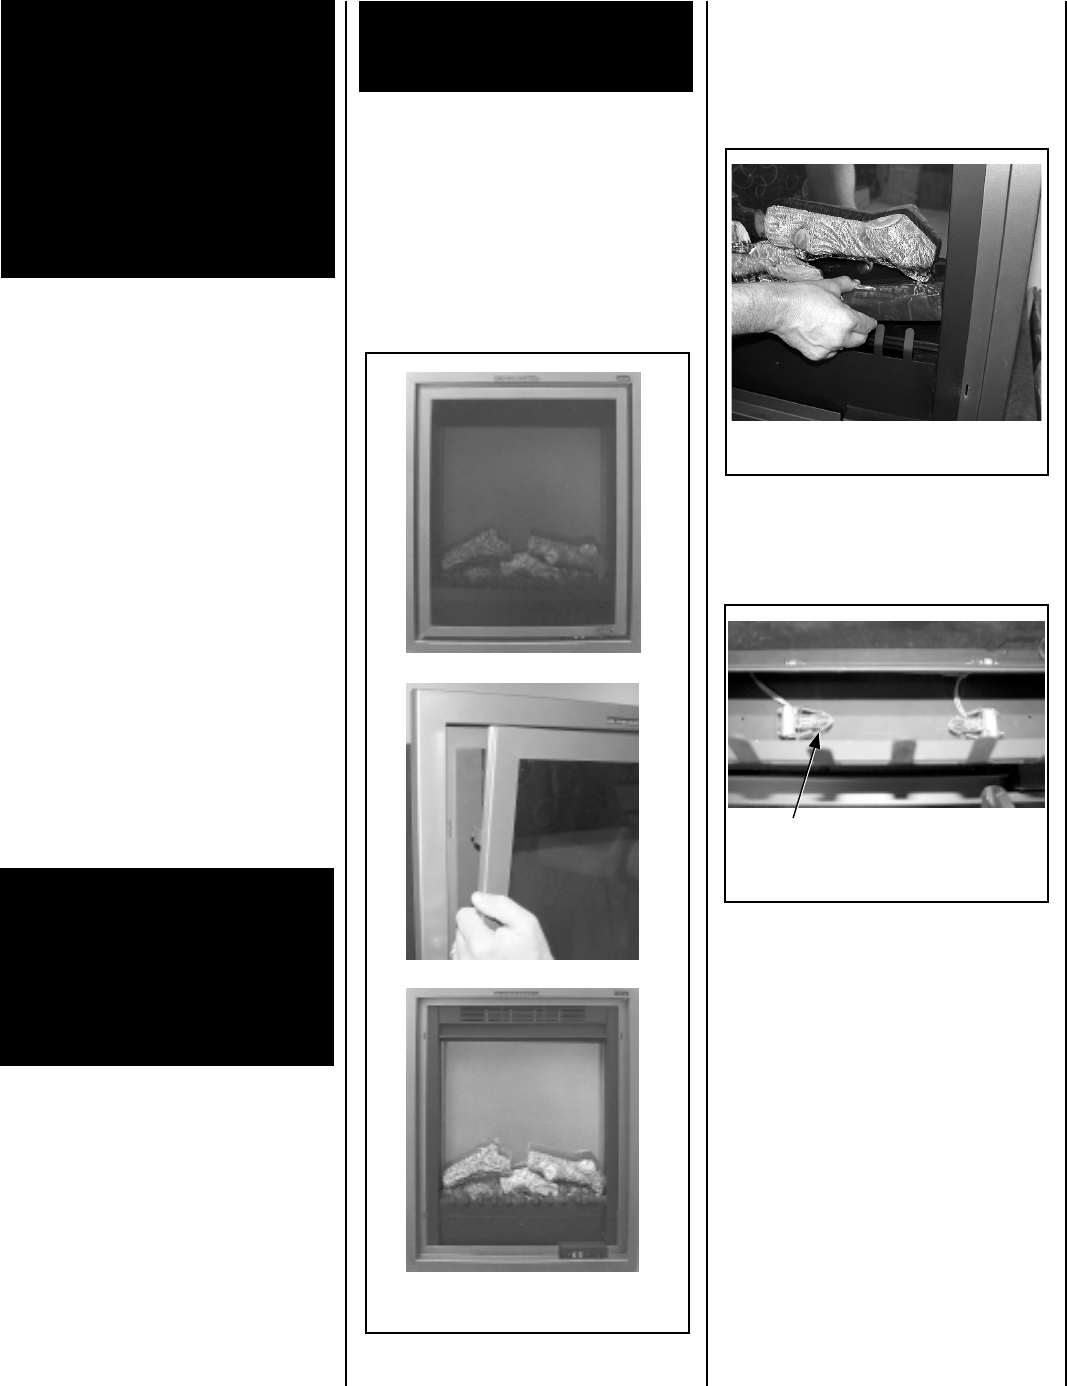
3. Release spring clip over one bulb (
see
Figure 8
).
4. Hold socket and pull out the old bulb.
Your fireplace unit must be opened in order to
replace the light bulbs. To reduce the number
of times you need to open the unit, replace all
bulbs at the same time.
EMBER BED BULBS
1. Remove the door (
see Figure 6
) by
grasping the door firmly at the bottom and
supporting the top. Lift up and away.
2. From the bottom of the ember bed (on the
plastic), gently grasp and lift up log/ember bed
until front edge clears the grate tines. Angle
the ember bed (one end higher than the other)
to clear it from the front of the unit (do not pull
up on logs) (
see Figure 7
).
5. Hold socket and push in new bulb (DO NOT
exceed wattage).
6. Replace spring clip.
7. Replace steps 4 through 6 for second bulb.
8. Gently push log/ember bed down into place.
9. Reinstall the door. Catch all four tabs in the
slots located at the four corners of the unit
inside of the outer frame. Ensure the slots on
the tabs engage the face frame as the door
drops into place downwards.
Figure 6
Figure 7
Figure 8
Spring Clip


