


13
Features and Installation
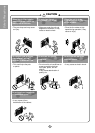
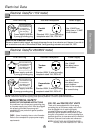
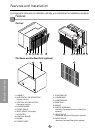
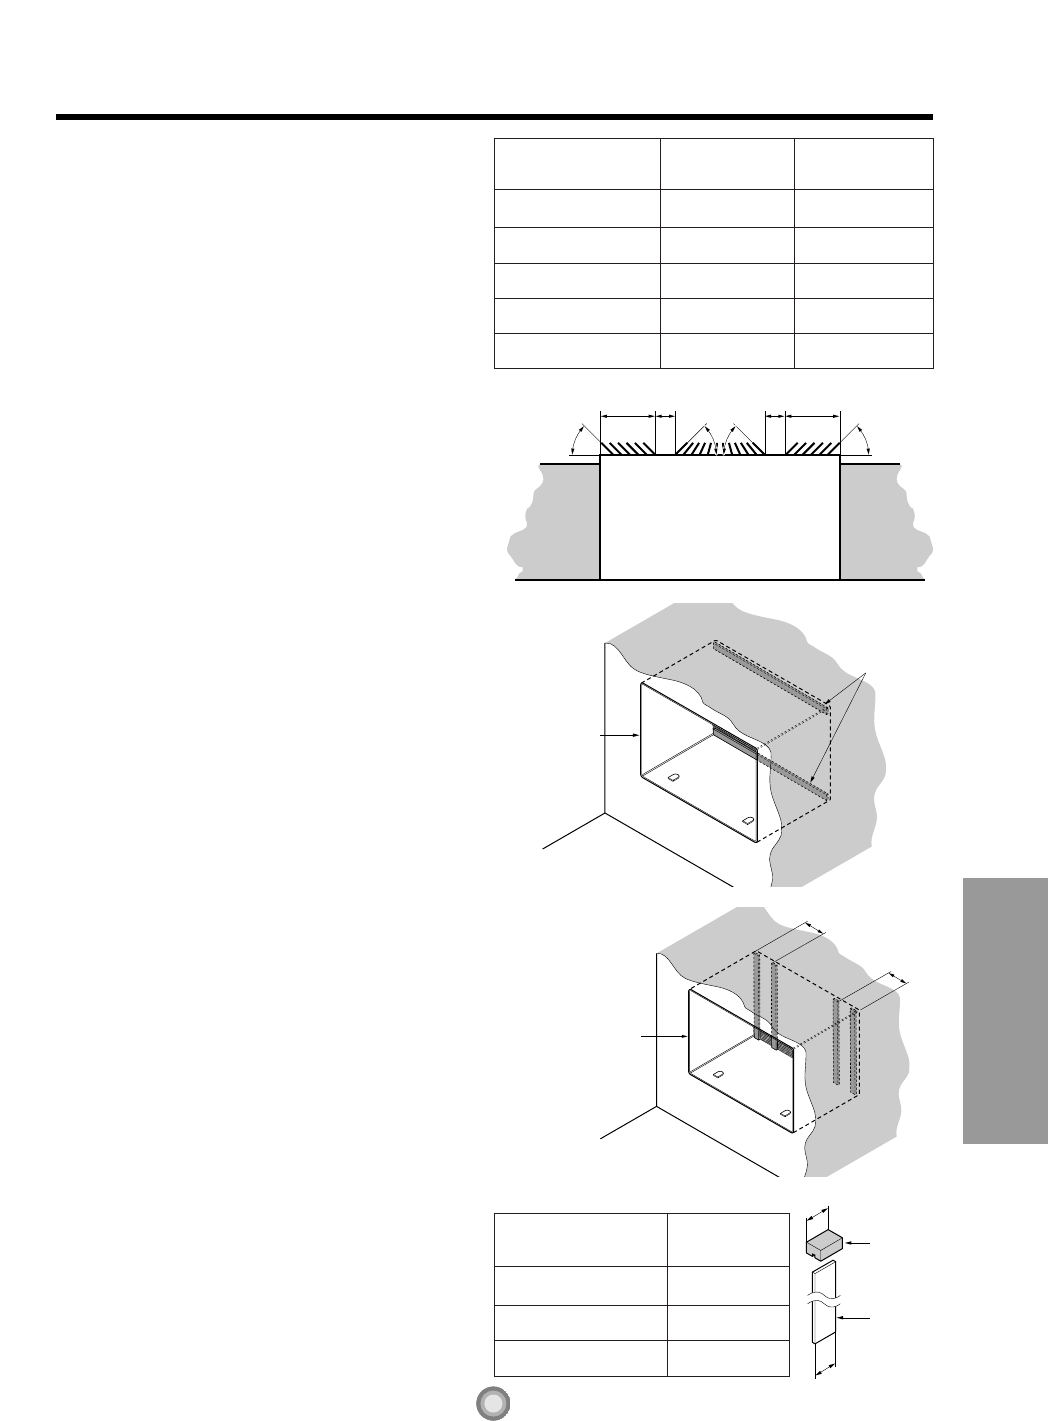
Wall
Wall Sleeve
Front
Insulation
Horizontal
(2 ea)
1
/
2
"
(12 mm)
1-
1
/
4
"
(32 mm)
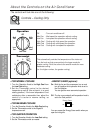
45~60°
45~60° 45~60°
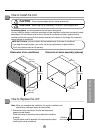
Top view of the wall sleeveWall Wall
A B
B
4-
3
/
4
" (120 mm)
5" (130 mm)
5" (130 mm)
5-
1
/
2
" (140 mm)
5-
1
/
2
" (140 mm)
A
2-
3
/
4
" (70 mm)
2-
3
/
4
" (70 mm)
3" (75 mm)
3-
1
/
4
" (80 mm)
3-
1
/
2
" (90 mm)
Width of the existing
wall sleeve
25-
1
/
2
"(648 mm)
25-
3
/
4
"(654 mm)
26" (660 mm)
26-
3
/
4
"(680 mm)
27" (686 mm)
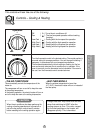
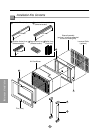
Wall
Wall Sleeve
A
B
Front
Support
Block
Baffle
C
C
Depth of the existing
wall sleeve
C
18-
5
/8" (473 mm)
3
/4" (20 mm)
19-
3
/4" (502 mm) 1-
3
/4" (45 mm)
22" (559 mm) 4"
(100 mm)
2. Prepare the wall sleeve for
installation of the new unit according
to the following installation
procedures. Before you prepare the
wall sleeve, you should check the
wall sleeve dimensions.
3. Redirect the louvers at the back of
the wall sleeves as following A and B
lengths in the below table.
4. Sleeve (up to 18 inches deep)
When the depth of your existing sleeve
is deeper than 18", please skip to step 5.
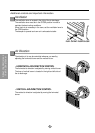
Remove the backing from horizontal
insulation and attach them to the inside
of the wall sleeve as shown below.
Remove the backing from insulation
vertical and attach them to the inside
of the wall sleeve, as shown below.
5. Sleeve (18~22 inches deep)
When the depth of your existing
sleeve is not deeper than 18", please
skip to step 6.
Cut the baffles and the support blocks
as following C length in the below
table.