7
NOTE: DIAGRAMS & ILLUSTRATIONS NOT TO SCALE.
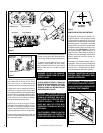
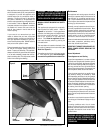
Figure 9
Figure 8
³⁄₈" Min
(9 mm)
Hood
Pilot
Nozzels
Ignitor Rod
Proper Flame
Adjustment
Hot Surface
Igniter
Flame Rod
Ground
Electrode
3/8 To 1/2 Inch
(9 mm to 13 mm)
Pilot
Nozzle
MILLIVOLT
ELECTRONIC
Millivolt Appliance Checkout
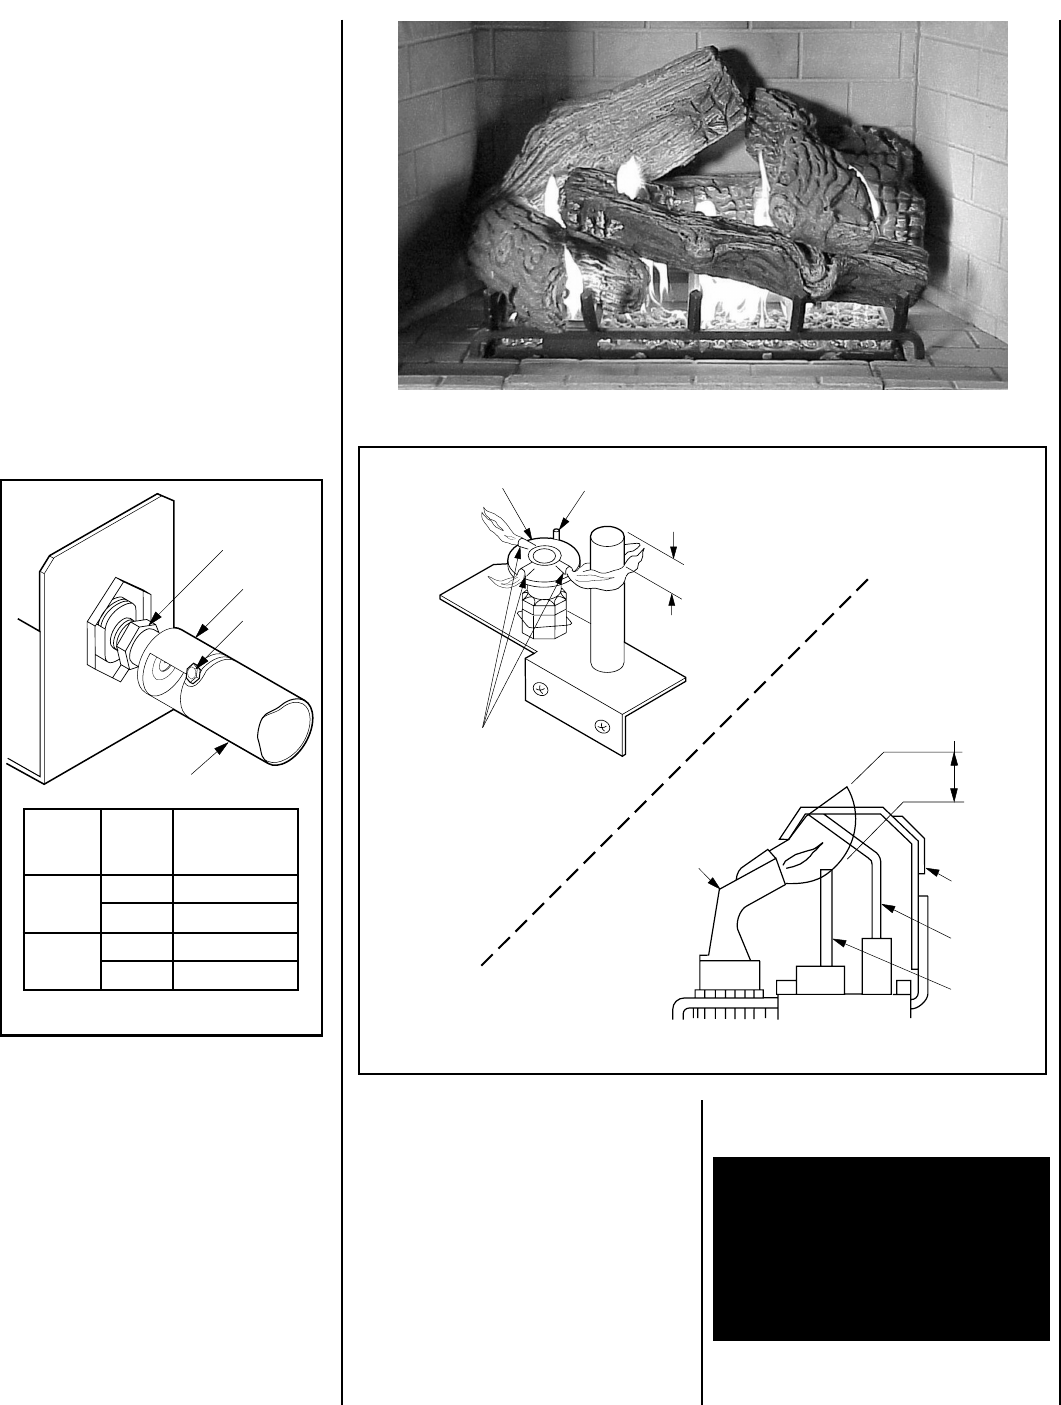
The pilot flame should be steady, not lifting or
floating. Flame should be blue in color with
traces of orange at the outer edge.
The top ³⁄₈" (9 mm) at the pilot generator (thermo-
pile) should be engulfed in the pilot flame. The
flame should project 1" (25 mm) beyond the hood
at all three ports
(Figure 9 - Millivolt section)
.
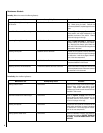
Figure 7
Orifice
Air Shutter
Burner Tube
Adjusting
Set Screw
Factory Air
Models Shutter Setting
Inches (mm)
LBV-3824
Gas
Type
Natural 1/16" (1.59 mm)
Propane 3/16" (4.76 mm)
Natural Closed
Propane 1/4" (6.35 mm)
LBV-4324
Adjustment
To adjust the flame, position the air shutter to
the nominal setting
(see Figure 7 ).
Allow the
burner to operate for at least 30 minutes.
Observe the flame continuously.
If it appears weak or sooty as previously de-
scribed, adjust the air shutter open or closed
until desired effect is achieved.
Note: If the flame still appears anemic with the air
shutter closed all the way (usually a result of
lengthy vertical venting runs), turn off the appli-
ance, turn off the gas supply, wait for the parts to
cool and access the air shutter. The shutter is
prevented from actually closing by a tab that is
bent over into the opening. Remove this obstruc-
tion by bending back. Reassemble and restart the
appliance and after 24 minutes reobserve the
flame. Adjust the air shutter as described.
Electronic Appliance Checkout
Light the burner, refer to the Lightilng Instruc-
tions in this manual. Ensure the ignitor lights the
pilot. The pilot flame should engulf the flame rod
as shown in
Figure 9 - Electronic section.
With proper care and maintenance, your appli-
ance will provide many years of enjoyment. If
you should experience any problem, first refer
to the trouble shooting guide in this manual. If
problem persists, contact your Lennox Dealer.
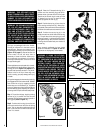
Logs and Rockwool (Glowing Embers)
Placement
WARNING: LOGS GET VERY HOT AND
WILL REMAIN HOT UP TO ONE HOUR
AFTER GAS SUPPLY IS TURNED OFF.
HANDLE ONLY WHEN LOGS ARE COOL.
TURN OFF ALL ELECTRICITY TO THE
APPLIANCE BEFORE YOU INSTALL
GRATE AND LOGS.


