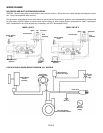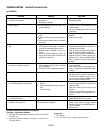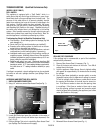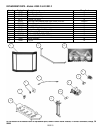
PROPANE CONVERSION
PAGE 18
PROPANE CONVERSION PROCEDURE (ALL MODELS)
(Only required if Propane gas is used)
This appliance is designed to operate on natural gas, or propane
(LP). It is factory set for use with natural gas and requires field
conversion for use with propane. The use of other fuels or com-
bination of fuels will degrade the performance of this system
and may be dangerous.
When converting to Propane Gas (LP), it may be necessary to
install (as a minimum) 3 feet of vertical pipe from the appli-
ance prior to an offset to ensure optimum product performance.
This may be necessary due to variations in vent configuration
and other numerous factors which affect exhaust flow and air
delivery such as BTU value, ambient temperature, wind condi-
tions, altitude, etc.
The conversion kit provided with this appliance contains com-
ponents required to convert this appliance from use with natural
gas to use with propane (LP) Gas. All of the components in the
propane conversion kit must be installed in order for the appli-
ance to operate safely on propane.
Installation Tools / Supplies
7/16” Open end wrench
Small standard screwdriver
Pipe sealant compound (must be rated for use with LPG gas)
Parts List
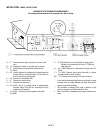
• Propane RB Regulator conversion screw (Red indicates LP gas)
• Burner Orifice (If you are at an elevation above 4500 feet do not use
the orifice provided in this kit. Contact your gas supplier to obtain a
smaller orifice)
• Pilot Orifice
• Label, Converted to (LP) Propane – Affix to valve
• Label, Converted to (LP) Propane – Affix to stove body
Avertissement: cet équipement de conversion sera installé par
une agence qualifiée de service conformément aux instructions
du fabricant et toutes exigences et codes applicables de
l’autorisés avoir la juridiction. Si l’information dans cette in-
struction n’est pas suivie exactement, un feu, explosion ou pro-
duction de protoxyde de carbone peut résulter le dommages
causer de propriété, perte ou blessure personnelle de vie.
L’agence qualifiée de service est esponsable de l’installation
propre de cet équipment. L’installation n’est pas propre et
compléte jusqu’à l’opération de l’appareil converti est chéque
suivant les critères établis dans les instructions de propriétaire
provisionnées avec l’équipement.
IN CANADA:
The conversion shall be carried out in accordance with the re-
quirements of the provincial authorities having jurisdiction and
in accordance with the requirements of the CAN1-B149.1 and .2
Installation code.
La conversion devra être effectuée conformément aux recom-
mandations des autorités provinciales ayant juridiction et con-
formément aux exigences du code d’installation CAN1-B149.1
ET.2.
PROPANE Conversion Procedure
1. Turn off Gas - Turn gas control knob to the off position, and
shut off the gas supply to the valve. If necessary, disconnect
appliance from gas supply.
2. Caution: The gas supply shall be shut off prior to disconnect-
ing the electrical power, before proceeding with the conver-
sion. Unplug blower power cord.
3. If the installation is at an elevation below 4500 feet, proceed
to step 4.
If you are at an elevation above 4500 feet, do not use the
orifice provided in this kit. Contact your gas supplier to obtain a
smaller orifice).
4. Burner Orifice Installation Procedure:
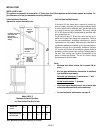
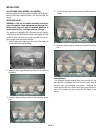
a. Remove glass door.
b. Remove logs, burner cover, and burner.
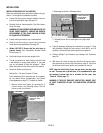
c. Use a 7/16” open-end wrench to remove gas burner ori-
fice.
d. Replace the burner orifice with the appropriate burner
orifice (see instruction #3).
e. Use pipe sealing compound rated for LP gas. BE VERY
CAREFUL THAT THE PIPE COMPOUND DOES NOT GET
INSIDE OF THE ORIFICE (THIS COULD RESULT IN
PLUGGING OF THE ORIFICE). Using a 7/16” open-end
wrench to tighten orifice - DO NOT OVER TIGHTEN (fin-
ger tight, then 1/2 turn maximum). *Make sure the ori-
fice is inserted fully into the primary air shutter fixed
opening.
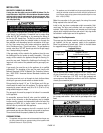
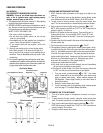
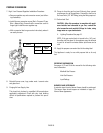
5. Adjust primary air shutter. Burner Air Shutter opening to be:
Natural Gas – 1/4 open, Propane 1/2 open. Some adjustment
from standard may be necessary for the desired flame char-
acteristics (see Burner Flame Appearance, page 21).
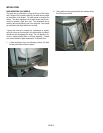
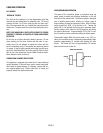
6. Replace Pilot Orifice - Using a 7/16” open-end wrench, re-
move the pilot burner hood. Replace the pilot orifice with the
one supplied in the propane conversion kit. Then, reinstall
the pilot burner hood. Ensure that the mark on the pilot hood
is lined up with the mark on the pilot mounting plate.


