


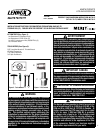

Step 6. Using a 7/16” open-end wrench, remove the pilot orifice by loosening
the nut (see Figure 5) on the end of the pilot supply tube. Once the
nut is removed, slide the nut down the tube, then pull the supply
tube down no more than 1/2” out of the fitting and orifice will fall
out. Once the orifice is out, discard it and put the new one in, then
reinstall the nut.
Pilot Assembly
Figure 8
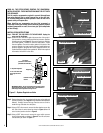
Step 7. Using a 3/4” open-end wrench, remove burner orifice. Replace
with #49 LP orifice that is supplied in this kit. Make sure to use
pipe sealing compound on threads of new orifice (see Figure 9).
Pilot Tube Nut
LO
HI
Burner Orifice
Gas Valve
Figure 9 - Replace Burner Orifice
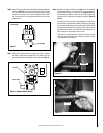
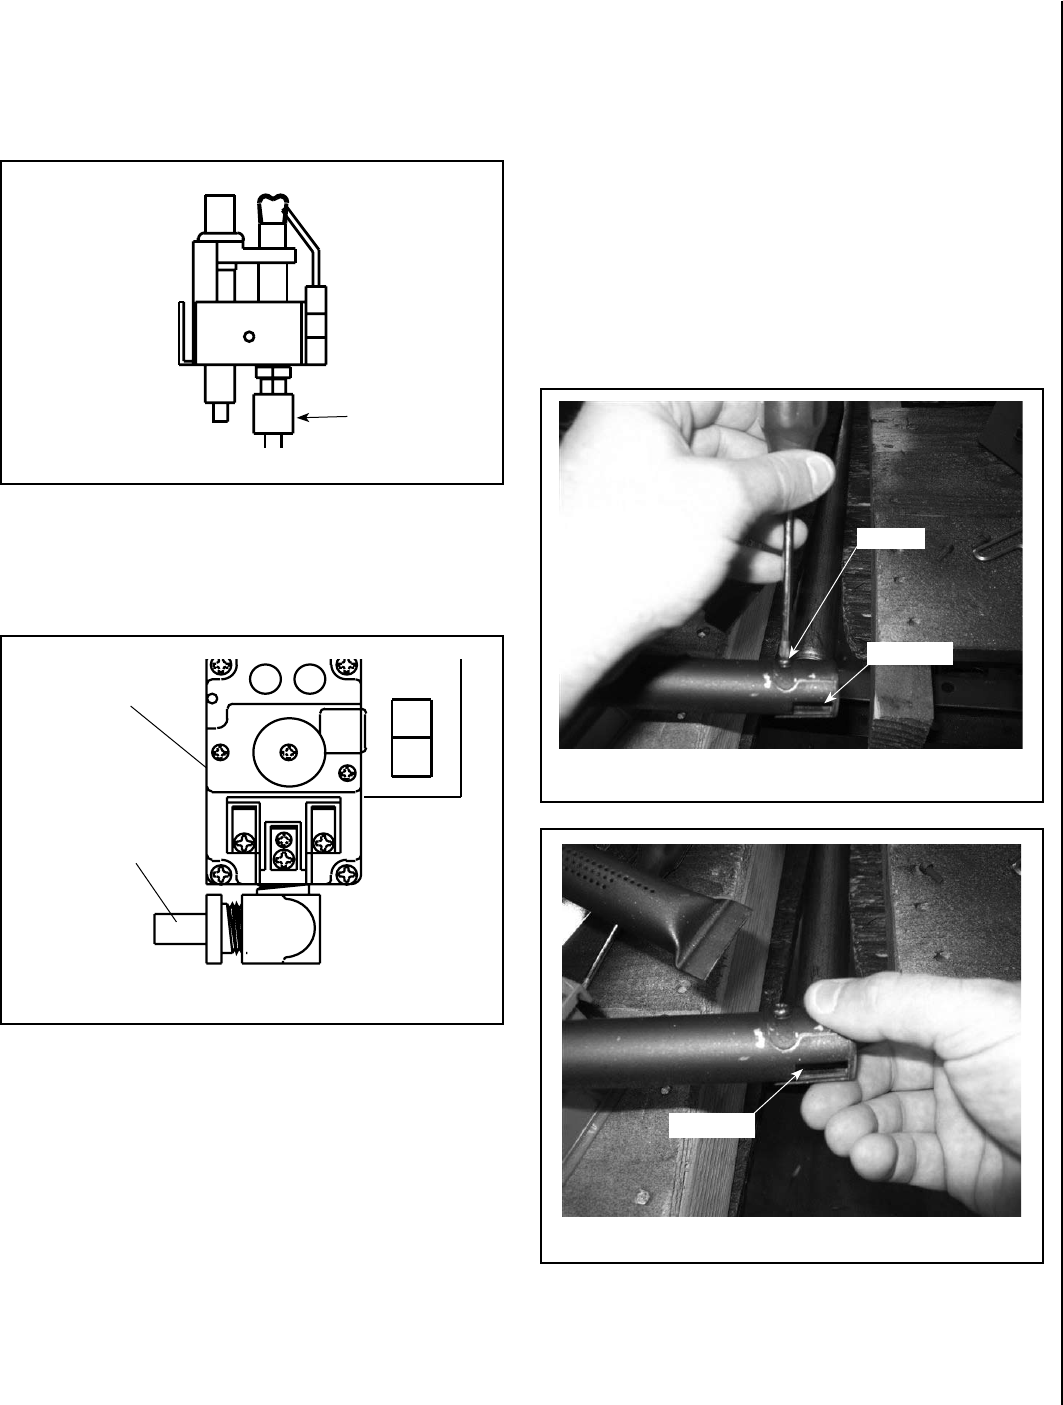
Figure 10
Figure 11
Air Shutter
Step 8. Adjust the air shutter as follows (see Page 12 in the Installation
and Operation Manual); The main burner has an adjustable air
shutter located at the end of the burner (see Figures 10 and 11).
Using a phillips screwdriver, loosen the air shutter setscrew just
enough so the air shutter can be rotated by hand (See Figures 10
and 11).
The setscrew for the air shutter is secured tightly from the factory
so that it does not rotate from the factory setting during shipping.
Once you loosen the setscrew just enough so that it can be rotated
by hand, then reinstall the burner tube, you will be able to access
and adjust the air shutter from behind the right side panel to a
100% open gap for propane gas (below valve).
After step 12, with the appliance lit and fully warmed up, evaluate
the burner flame appearance and re-adjust air shutter for proper
flame appearance, if necessary.
Setscrew
Air Shutter
3
NOTE: DIAGRAMS AND ILLUSTRATIONS ARE NOT TO SCALE.