


5
NOTE: DIAGRAMS & ILLUSTRATIONS ARE NOT TO SCALE
WARNING
Turn off gas and electrical power
before servicing the appliance.
IMPORTANT
Always verify proper operation
after servicing.
OPERATION AND CARE OF YOUR
APPLIANCE
Appliance operation may be controlled through
a remotely located optional wall thermostat or
remote control.
In lieu of remote control or remote wall thermo
-
stat operation, the appliance must be operated
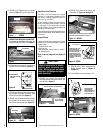
directly through the on/off switch located on the
surround panel (see
Figure 4).
If your millivolt appliance is equipped with an
optional wall thermostat kit or remote control
kit and the pilot is lit (and valve is in the On
position), the appliance main burner may be
turned on and off with the wall thermostat or
remote control.
Always keep the appliance area clear and free
from combustible materials, gasoline and other
flammable liquids.
Remember, Millivolt appliances have a continu
-
ous burning pilot flame. Exercise caution when
using products with combustible vapors.
MAINTENANCE
The appliance and venting system should be
thoroughly inspected before initial use and at
least annually by a qualified service technician.
However, more frequent periodic inspections
and cleanings should be performed by the
homeowner. Homeowner must contact a quali
-
fied service technician at once if any abnormal
condition is observed.
Refer to the maintenance schedule on
Page
7 for maintenance tasks, procedures, recom-
mended frequency and by whom they should
be performed. Always verify proper operation
of the appliance after servicing.
Always turn off the gas to the appliance before
cleaning. Before re-lighting, refer to the lighting
instructions in this manual. Instructions are also
found on pull-out panels located below the glass
door in the control compartment.
Keep lower control compartment clean by
vacuuming or brushing at least twice a year.
More frequent cleaning may be required due to
excessive lint from carpeting, bedding materials,
etc. It is important that control compartments,
burners and circulating air passageways of the
appliance be kept clean.
CAUTION
Wear gloves and safety glasses
for protection while doing
required maintenance.
Check Burner Flame Appearance
Visually check the flame of the burner periodi
-
cally making sure the flames are steady and not
lifting or floating (see
Figure 19 on Page 8).
Glass Cleaning
Note: Clean glass after first two weeks of opera-
tion (after Burn-In period is over).
The viewing glass should be cleaned periodi
-
cally to remove any build-ups caused from the
following:
• During start-up, it is normal for condensa
-
tion to form on the inside of the glass (this
condensation and fog will usually disappear
in a few minutes). This can cause lint, dust
and other airborne particles to cling to the
glass surface.
• Initial curing of the high temperature paint
and burning off of lubricants used in the
manufacturing process may result in a film
on the glass.
• A white coating may form on the glass as a
result of impurities and minerals in the fuel.
It is recommended that the glass be cleaned
two or three times during each heating season,
depending on the circumstances present.
Use one of the following to clean glass:
• Non-ammonia based household cleaner
• 50%-50% mix of white vinegar & water
• gas stove glass cleaner
Servicing Blower
Refer to blower wiring diagram on Page 13.
To access the blower assembly for mainte-
nance, adjustment or replacement, see the
following procedure:
1. Unplug 120-volt A.C. power supply to
insert.
2. Shut off gas supply to insert.
3. Remove Glass Door (see
Procedure For
Removing Standard Glass Door Assembly
on
Page 8).
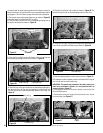
4. Remove log set, burner and grate.
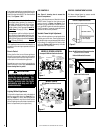
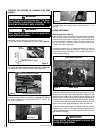
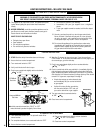
5. (EDVI25 only) Remove the two shields
shown in
Figure 5.
Figure 5
EDVI25
Remove the 4 screws from back
wall (indicated by arrows).
Remove 4 Screws
Shields
IMPORTANT
Do not use abrasive cleaners
on glass. Never clean the glass
when it is hot.
WARNING
Do not attempt to touch the front
enclosure glass with your hands
while the fireplace is in use.
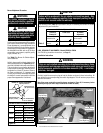
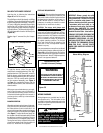
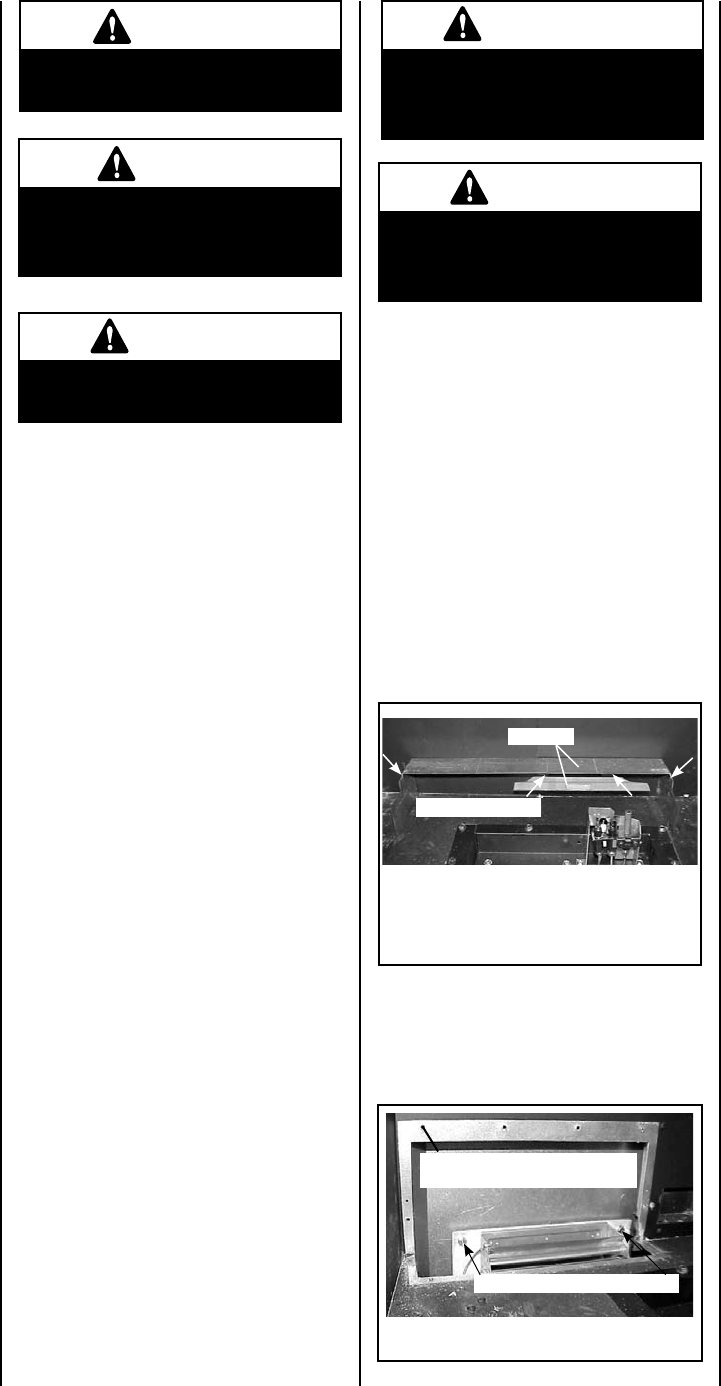
6. (EDVI25 only) Remove blower access panel
(see
Figure 6).
7. (EDVI25 only) Remove the two blower
mounting screws and remove the blower
(see
Figure 6).
Figure 6
EDVI25
Remove screws around parimeter of
blower access panel, then lift out.
Remove blower mounting screws.