


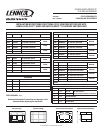
NOTE: DIAGRAMS & ILLUSTRATIONS NOT TO SCALE.
2
* NOTE: The fireplace is equipped with a unit-mounted ON/OFF switch.
In most installations this switch is not used. If you desire to use the
switch and want to install these Style View Doors, you may desire
to relocate the switch into the bracket provided on the door frame.
This is OPTIONAL. If you desire to relocate the switch complete the
optional procedures indicated by the asterisks below. Steps 2, 4 and
5 refer to ELDV Models only. For MPLDV Models, purchase a Rocker
Switch kit model FRS (80L41).
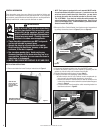
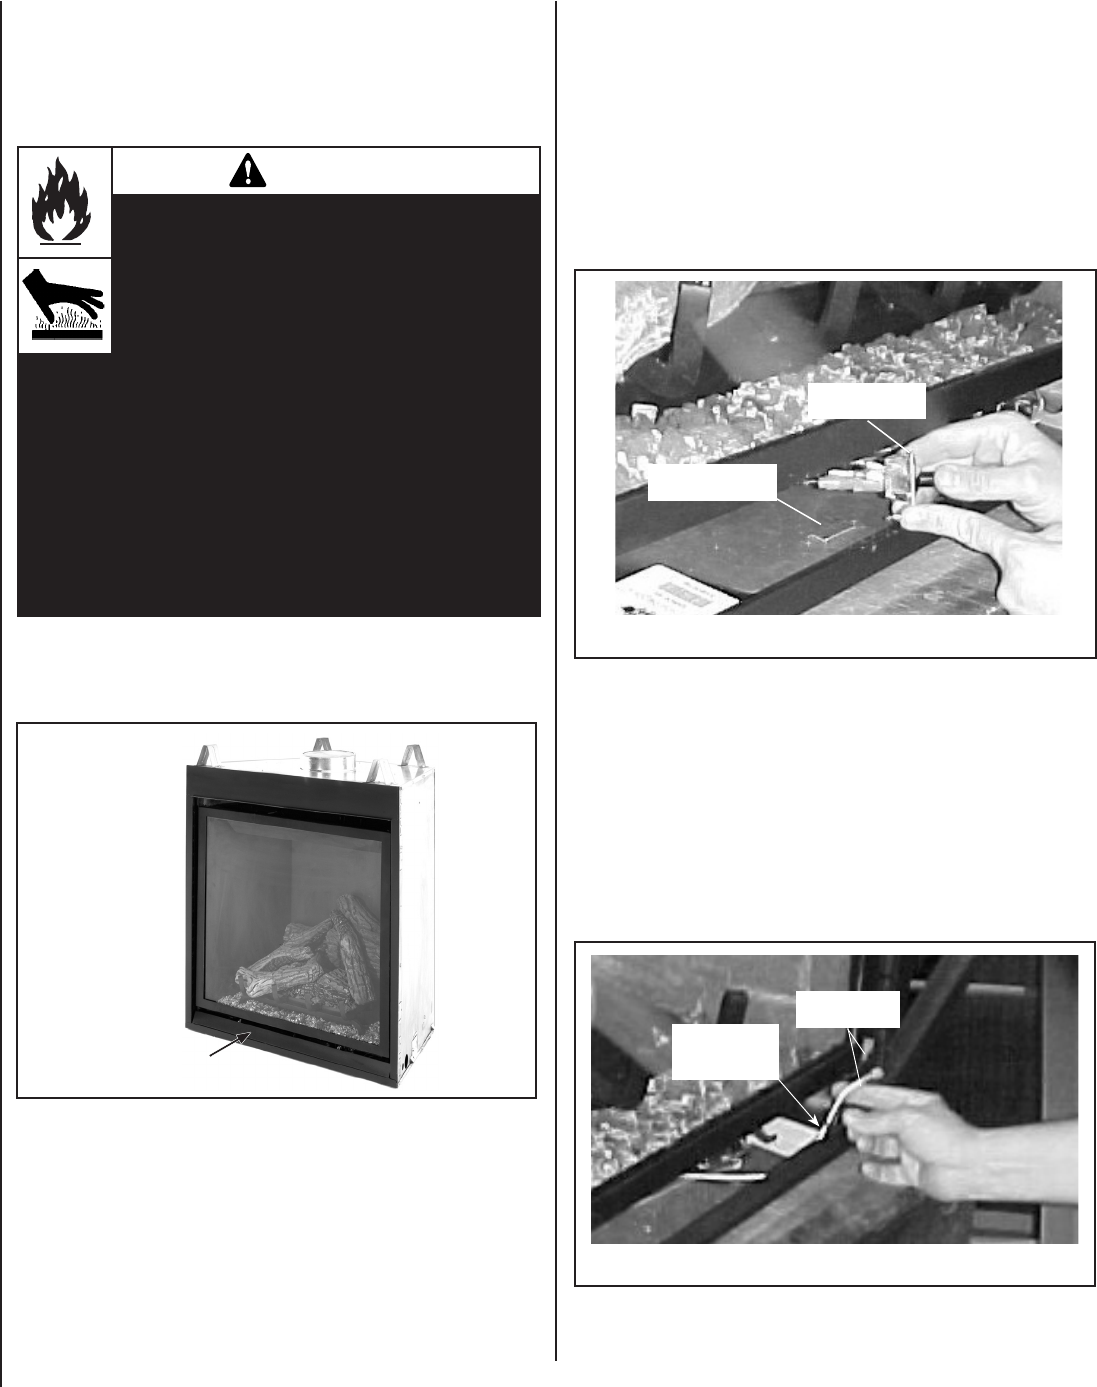
*2. Remove the Piezo / Switch Bracket from fireplace control compartment
by pulling it forward as shown in Figure 2 (also see Figure 6).
Piezo & Switch
Bracket
*3. Disconnect the black and white wires from the ON/OFF switch.
*4. Remove the ON/OFF switch from the bracket by squeezing the flex
catches on sides of switch until it releases from bracket.
*5. Reinstall the bracket with the piezo (reverse Step 2).
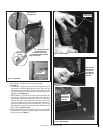
6. Remove Doorframe from packaging. Install as follows:
*a. Position switch wires in front, inside of control compartment (so
they can easily be reached after doorframe is in position).
b.Position the bottom of the doorframe so that the bracket on the
inside of the doorframe locks behind the cabinet bottom flange as
shown in Figure 4.
*c. Feed the switch wires through the switch mounting bracket on
doorframe as shown in Figure 3.
Piezo & Switch
Locating Bracket
Wires for
ON/OFF switch
Figure 2
Figure 3
WARNINGS
Hot! Do not touch!
The decorative screen doors
and the glass behind the screen doors will
become hot during operation
and will retain
heat for a while after shutting off the appliance
.
Severe burns may result. Carefully supervise
children in the same room as appliance.
• These decorative screen doors are NOT heat guards
and are not intended to prevent burns.
• Operate the doors by only using the door handles.
Avoid touching the doorframe, screens, or the glass
enclosure, if the door is opened.
• Use care when opening doors. Avoid exerting any
downward pressure on the doors when they are in an
open position. Excessive force can cause the doors to
come loose or be damaged.
• INSTALL ONLY WHEN THE FIREPLACE IS OFF AND COLD!
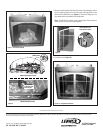
GENERAL INFORMATION
These decorative screen doors are offered in two attractive finishes and
fit on the face of the appliance over the glass doorframe. If you encounter
any problems, need clarification of these instructions or are not qualified to
properly install this kit, contact you local distributor or dealer.
Figure 1
INSTALLATION INSTRUCTIONS:
1. Remove and retain the Lower Panel per instructions in Figure 1.
Remove this lower panel
by lifting it up and out.
Retain the lower
panel for future use
in case the Style
View Door Kit is ever
removed.
Switch Mounting
Bracket on
Doorframe