


MODEL 4890
Rev. A 6/07
4
2085461
Rev. A 6/07
9
2085461
MODEL0 4890
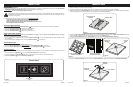
OPERATION (Figure 5)
1. Plug the cord set into a 120 volt outlet. When the Fan is plugged in, it will “beep” to indicate there is power to the Fan. DO NOT USE
EXTENSION CORDS WITH THIS FAN. Extension cords may overheat and cause a re.
Be sure that the plug ts tightly into outlet.
When plugs t loosely into receptacles, they may slip partially or completely out of the receptacle with only the slight movement of
the attached cord. Receptacles in this condition may overheat and pose a serious re hazard; if covered by a curtain,drape, etc. the
re hazard is even greater.
2. Test GFCI (Ground Fault Circuit Interrupter) plug BEFORE EACH USE:
1. Plug GFCI into outlet. Indicator light on the GFCI plug should turn on.
2. Press test button. Indicator light on the GFCI plug should turn off.
3. Press reset button for use. Indicator light on the GFCI plug should turn on.
4. DO NOT USE IF ABOVE TEST FAILS.
Power and Speed Control:
1. Turn the Fan ON by pressing the Power/Speed Button ( ) located on the front of the unit. The Fan will start in High Speed.
2. Press the Power/Speed Button ( ) a 2nd time for Medium Speed.
3. Press the Power/Speed Button ( ) a 3rd time for Low Speed.
4. Press the Power/Speed Button ( ) a 4th time to turn the Fan OFF.
Internal Oscillation Control:
NOTE: This Fan is equipped with an Internal Oscillation Function. The movement occurs INSIDE the Fan housing
- the whole Fan WILL NOT move side to side.
1. To turn ON the internal oscillation function, press the Oscillation Button ( ) once. The Oscillation Button will ‘blink’ to indicate that the
Fan is oscillating.
2. To turn OFF the internal oscillation function, press the Oscillation Button ( ) a second time.
Control Panel Light:
When the Fan is initially plugged in, the Control Panel will be lit.
1. To turn the Control Panel Light OFF, press and HOLD the Power/Speed Button ( ) for 3 seconds.
2. To turn the Control Panel Light ON again, press and HOLD the Power/Speed Button ( ) for 3 seconds.
Accent Lighting:
This Fan includes a maintenance-free, soft LED accent lighting function for nighttime use. This function can be used while the Fan is ON or
OFF.
1. Press and release the Light Button ( ) to turn the Fan Accent Lighting ON to full brightness.
2. Pressing and holding the Light Button ( ) will allow the light level to dim up and down to the desired brightness.
3. Press the Light Button ( ) to turn the Fan Accent Lighting OFF.
Figure 5
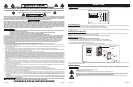
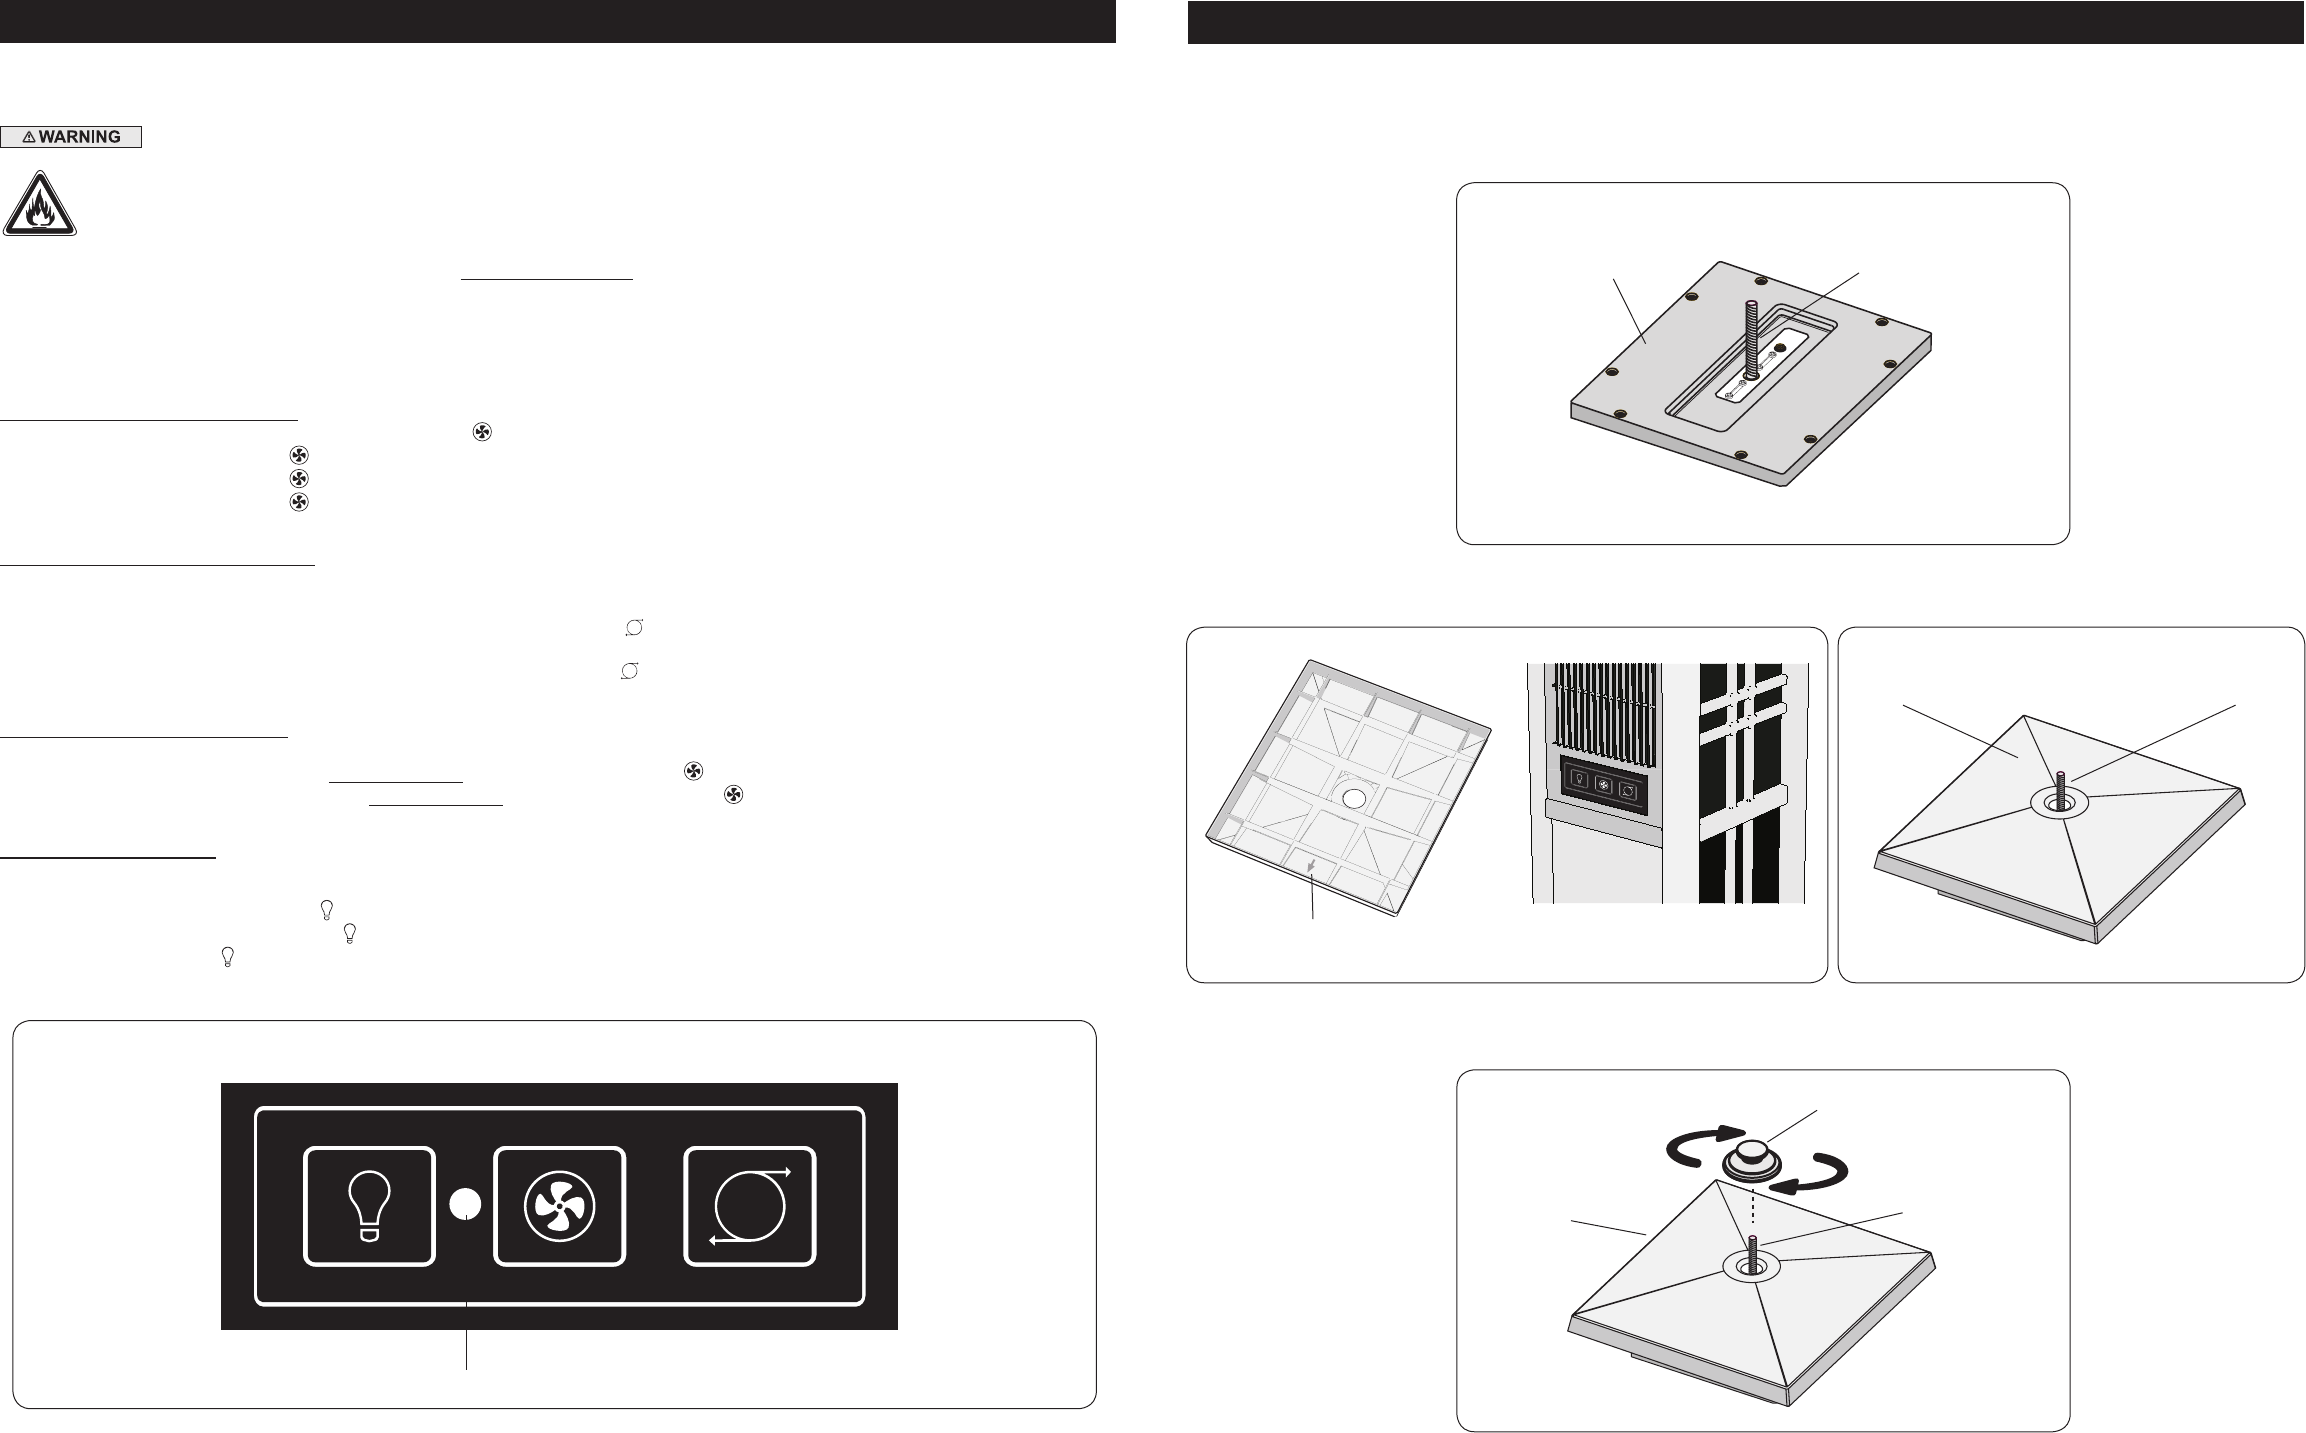
ARMADO (Figuras 1 a 4) NO SE REQUIEREN HERRAMIENTAS
1. Retire el ventilador y sus partes de la caja de cartón.
2. Coloque el ventilador en el lugar deseado al aire libre o en interiores sobre una supercie rme, plana y nivelada.
3. Introduzca manualmente la Varilla de Metal en el oricio ubicado en la parte superior del ventilador. La varilla de metal habrá quedado
rmemente asegurada en su lugar cuando usted ya no pueda seguir atornillándola. (Figura 1)
4. Coloque la Cubierta del Ventilador sobre el ventilador con la echa ubicada en el lado inferior de la Cubierta del Ventilador apuntando
hacia el frente del ventilador donde están ubicados los botones de control. (Figuras 2 y 3)
5. Coloque la Tapa del Ventilador sobre la Varilla de Metal en el centro de la Cubierta del Ventilador. (Figura 4)
6. Enrosque la Tapa del Ventilador en forma manual a la Varilla de Metal hasta asegurar completamente. NO AJUSTE EN EXCESO.
Figura 4
Cubierta del
Ventilador
Tapa del
Ventilador
Varilla de Metal
Figura 3
Varilla de
Metal
Cubierta del
Ventilador
Flecha en el Lado Inferior de la
Cubierta del Ventilador
Apunte la Flecha Hacia
el Frente del Ventilador
Figura 2
Figura 1
Varilla de Metal
Parte Superior del
Ventilador
Light
Power/Speed
Oscillation
Control Panel
Control Panel
Lens