6 GKS 324.0/GKS 644.0 Installation LP gas
Installation
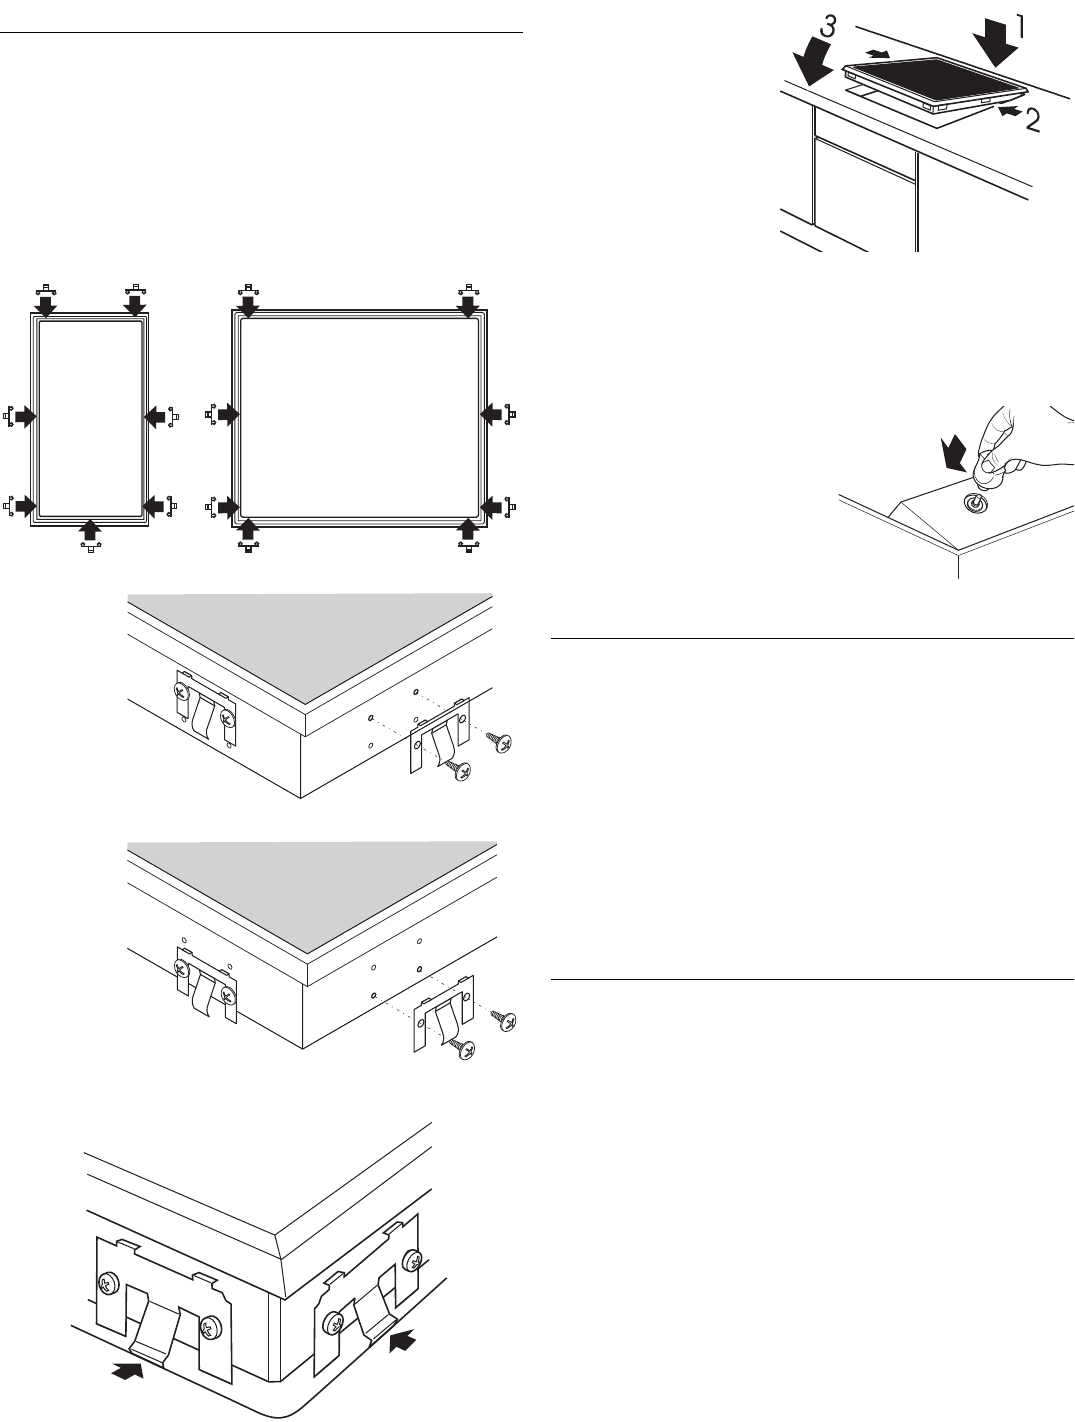
It’s quicker and easier to install these units by using clips. You can perform
all installation work from above.
– Make a clean cut into the counter top. (see “Installation dimensions ”).
– Make sure that the gasket is properly seated. “See Gasket” on page 3.
– Insert the clips on the cooking area counter top cut-out as shown in the
diagram on the previous page. Use the exact measurements as indicated.
GKS 324.0 GKS 644.0
Up to 37 mm (1-3/8") worktop:
38 mm (1-1/2") or more worktop:
Detail of the cooktop with clips screwed on:
– Insert the rear edge of the
cooktop and lower it
– carefully. At the same time
press in the clip with both
hands.
– Press the cooktop down-
wards until it rests com-
pletely on the worktop.
F
If the worktop cut-out is a little too large, it’s possible to increase the
preliminary spring tension of the clips by screwing them down.
– Place the burner cover, the saucepan support(s) and attachment carefully
in the correct position.
– Pin up the control knobs.
– Insert plug into the socket.
Initial start-up
– Turn on the gas connection tap, and insert the plug into the shockproof
socket.
[
Follow these installation instructions in order to test the appliance for
leaking.
Before the appliance is put into operation, it must be checked by a gas tech-
nician to make sure it’s functioning properly and there is no gas leakage. Then
the appliance is ready to be put into operation.
Using the operating instructions, the technician should demonstrate operating
functions to the user. The operating instructions should then be given to the
operator.
Testing the appliance’s functions
[
After you’ve completely reassembled the appliance, be sure to test all of
its functions!
– Put the appliance into operation as described in these operating instruc-
tions.
– Check the appliance and the installation for any gas leaks.
– Check the burners for signs of over-ignition and a steady flame (do not for-
get to check them on low flame, as well).


