


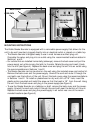
CAUTION: THIS UNIT IS SEALED. THE COVER IS NOT
REMOVABLE.
After installation TEST your Smoke Sounder by following the test
procedure outlined in section 4.
Kidde alarms and accessories CAN ONLY BE interconnected
with other Kidde alarms and accessories as well as speci-
fied brands and models of interconnect compatible alarms.
Connection of Kidde products to a non-specified manufac-
turer’s interconnect system, or connection with non-speci-
fied equipment from another manufacturer into an existing
Kidde system could result in nuisance alarming, failure to alarm, or damage to one
or all of the devices in the interconnect system. Refer to User’s Guide supplied with
each Kidde product for lists of interconnect compatible models, brands, and devices.
4. OPERATION AND TESTING
OPERATION
The Smoke Sounder is operating once fresh batteries are installed, it is plugged into a non-
switched AC outlet and testing is complete. When the Smoke Sounder receives an alarm
message from a Kidde Wireless smoke alarm, the horn will sound a loud temporal alarm for
two cycles of three beeps followed by a verbal “Danger” message. This cycle repeats until
the alarm message is no longer broadcasted from the smoke alarm.
Remote HUSH
®
: Press the button on any Kidde Wireless device to activate the Smart Hush
TM
on the Wireless smoke alarm that is initiating an alarm (see your Wireless smoke alarm’s
user’s guide for an explanation of Smart Hush
TM
). This allows you to enable the Smart
HUSH™ feature on a Kidde Wireless smoke alarm that may be installed in an area that is
difficult to reach. This feature should only be used when a known alarm condition, such as
smoke from cooking, activates the alarm.
CAUTION: BEFORE USING THE REMOTE HUSH
®
FEATURE, IDENTIFY THE
SOURCE OF THE SMOKE AND BE CERTAIN A SAFE CONDITION EXISTS.
Low Battery HUSH
®
: When the battery needs replacement, the unit will produce a low bat-
tery “chirp” once per minute and announce “low battery”. The Low Battery HUSH
®
allows
you to press the button on the unit producing the warning, and disable the “chirp” for a
period of up to 12 hours. This gives you a chance to replace the battery at a more conven-
ient time without sacrificing your safety by disconnecting the sounder from power. During
this Low Battery HUSH
®
period, your Smoke Sounder is performing normally.
LED Indicator Operation
Red LED:
The red LED will flash in conjunction with the unit beep. Therefore, the red LED will flash
during a smoke alarm, a low battery mode chirp and a unit error mode chirp.
Green LED:
The green LED will illuminate as described below under the following conditions:
STANDBY CONDITION (powered by AC and battery backup) - The LED will be con-
stantly on.
STANDBY CONDITION (powered by only battery backup) - The LED will flash every 10
seconds.
FIGURE 7